AdOperator integration in CPV Lab Pro
CPV Lab and CPV One have direct server to server integrations with AdOperator ad network.
By using tracking macros and Postback URL to get data from AdOperator, your CPV tracker will show accurate performance metrics, all in one dashboard.
Who is AdOperator?
AdOperator (opens new window) is a performance Advertising Network that serves targeted traffic to carefully matched users. This high-performing platform gives amazing opportunities for advertisers to control and maximize the impact of their ads. Launch your campaigns in the best engaging advertising formats for desktop and mobile devices.
It comes with:
- Ad types: Popunders, In-Page Push ads, Push Notification Ads
- Verticals: Dating, Betting, Casino, E-commerce, Finance, Sweepstakes, Nutra, Web Utilities
- Premium Mainstream traffic
- Deep traffic quality control including Forensiq technology
- Simple registration and compliance
If you don’t have a AdOperator account yet, then you need to register here! (opens new window)
Step 1: Setup AdOperator in CPV Lab
- CPV Lab (opens new window) comes with the AdOperator Traffic Source pre-configured in the Traffic Sources Catalog pages, so in this case all you have to do is import it from the Catalog.
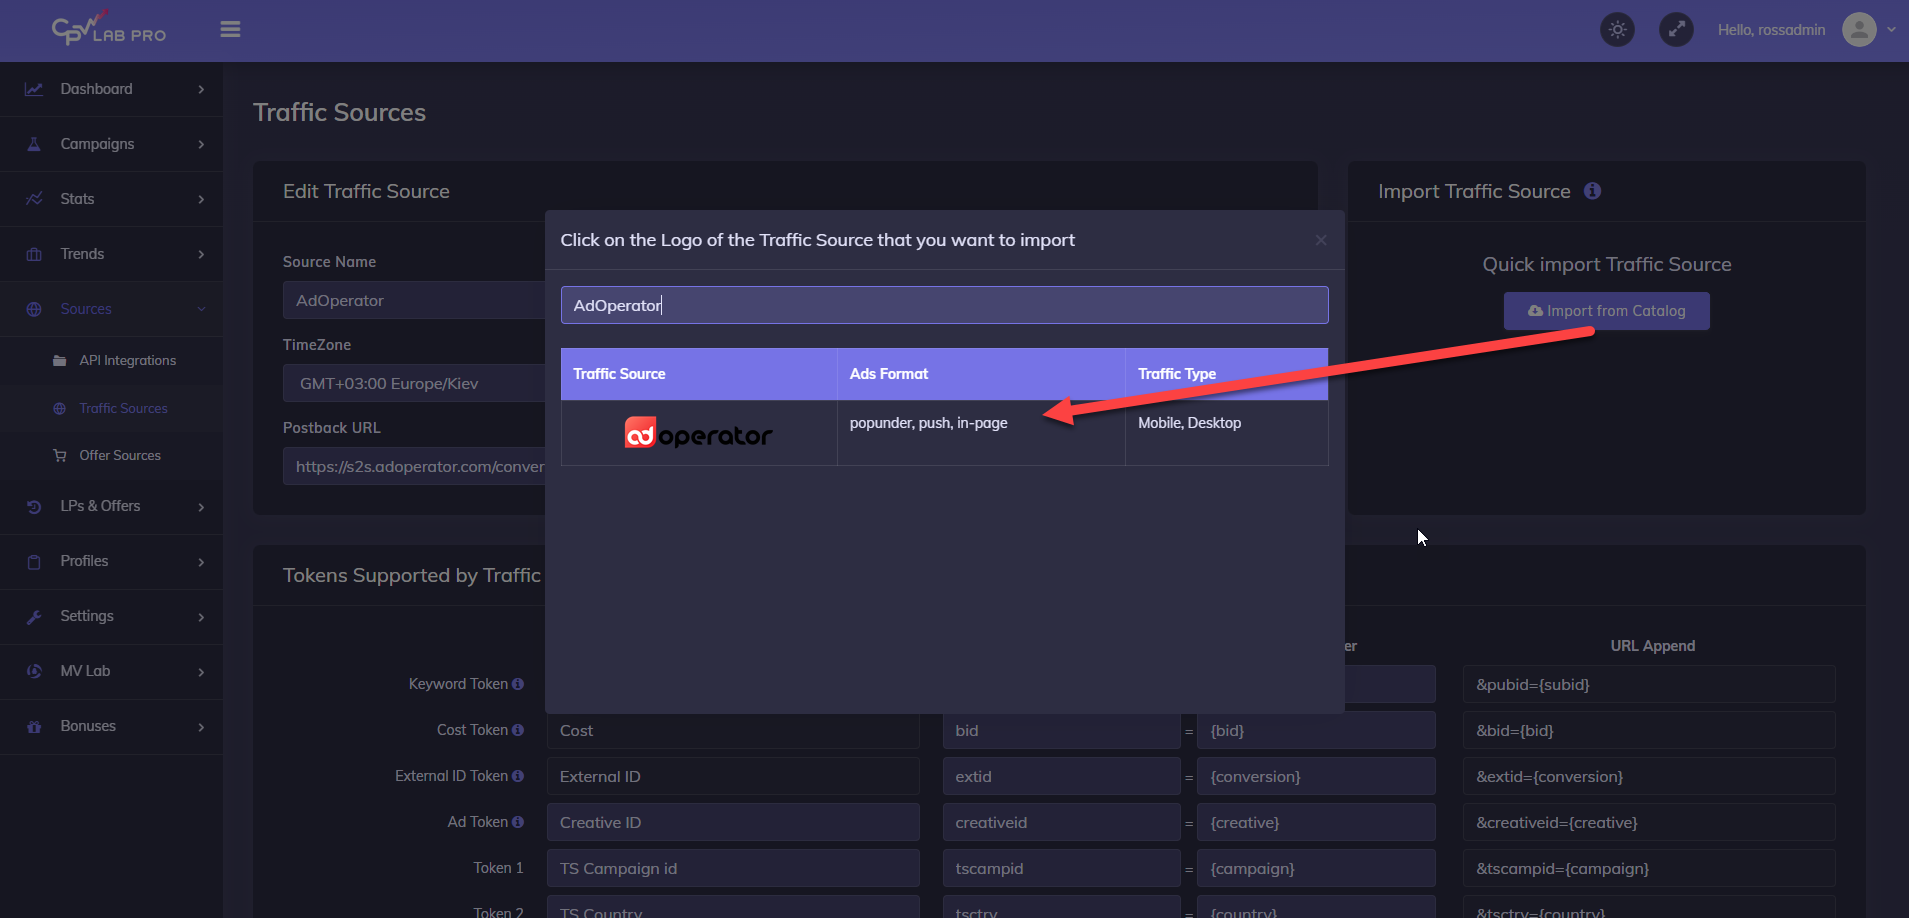
- The detailed configuration for the AdOperator Traffic Source is the following:
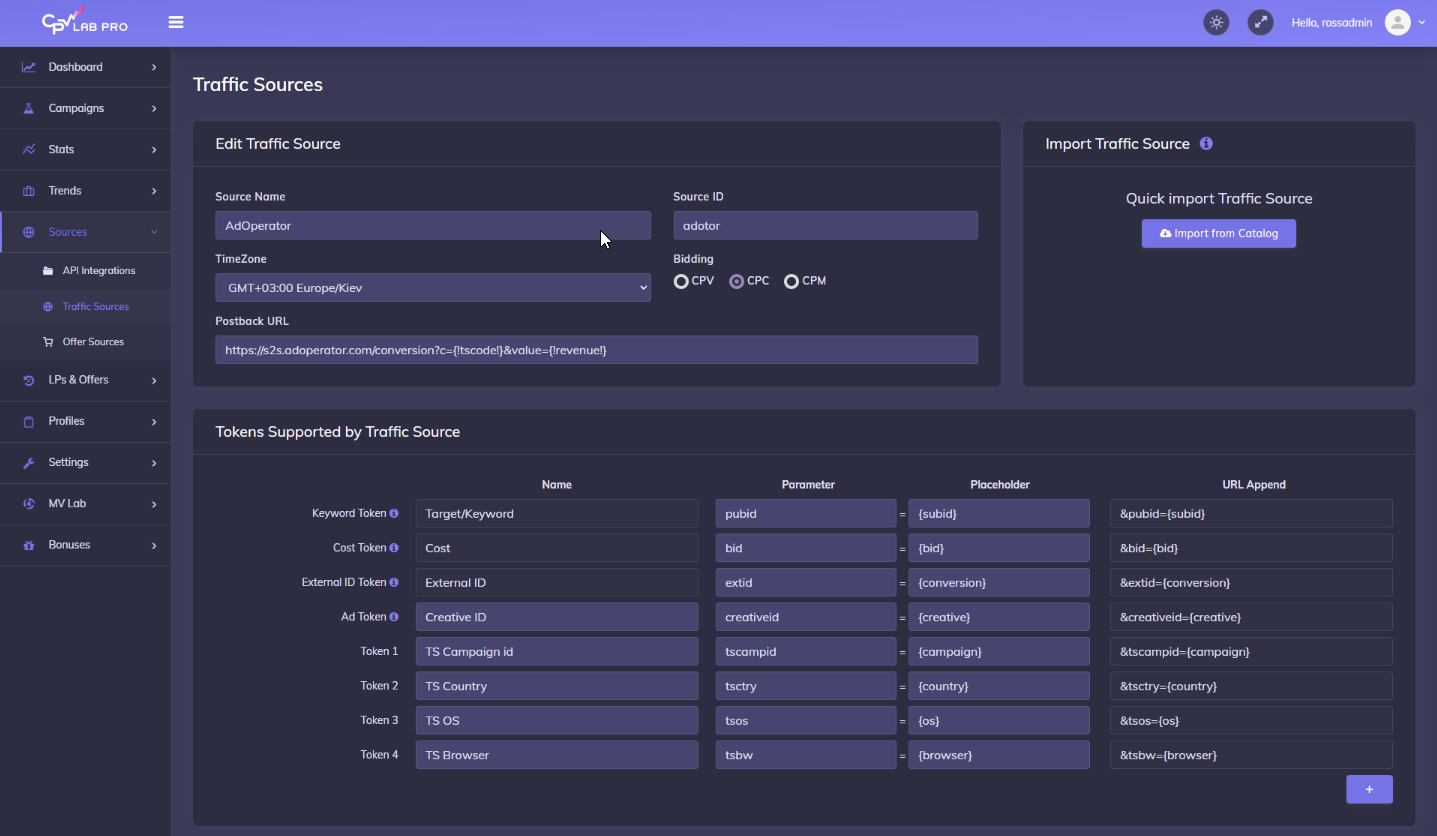
Once you import the traffic source from the catalog, it will show up when you create your campaign on the Campaign setup page and in the quick campaign page.
To be able to keep your tracker and your Traffic Source reports in sync, you need to send data back to your traffic source. For that you have to have the Postback URL field setup correctly.
- In AdOperator, Postback URL is imported automatically from our catalog.
- Save the Traffic Source
Once you have the Traffic Source setup you can start creating your campaign
Step 2: Create a Campaign in CPV Lab
- In your CPV Lab Pro campaign setup page select AdOperator as the Traffic Source and choose the Predefined Extra Tokens that you want to capture.
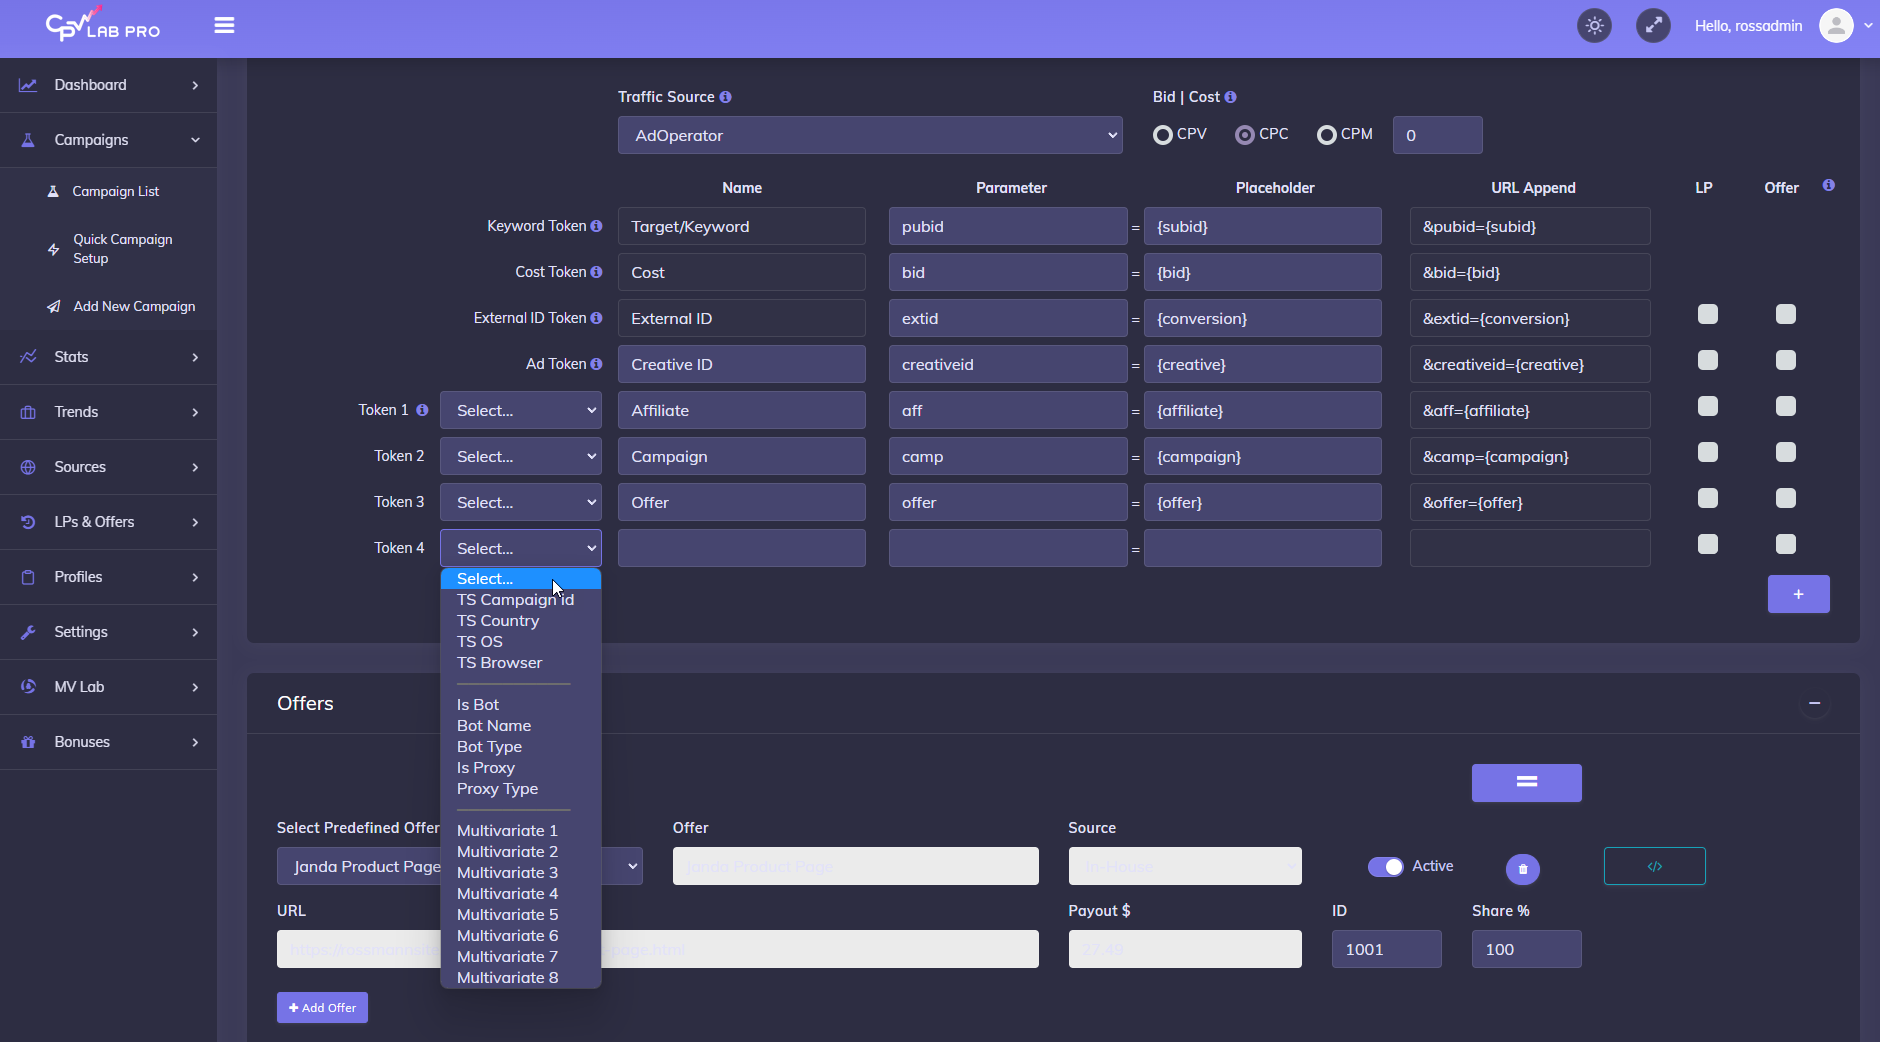
- Complete the other fields
- Save the campaign
- Optional: check the Traffic Source Postback URL - check the step 5 below for details
Step 3: Create the campaign in AdOperator
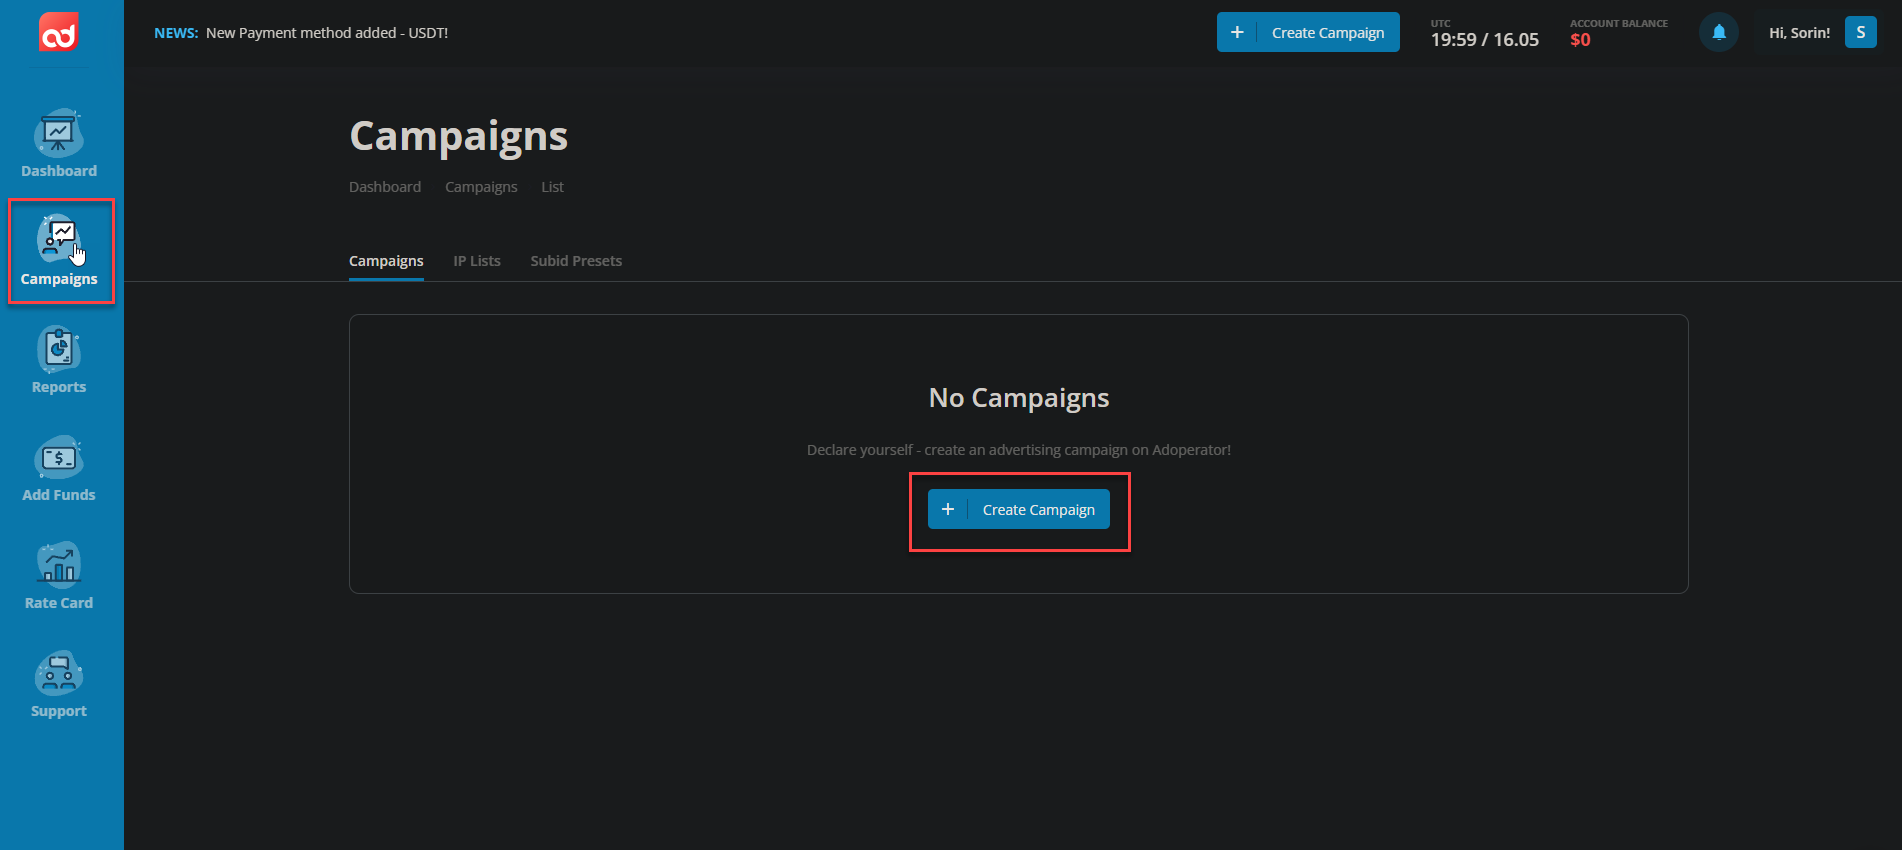
- Login to your AdOperator account
- Create a new campaign by clicking the "Campaigns" menu
- Then click on "+Create Campaign" button
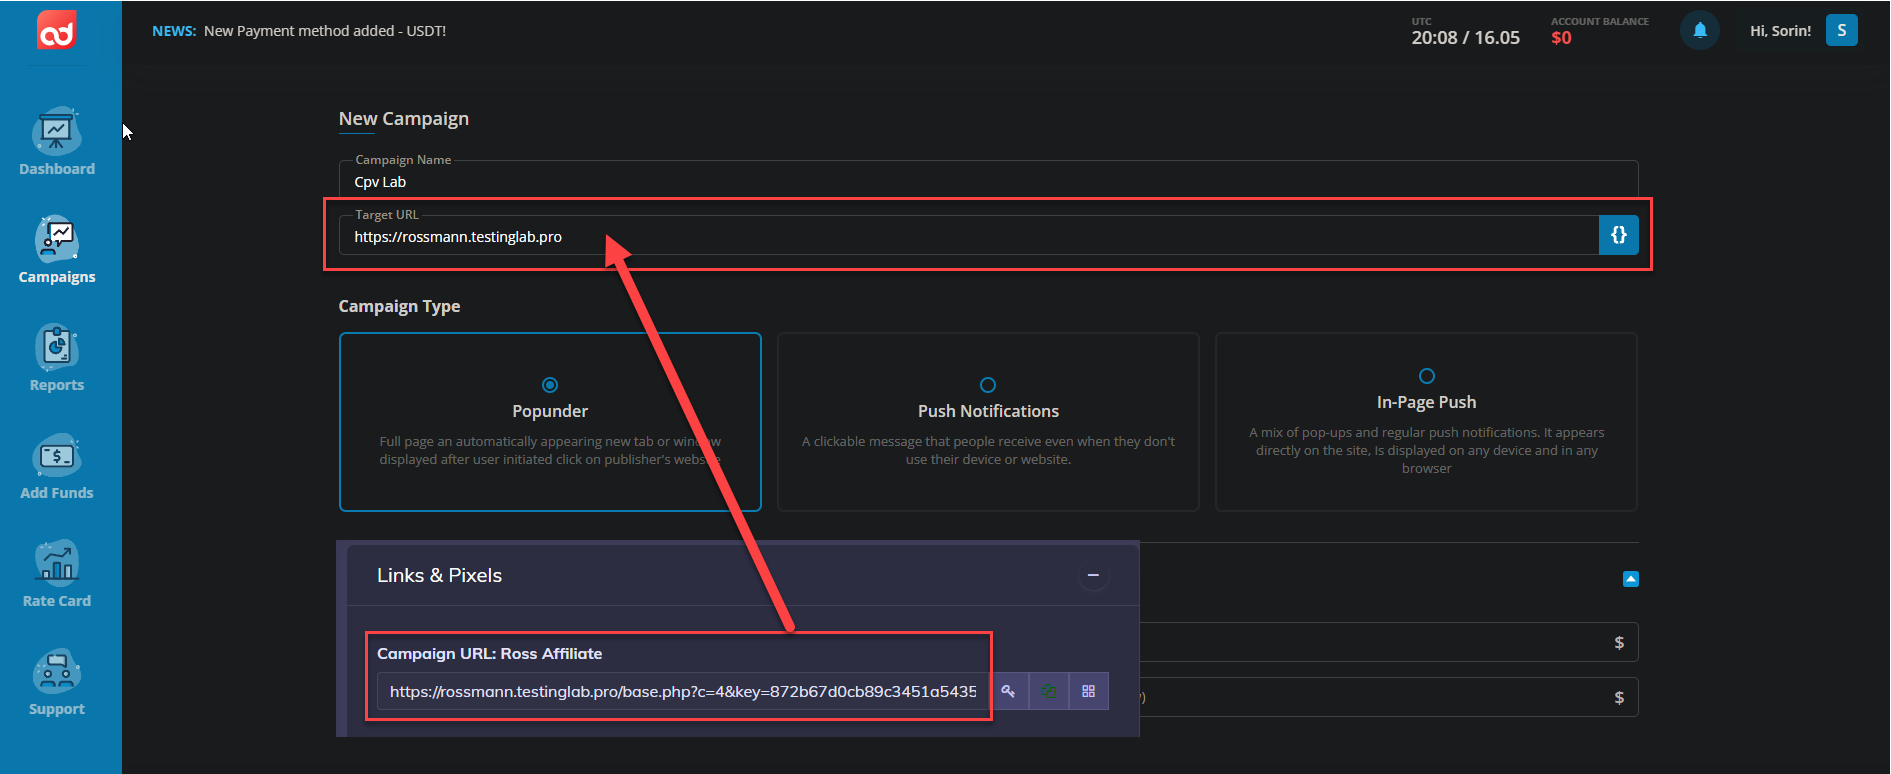
Popunder type
- If you choose Popunder type, on the Target URL field, copy the Campaign URL from your campaign in CPV Lab ( step 2 above ) and paste it as a Landing URL in AdOperator
Push Notifications or In-Page Push
- If you choose Push Notifications or In-Page Push, scroll down to “Creatives” section and expand this option, then copy the Campaign URL from your campaign in CPV Lab ( step 2 above ) and paste it as a Target URL in AdOperator
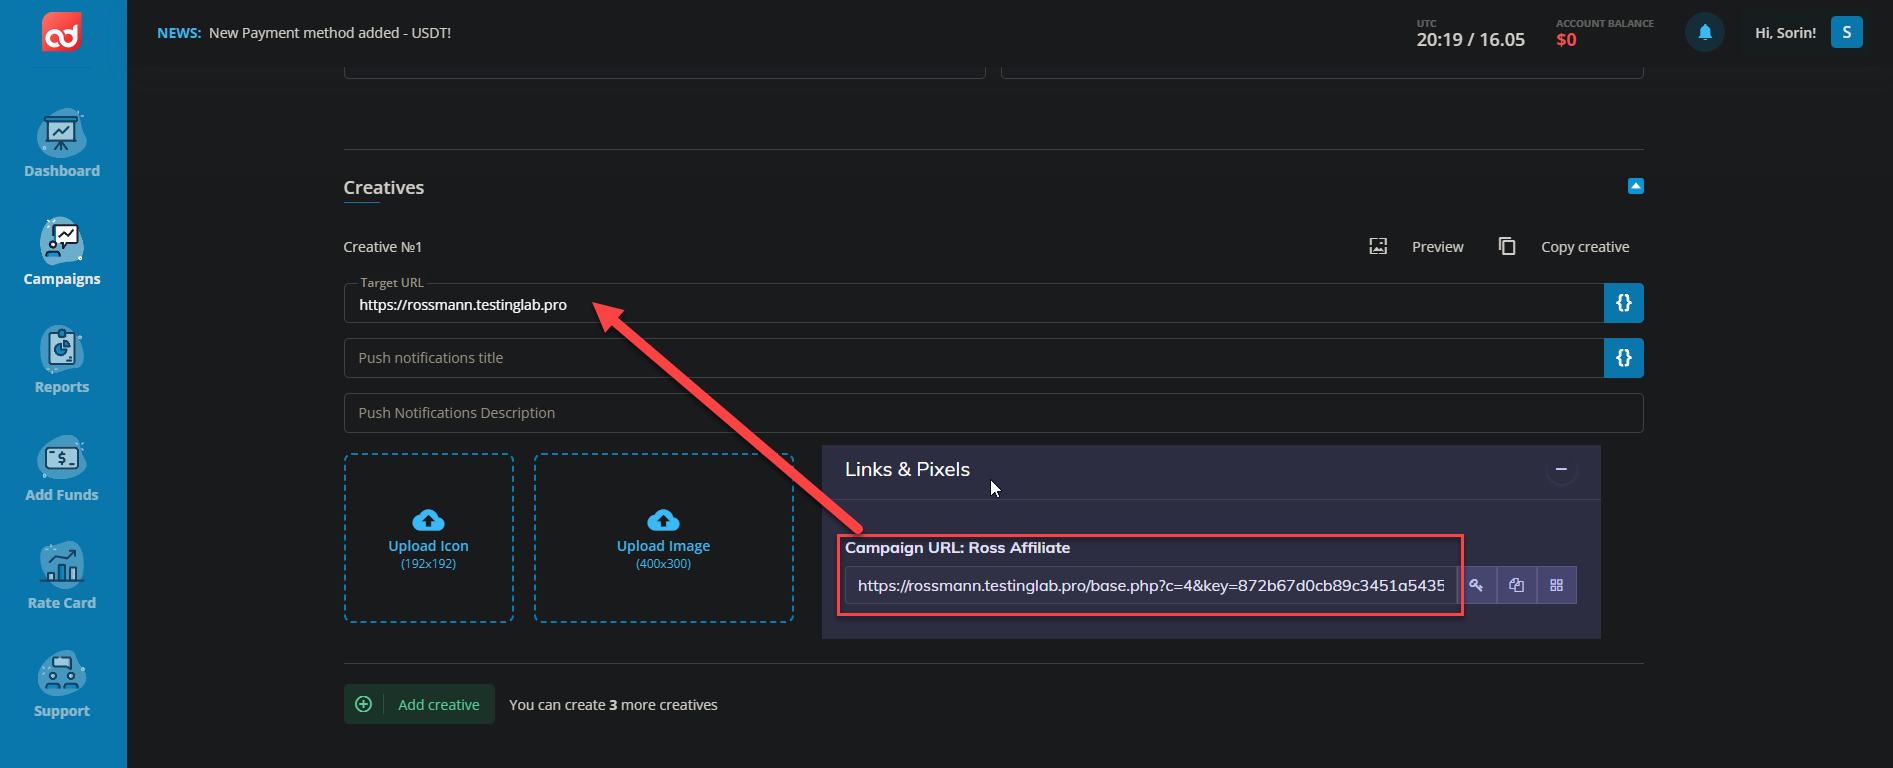
- Finish the campaign by filling in all the other fields and clicking "Save".
TIP
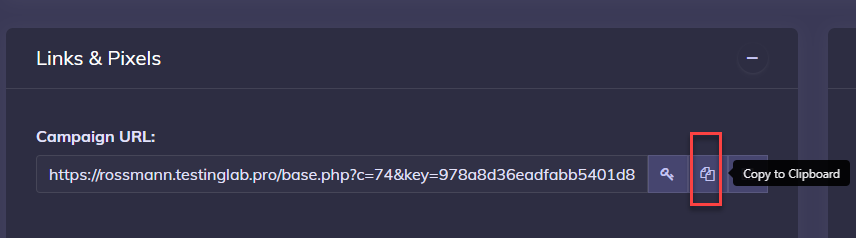
You can find the campaign URL in the Links & Pixels section of your campaign in CPV Lab.
Step 4: Start the campaign in AdOperator
In AdOperator platform, by default, after it is created, the campaign is sent to moderation. Wait until you get the ok to start the campaign.
Start your campaign and follow the results in CPV Lab (opens new window)
Step 5 (optional): Setup the Postback URL
- In order to track conversions back into the AdOperator platform, you need to CHECK the Traffic Source Postback URL in your tracker.
- The Postback URL should contain the CPV Lab Pro macro
{!tscode!}(for Unique Click ID). - The Traffic Source Postback URL will be automatically filled for the selected Traffic Source in the Campaign setup page, but you need to select/check it in order to have it used (check image below).
- It is located in the "Tracking Pixel" section from your campaign page.
- The Postback URL should contain the CPV Lab Pro macro
![]()
- The postback URL is in the following format:
https://s2s.adoperator.com/conversion?c={!tscode!}&value={!revenue!}