Clickbank integration with CPV Lab | CPV One
Clickbank Integration via Postback URL
ClickBank updated their system to support Postback URL tracking. So, tracking conversions from ClickBank with CPV Lab | CPV One is now my easier because it can be done Server to Server via Postback URL.
Below is the old way of tracking conversions from ClickBank, still functional but which soon will become obsolate.
ClickBank Instant Notification (soon obsolate)
- Clickbank (opens new window) uses a different format for the Postback URL and passes encrypted details about conversions.
- CPV Lab Pro (opens new window) offers a dedicated ClickBank Postback URL that will decrypt data and mark conversions in the database.
- In order to decrypt data you need to define the same Secret Key both in Clickbank and in CPV Lab Pro.
- The Secret Key can have a maximum of 16 uppercase letters and digits.
You’ll setup your campaign as you normally would but when entering your Clickbank offers you need to allow the steps below:
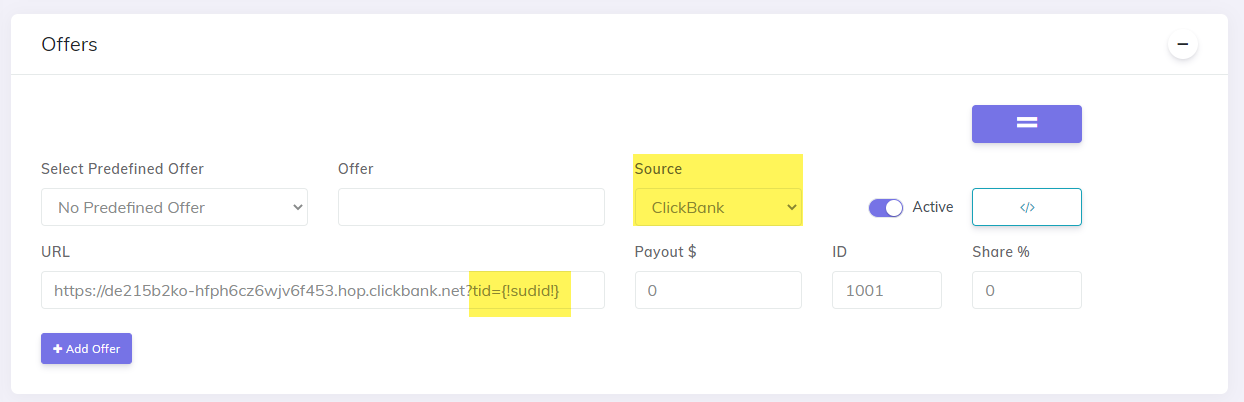
1. Select Clickbank as the Offer Source.
- Clickbank must be selected as the Offer Source or the SubIDs will not work correctly.
- CPV Lab Pro generally uses spacing characters
_in SubIDs, but these types of characters are not allowed in Clickbank Tracking IDs.- So when Clickbank (exactly as show) is selected then CPV Lab Pro will automatically change the spacing character in the SubIDs to “z” in order to pass correctly to Clickbank.
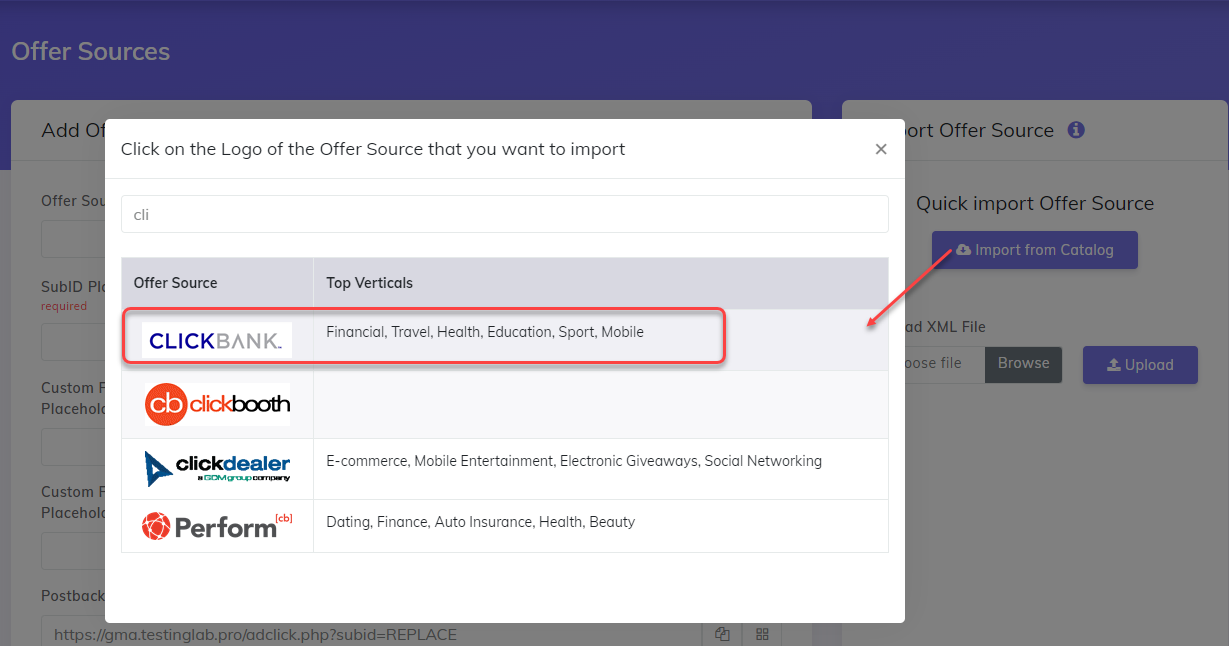
- Go to Sources -> Offer Sources and import Clickbank from the catalog.
2. Entering Clickbank Offer URLs
- Go to "LP & Offers" menu and add your Clickbank offers
- make sure you select Clickbank as your Source
- you can add the offers directly in the campaign setup as well
- When entering Clickbank Offer URLs, be sure to include the Tracking ID Parameter they support to the end of the offer URL followed by the "subid" macro as:
&tid={!subid!}
3. Setup Clickbank Instant Notifications for Conversion Tracking
In your Clickbank Account
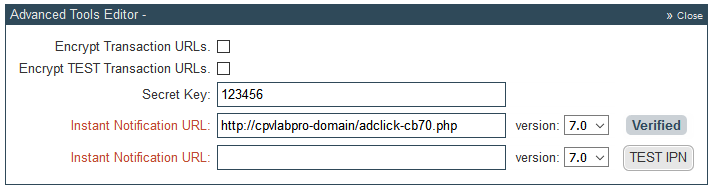
- go to the My Site page under Vendor Settings menu, then click Edit in the Advanced Tools section
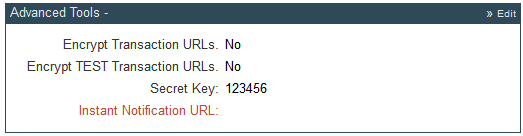
- enter the secret key that you set above
- set the Instant Notification URL to:
http://cpvlabpro-domain/adclick-cb70.php- make sure you replace
cpvlabpro-domainwith your actual domain name
- make sure you replace
- Select Version 7.0 and then Click TEST IPN.
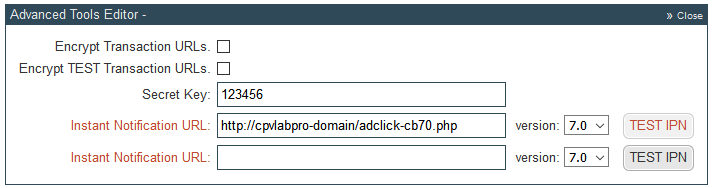
If the URL is correct, you should see a Verified message appearing next to the URL
Clickbank will automatically send the following parameters to the URL:
- ctid – the Clickbank transaction ID which must be setup to be the CPV Lab Pro subID
- caccountamount – the conversion revenue (in cents)
CPV Lab Pro will read these 2 values and mark the correct conversion in the database, as well as store the actual revenue, then execute any additional server-to-server pixels setup for that campaign.
Because the Clickbank performs a POST request, any 3rd party pixels entered as image, iframe or script won’t execute
- so in this case only server-to-server 3rd party pixels will fire (those are entered as simple URLs in the campaign setup page).
The Clickbank pixel allows multiple conversions from the same subID.
- If the pixel fires more than once for the same subID, CPV Lab Pro will sum the revenues that were sent from Clickbank.
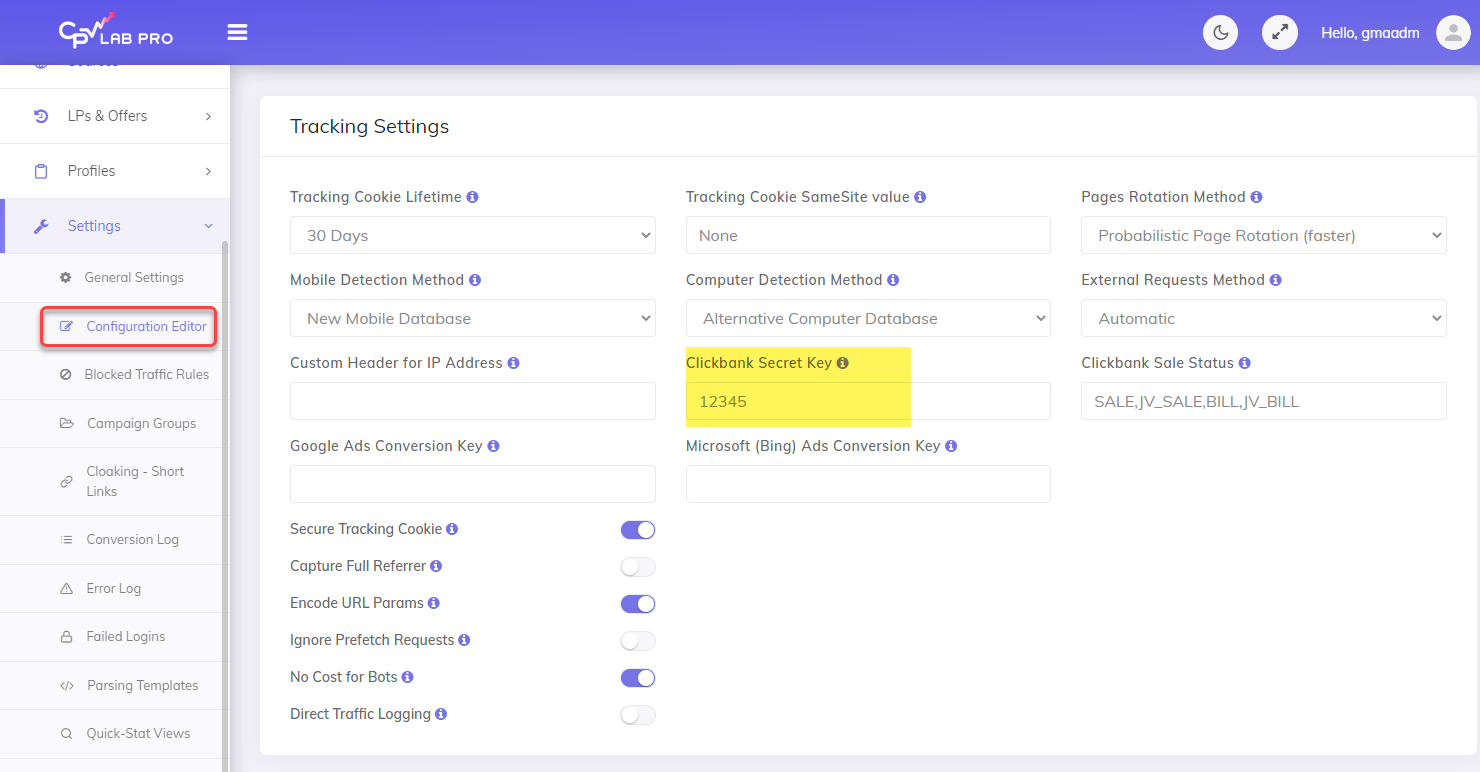
Go to the Configuration Editor page (under Settings) and edit the
Clickbank Secret KeyandClickbank Sale Statusvariables;- Enter the same Secret Key that you have entered in your Clickbank account previously:
Clickbank Order form impressions tracking
About order form conversion reporting
Besides conversions/sales, Clickbank can also provide information about a metric that is often ignored, but which can offer useful information: order form impressions. Each time a visitor goes to the checkout form in Clickbank, it will trigger an order form impression.
With CPV Lab you can also track visitors that trigger the order form impression by using a tracking pixel and also the percentage of visitors that reached the order form.
This feature proves invaluable in analyzing the performance of both your order form template and product conversions.
Why is form conversion important?
Making simple, easy forms is super important for getting more people to sign up or buy stuff on your website. Forms are usually the last step before someone becomes a customer.
When someone starts filling out a form, it means they're interested in what you're offering. They trust you enough to give you their info like their name, email, or credit card details.
What do you need to track form impressions in CPV Lab?
To effectively monitor order form impressions on CPV Lab, you'll require either a Lead Capture campaign or a Landing Page Sequence. This will allow tracking of both order form impressions (as subscribers) and purchases (as conversions).
More information about how to setup the campaigns:
How to configure the order form impression pixel (adsub.php)
To track Order Form Impressions effectively, follow these steps to define the subscriber's pixel from CPV Lab (opens new window) or CPV One (opens new window) as a Tracking Pixel in ClickBank:
- Access Vendor Settings in ClickBank:
Navigate to Vendor Settings, then select My Site in ClickBank.
- Locate Integrated Sales Reporting Section:
Look for the Integrated Sales Reporting section within My Site.
- Add Tracking Code:
Click on the "ADD TRACKING CODE" button to proceed.
- Define Tracking Pixel:
Specify the Tracking Pixel with the following settings:
- Type: Tracking Pixel
- Tracking Pixel URL: https://go.the-wellness-network.com/adsub.php
- Track as: Affiliate
- Where to Fire: Order Form
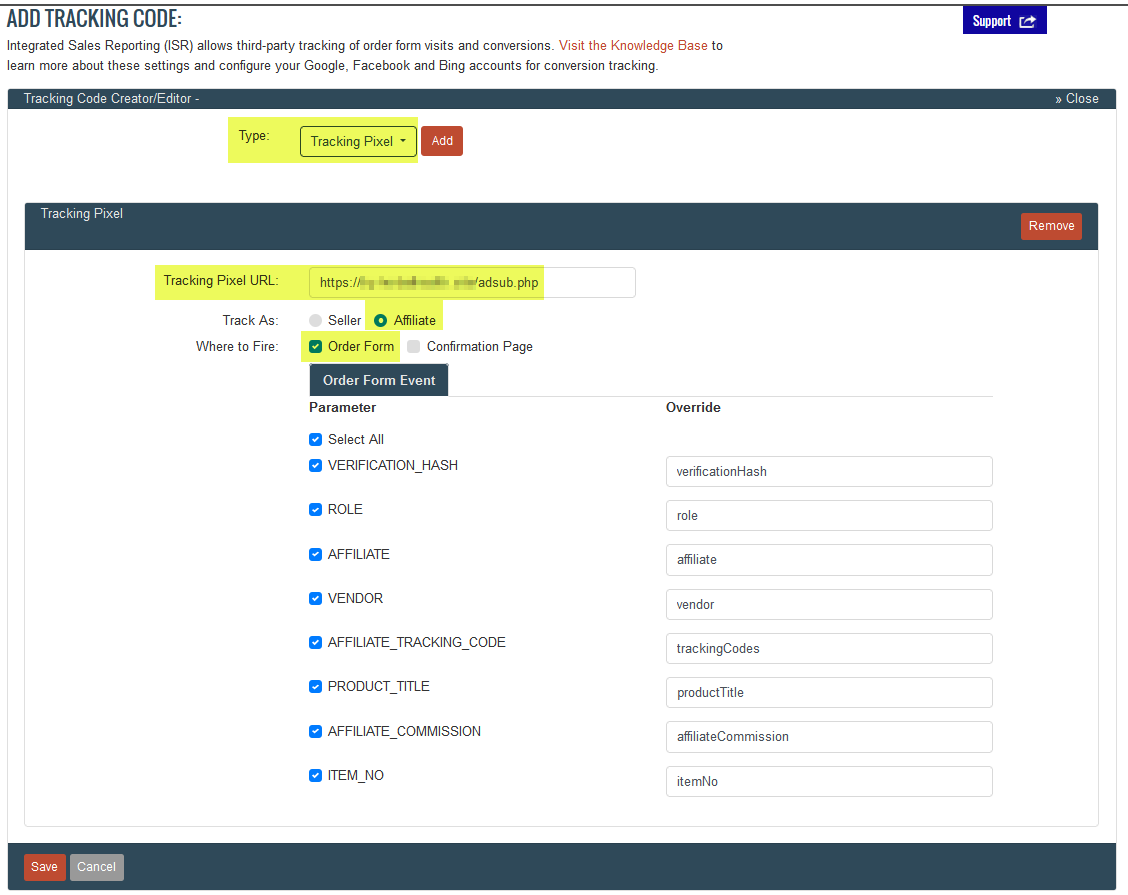
- Save the Tracking Pixel:
After defining the Tracking Pixel, save your settings to ensure they are applied.
- Activate Tracking Pixel:
By default, the Tracking Pixel may be set to Inactive. Ensure to activate it from the data table provided to enable tracking.
![]()
By following these steps, you'll successfully define the subscriber's pixel from CPV Lab as a Tracking Pixel in ClickBank, allowing you to track Order Form Impressions efficiently.
TIP
This setup is the same for both CPV Lab and CPV One tracker.
Potential Issues & Solutions
1. Error message when entering the Instant Notification URL in Clickbank
Error:
- if you get the error :
Invalid IPN URLwhen entering the Instant Notification URL in Clickbank (image below) and you click Test IPN - and the URL is correct

Solution:
- Logout from the system and log back in
- Click again on "Test IPN"
Find more details in the video below:
Video Tutorial for setting up your Clickbank campaign in CPV Lab (opens new window)
