ExoClick integration in CPV Lab Pro
This is a guide showing step-by-step how to use CPV Lab and CPV One ad tracker to track campaigns using Exoclick traffic source.
Who is ExoClick?
ExoClick is a leading ad tech company that provides monetization opportunities for both advertisers and publishers. It works both ways; as an Ad Exchange and as an Ad Network.
As an Ad Network, Exoclick has been serving over 8.5 billion geo-targeted ads per day. These ads are served to a global network of 65,000 mobile or website publisher platforms.
Ad formats: In-Page Push Notification, Mobile Fullpage Interstitial, Multi-Format Ads, Desktop Fullpage Interstitial, Push Notifications, Email Clicks, Outstream Video, InStream Video Ads, Video Sliders, Video banners, In-Video Banners (VAST), Popunders, Native interstitials, Native Exit, Native recommendation, Display banner, Sticky banner, Large footer, Direct links, Mobile Instant message.
If you don’t have an ExoClick account yet, then you need to register here (opens new window)!
Step 1: Create the goal ID for the postback URL
- Access your ExoClick Admin Panel and navigate to the Campaigns > Conversions tracking section. Here, you can generate the tracking code for conversions, which will be utilized in your postback URL.

Select the option "New Conversion Goal" and proceed to complete the three required fields: Name, Conversion Value, and Order. In the Name field, assign a suitable name for the goal, such as "Postback."
There are three available options for Conversion Values:
- No Value: The assigned value is 0.
- Fixed: You manually determine the payout for the conversion while setting up the goal.
- Dynamic: The payout value is passed through the Postback URL.
The Order field is used to organize your created goals within your account. If you have multiple Conversion Goals, utilizing the Order feature will help arrange how these goals are displayed in your Statistics and Campaigns List.
Once you have filled in all the required fields, click on the "Create" button. The Admin Panel will present the structure of the Postback URL and provide the corresponding `Goal ID`` for the newly created goal. The displayed information should resemble the following example:

Step 2: Add ExoClick as a traffic source in CPVLab and configure the Postback
In order to track conversions on ExoClick, it is necessary to include a dynamic tracker called {conversions_tracking} in your campaign URL. This tracker parameter ensures that each conversion is identified uniquely.
To enable this tracking, you need to store the tracker on CPV Lab and set up a notification to be sent to ExoClick's server whenever a conversion is generated (Server to Server). This process is straightforward and involves configuring ExoClick as the traffic source using a pre-defined template.
Here's how you can do it:
- Access your CPV Lab account
- Navigate to the "Sources" tab and locate the option for "Traffic Sources"
- Click on the "Import from Catalog" button
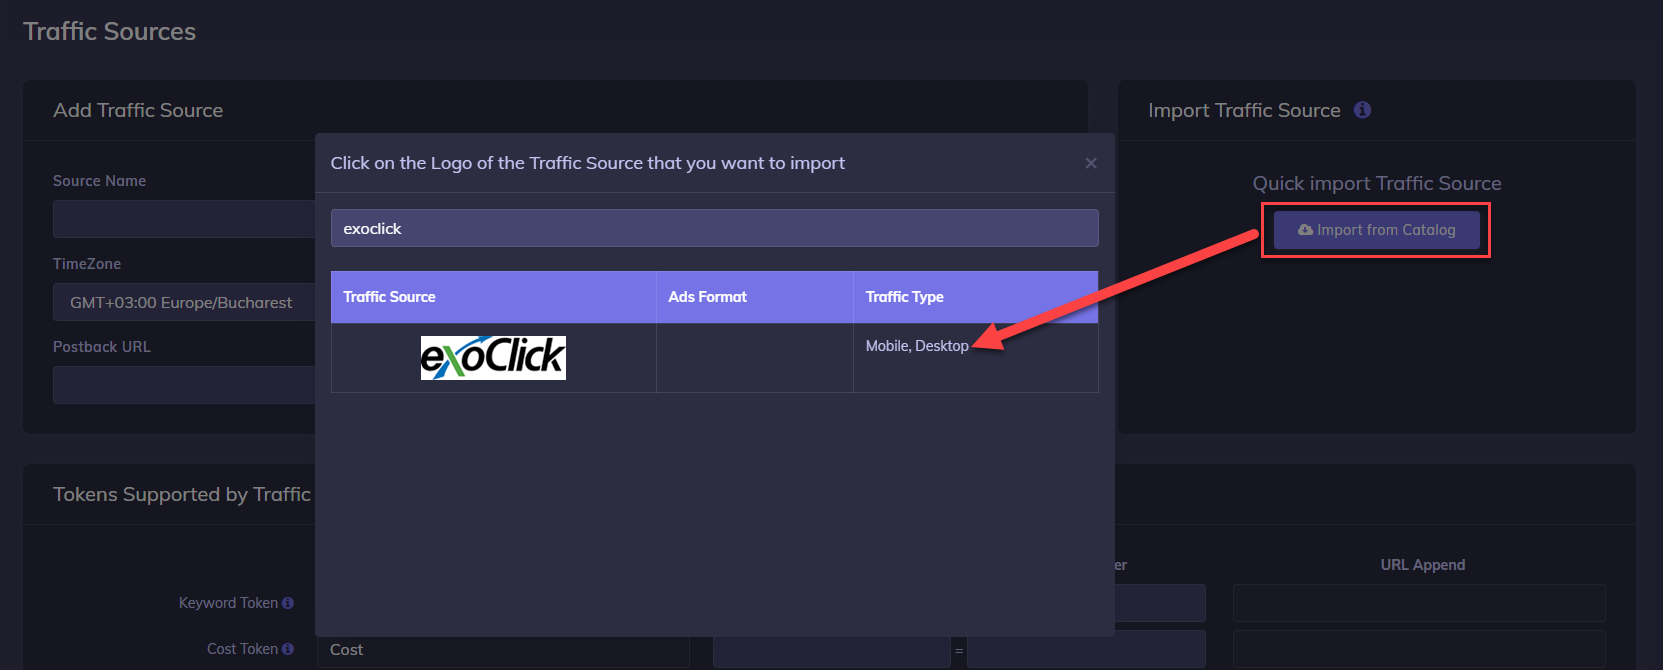
- Select ExoClick
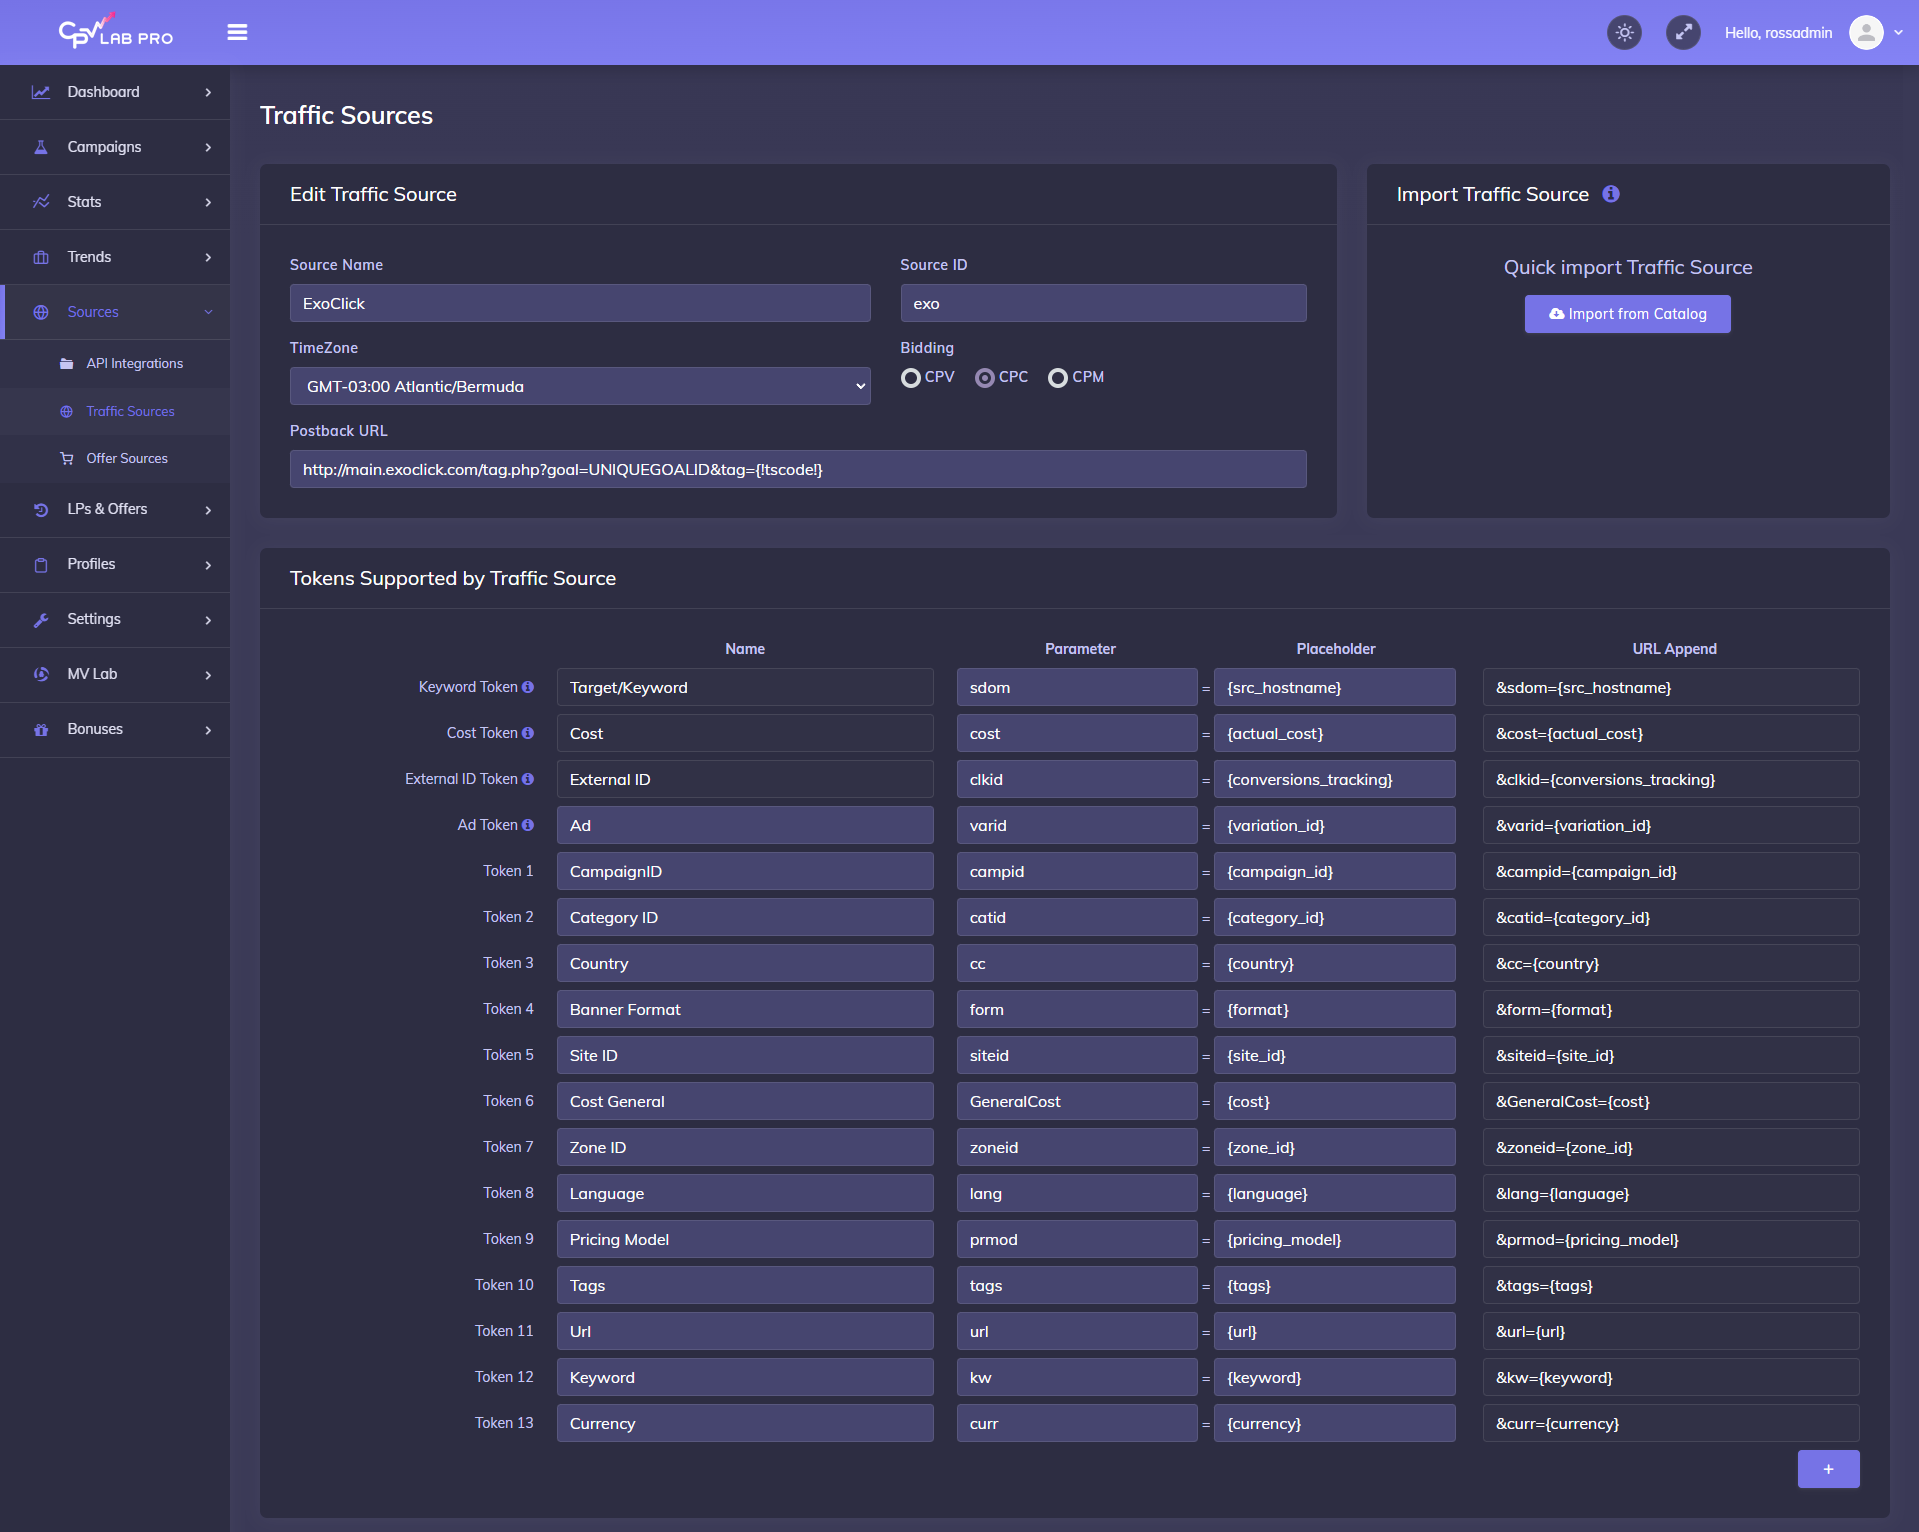
- CPV Lab Pro will pre-populate all the traffic source settings. The first change you need to make is to replace the
UNIQUEGOALIDvalue with the goal ID we generated in Step 1 of this guide.
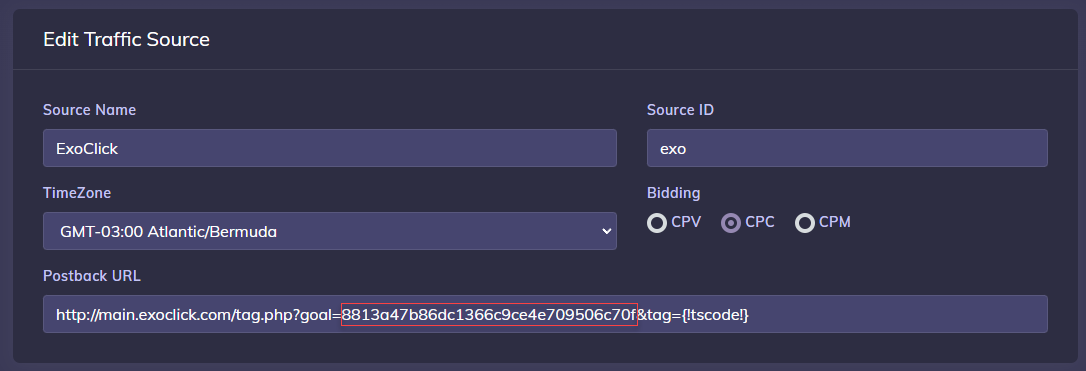
- CPV Lab Pro will pre-populate all the traffic source settings. The first change you need to make is to replace the
WARNING
Important: If you opted for the "Dynamic" value when setting up your Conversion goal in Step 1, it is essential to append value={!revenue!} at the end of the Postback URL. In such cases, your postback URL will resemble the following example:
http://main.exoclick.com/tag.php?goal=UNIQUEGOALID&tag={!tscode!}&value={!revenue!}
- In order to have matching statistics in CPV Lab Pro and ExoClick, you need to pick EST timezone for this Traffic Source (GMT-04:00 America/New_York)
- Finally, choose your desired price model from the available options under the "Bidding" section. It's important to note that you can adjust the Bidding again later in your campaign settings if needed.
Step 3: Add an Offer Source to CPVLab (optional)
If you are not utilizing an Offer from an Affiliate platform, please proceed to Step 4.
To integrate an Affiliate network, navigate to the "Sources" section and select "Offer Sources.". Within the "Import from catalog" feature, you will discover a selection of Affiliate networks available for integration.
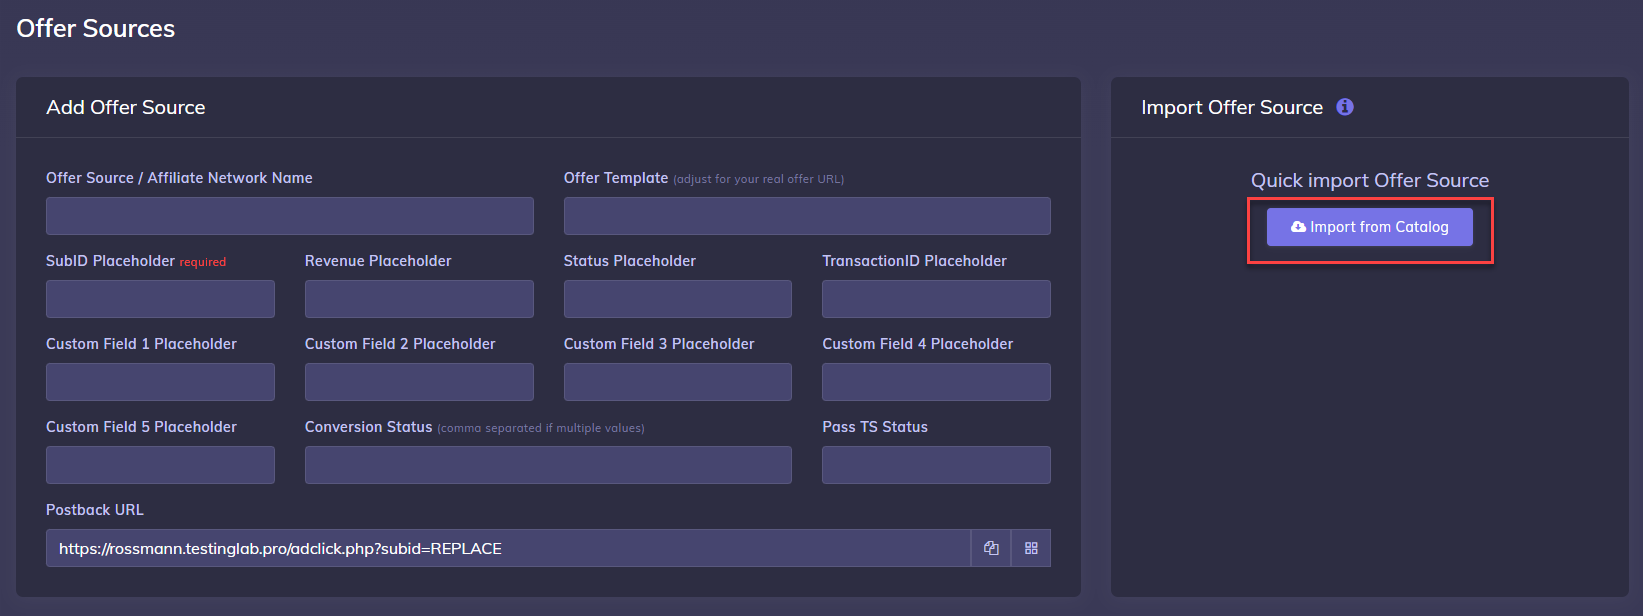
- On this page, the most important aspect of ExoClick is the Revenue Placeholder. If you intend to utilize dynamic conversion values from your goals, it is crucial to ensure that the payout token from your affiliate platform is successfully transmitted to the postback URL provided by ExoClick.
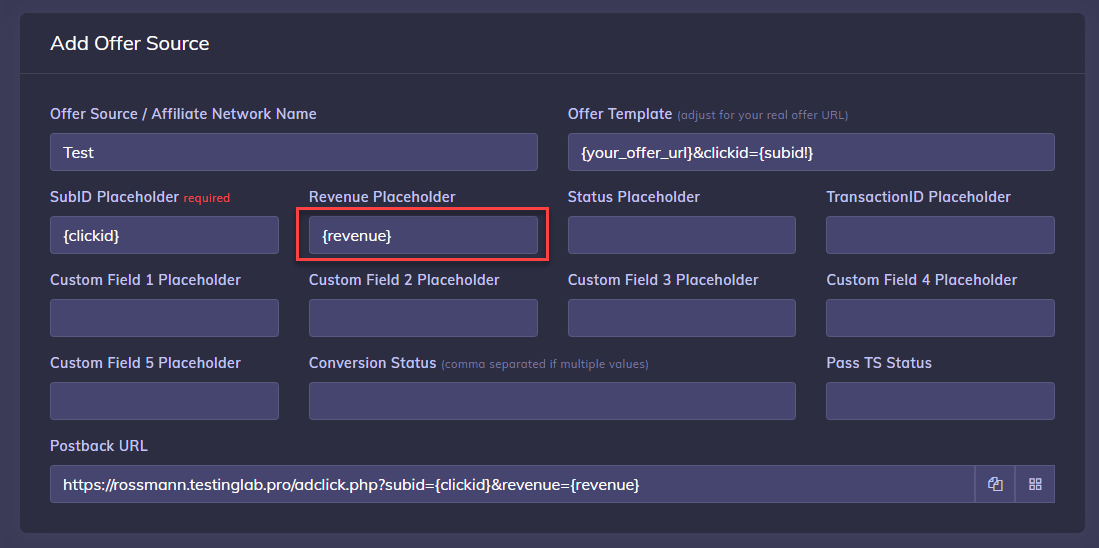
- The Postback URL displayed on this page should be added to your Affiliate Platform to notify you about the conversions. It's important to note that this Postback URL should not be confused with the one you created in the Traffic Source settings. (this Postback URL is used by the Affiliate Network to send conversions to the tracker).
Step 4: Adding Landing Page & Offer URLs to Campaigns
Within all the Campaign Types available in CPV Lab, there are a few general rules to follow to ensure CPV Lab Pro is setup correctly to track your campaigns.
Here is more information about Adding Landing Page & Offer URLs to Campaigns
Step 5: Set up your campaign in CPV Lab
Click the "Campaigns" tab within CPVLab -> "Add new campaign" and you will encounter a menu providing options for creating a campaign based on your preferences.
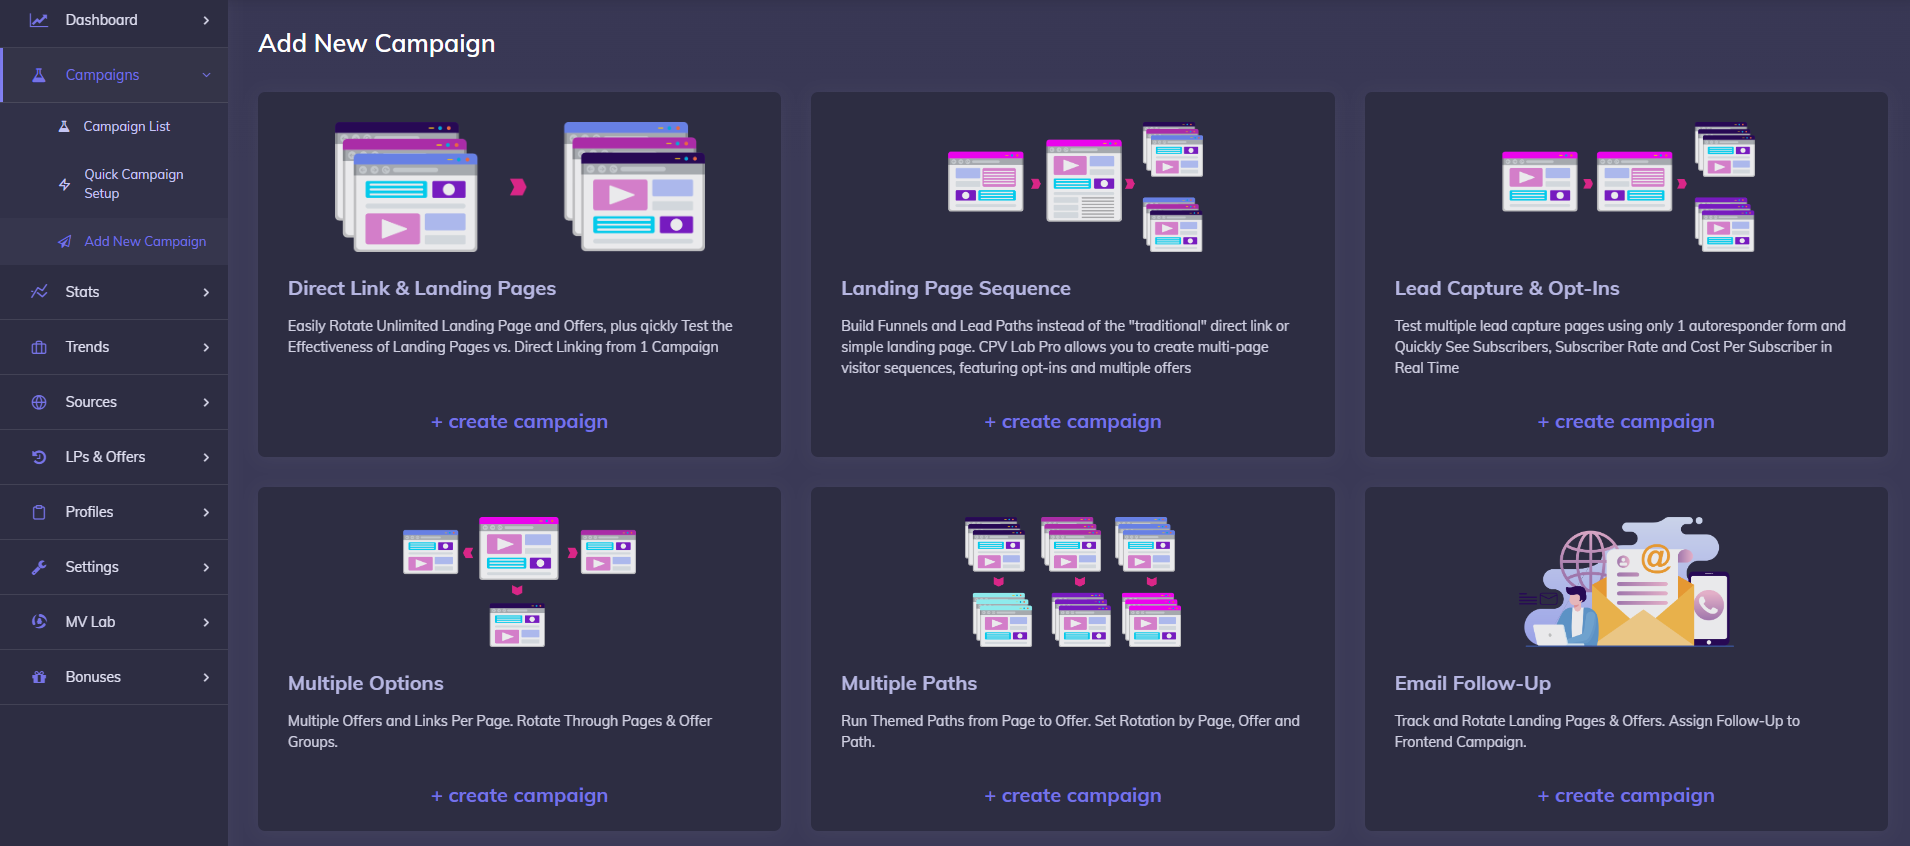
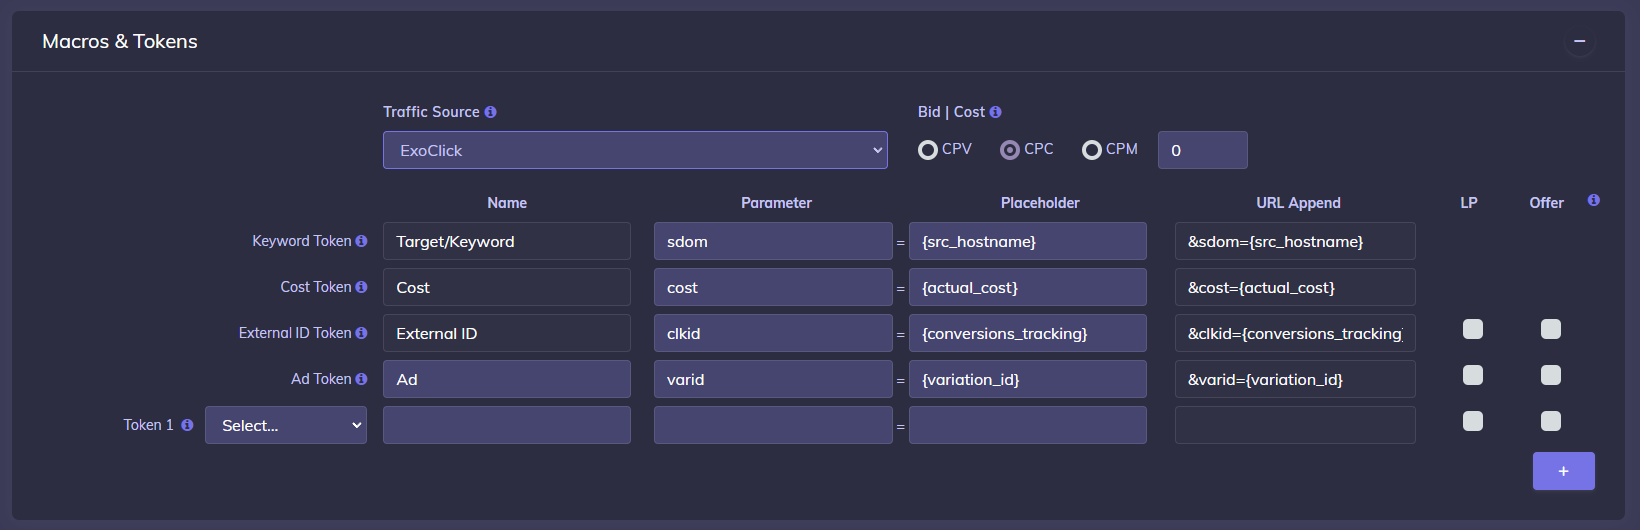
In this tutorial, we will be employing a "Direct Link & Landing Page" configuration. Begin by assigning a "Name" to the campaign, and then proceed to scroll down to the section labeled "Macros & Tokens."
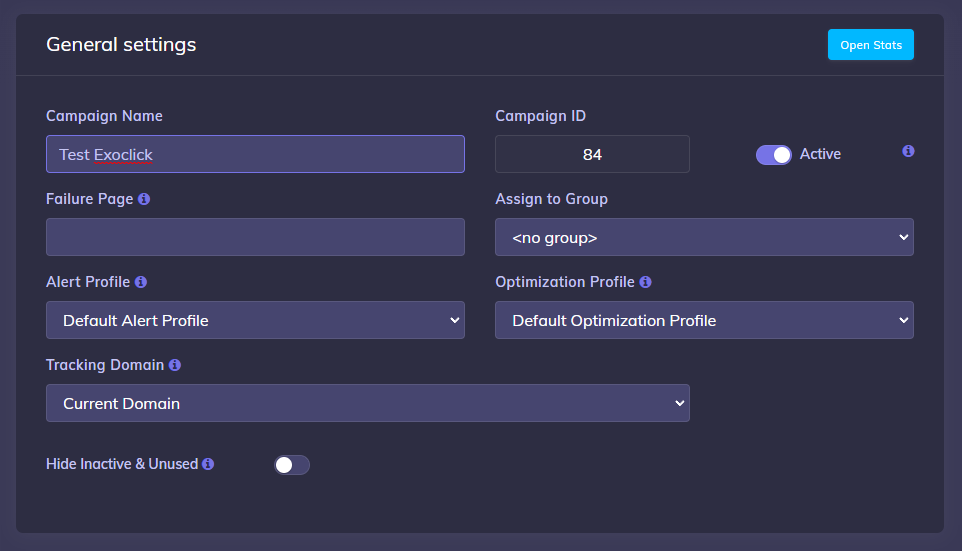
- Choose ExoClick as the designated Traffic Source for this campaign. If desired, you can modify the price model specifically for this campaign. However, please refrain from including a Cost value, as this information will be conveyed through the `{actual_cost}`` token receved from the traffic source.
- If you have a Landing Page, you can input it in the "Landing page" section.
- Under the "Offers" section, click on "Select Predefined Offer" and choose the Offer you previously created at step 4. The remaining parameters will be automatically populated based on the settings defined for the selected Offer.
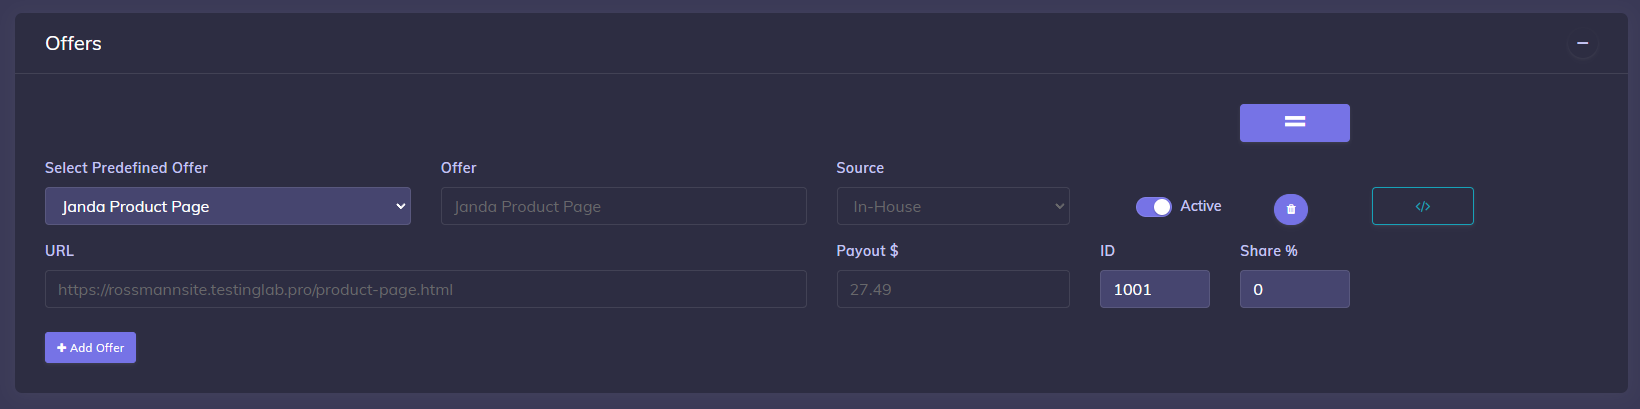
- Finally, in the "Tracking Pixel: Add Pixel to Offer Source" section, tick the option "Use Traffic Source Postback URL to mark conversions at your Traffic Source."
- It is essential to verify that the Postback URL displayed in this section corresponds with the one you generated at step 2 of this guide.
![]()
- Save the Campaign.
- You should now get a Campaign URL similar to the following: https://your-tracker-domain/base.php?c=84&key=d8d75770760dd2b3818105a34d76c7fb&sdom={src_hostname}&cost={actual_cost}&clkid={conversions_tracking}&varid={variation_id}
TIP
Please take note that the tracking domain used in CPV Lab may vary based on your campaign settings. However, the campaign URL should resemble the example provided above. You will utilize this URL when configuring your campaign in ExoClick.
You need to change "[GOAL_ID]" to your ExoClick Goal that was created and can be found on the Conversion Tracking screen in your ExoClick account.
Step 6: Set up the campaign in ExoClick
- Insert the campaign URL generated in the previous step as your "Variation" for your ExoClick campaign. Ensure that the URL includes the
{conversions_tracking}tag to transmit the conversion details to CPV Lab Pro.

- Finish the campaign setup. You can find a detailed guide on how to create a campaign in Exoclick here.
If the setup has been done correctly, you will start seeing conversions both in CPV Lab and Exoclick.
- Do not forget to enable the corresponding Goal column in your Campaigns List and your Statistics
That's it!