AdMaven integration in CPV Lab | CPV One
This is a step by step guide showing how to:
- setup and track an AdMaven campaign in CPV Lab (opens new window) or CPV One (opens new window) ad tracker
- setup an AdMaven campaign in AdMaven
- setup the Postback URL tracking to have CPV Lab and AdMaven connected
Who is AdMaven?
AdMaven is a top-tier ad network delivering high-converting direct traffic to advertisers across the globe. With over a decade of experience, AdMaven connects you to millions of users daily through a variety of ad formats, including Pop, Push Notifications, In-Page Push, Interstitials, and Native Ads.
Their platform is optimized for both desktop and mobile traffic, covering a wide range of verticals such as finance, e-commerce, software, and more. Whether you're targeting Tier 1 geos or looking to scale in emerging markets, AdMaven offers granular targeting and high-quality audience segments to fit your goals.
To get started -> Sign up as an advertiser with AdMaven here! (opens new window)
When combined with CPV Lab’s advanced tracking and attribution tools, this integration gives you complete control over your AdMaven traffic performance, so you can test smarter, scale faster, and drive better ROI.
Step 1: You need an AdMaven account
- If you don't have an AdMaven account yet, then you need to register and create an AdMaven Account
- For CPV Lab Pro users, they have a special bonus that you can find inside your tracker dashboard, under Bonuses menu!
Step 2: Setup AdMaven in CPV Lab | CPV One
- CPV Lab Pro comes with the AdMaven Traffic Source pre-configured in the Traffic Sources Catalog pages, so in this case all you have to do is import it from the Catalog.
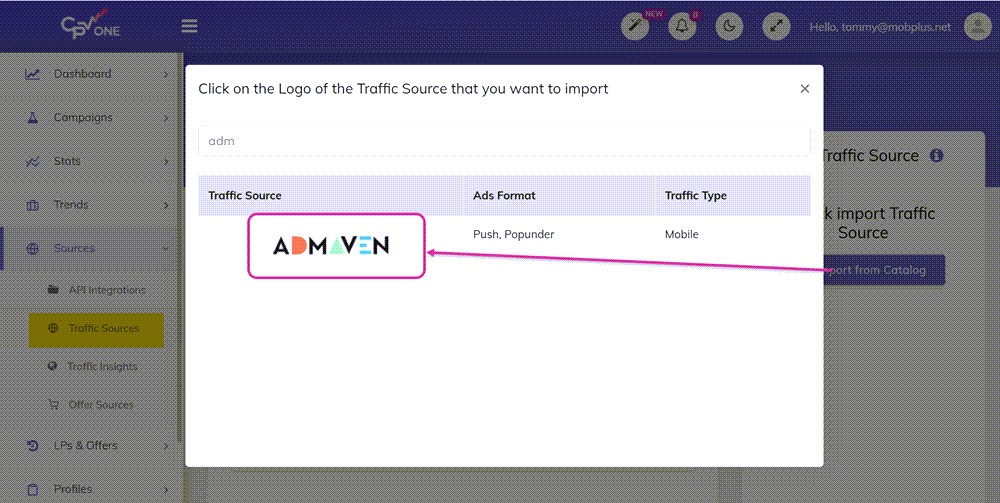
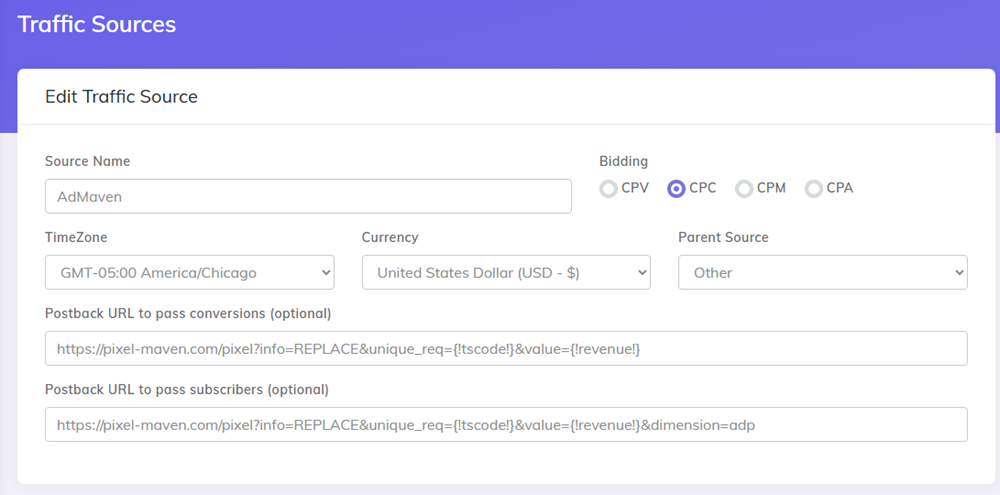
- The detailed configuration for the AdMaven Traffic Source is the following:
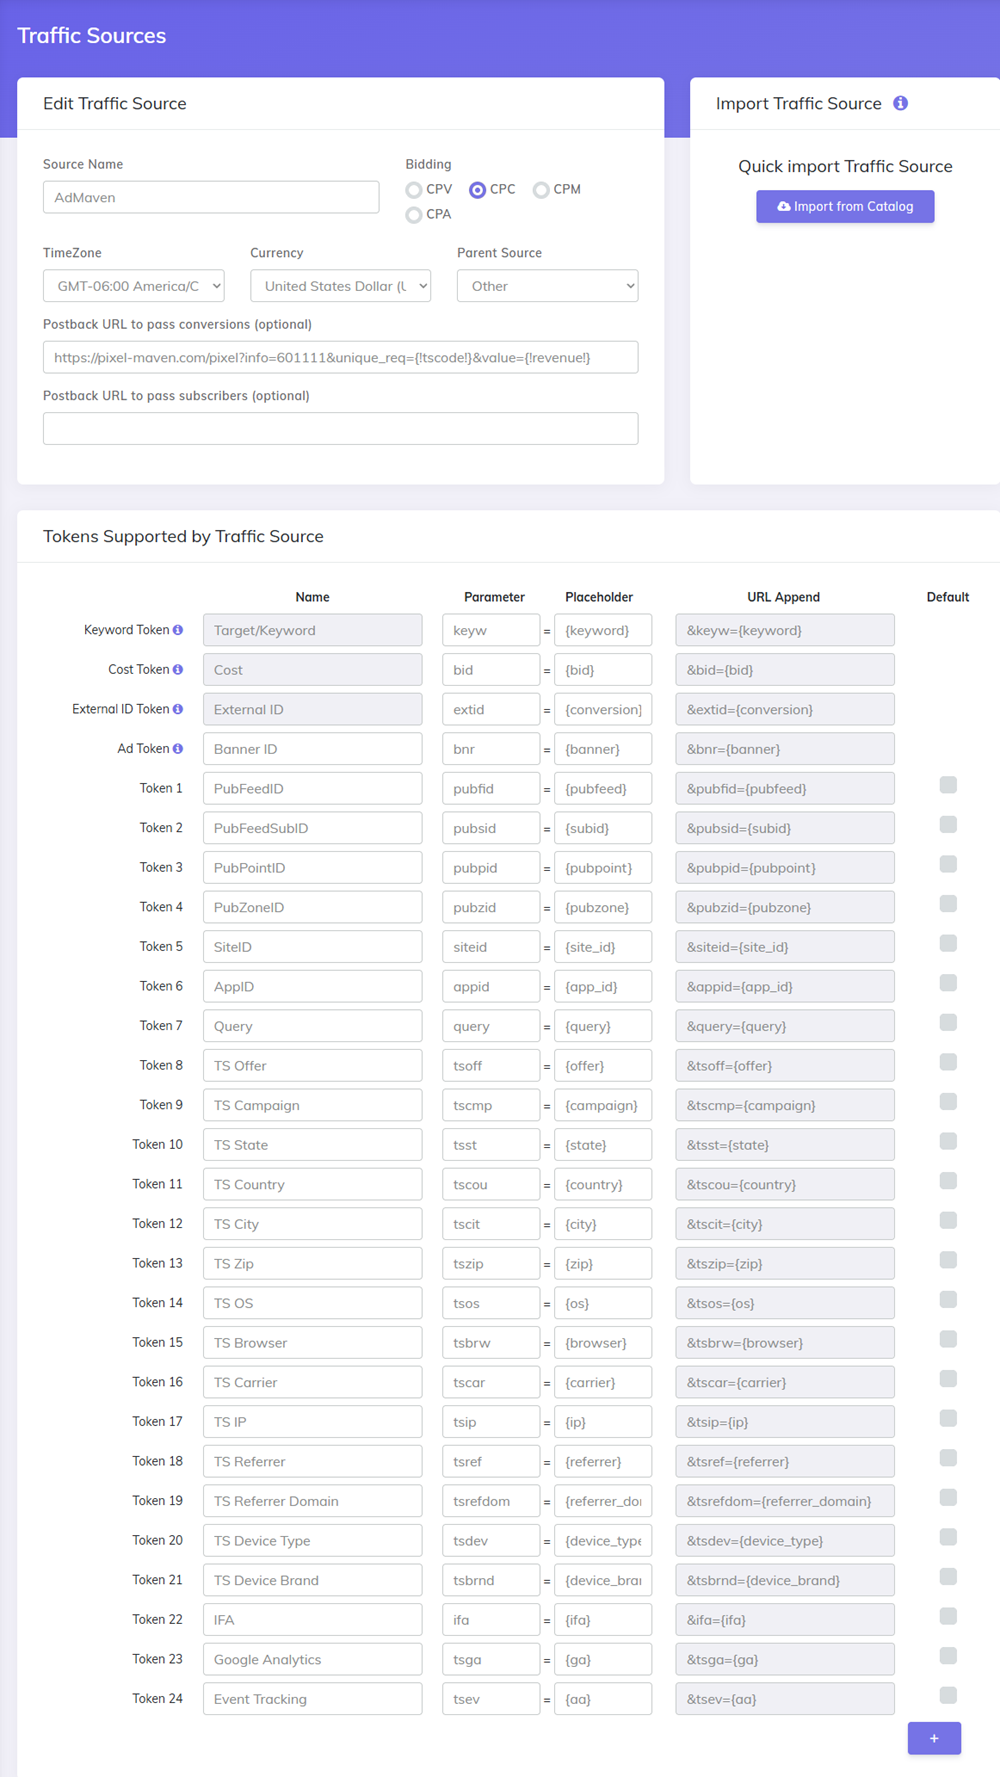
Once you import the traffic source from the catalog, it will show up when you create your campaign on the Campaign setup page.
To be able to keep your tracker and your Traffic Source reports in sync, you need to send data back to your traffic source. For that you have to have the Postback URL field setup correctly.
Update the PostbackURL field with your Unique information from your Admaven account (check images below for more details).
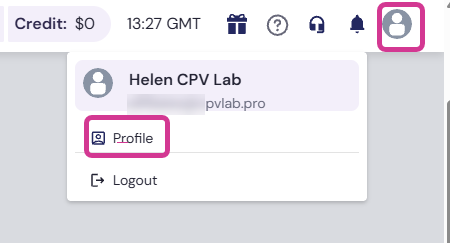
- first go to your Admaven account and click on the "Your Profile"
- Click on "Tracking URL" and select "CPV Lab" from the list of trackers
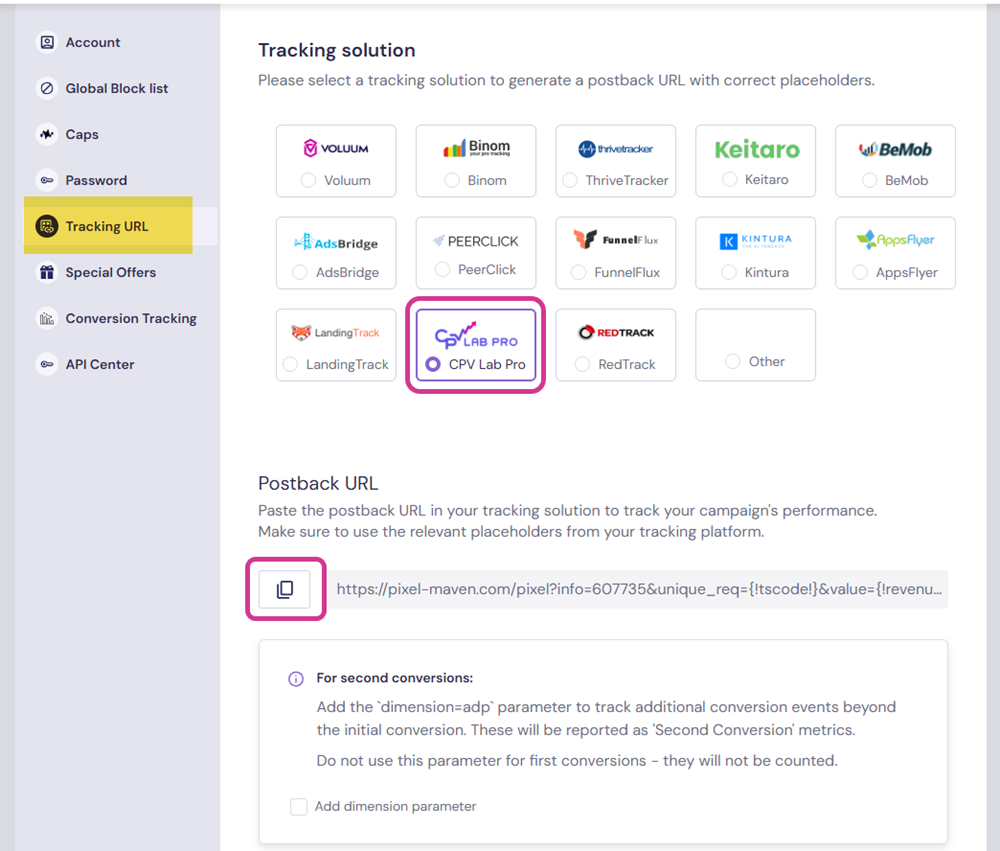
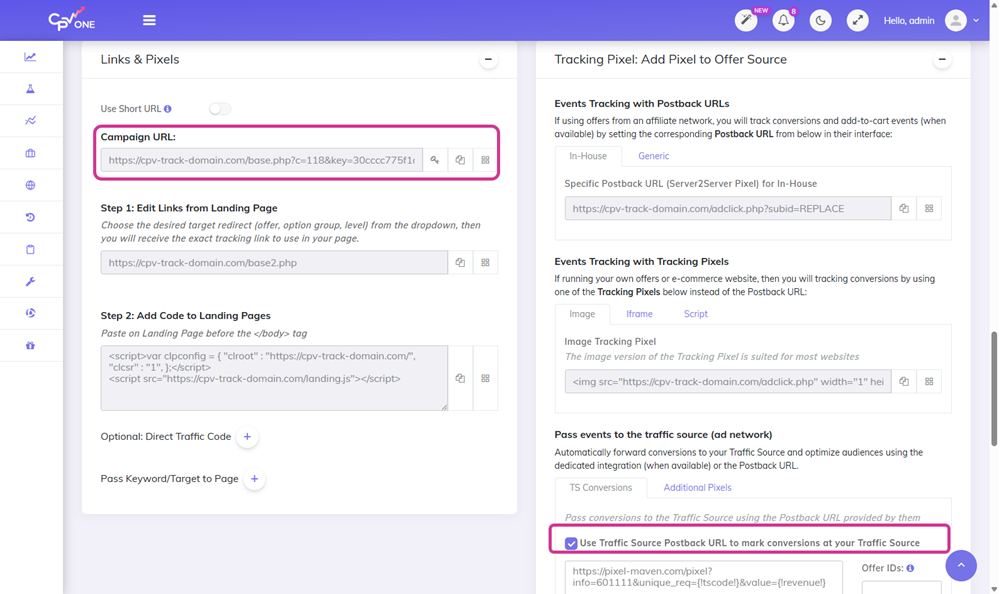
- Go to your CPV tracker -> Sources -> Traffic Sources and update the Postback URL for Admaven traffic source so it will contain your unique identifier.
- just update the part where it says REPLACE with your actual Admaven ID
Once you have the Admaven Traffic Source setup you can start creating your campaign in CPV Lab | CPV One.
Step 3: Create a Campaign in CPV Lab Pro | CPV One
- In your CPV Lab Pro campaign setup page select AdMaven as the Traffic Source and choose the Predefined Extra Tokens that you want to capture.
First Select the type of campaign you want to create (Direct Link and Landing page or a more complex one like Landing Page Sequence or Lead Capture campaign)

Fill the fields from General Settings and [Tracking Settings]((../campaign-setup-page.md##tracking-settings)
For Macros & Tokens, select AdMaven as your Traffic Source
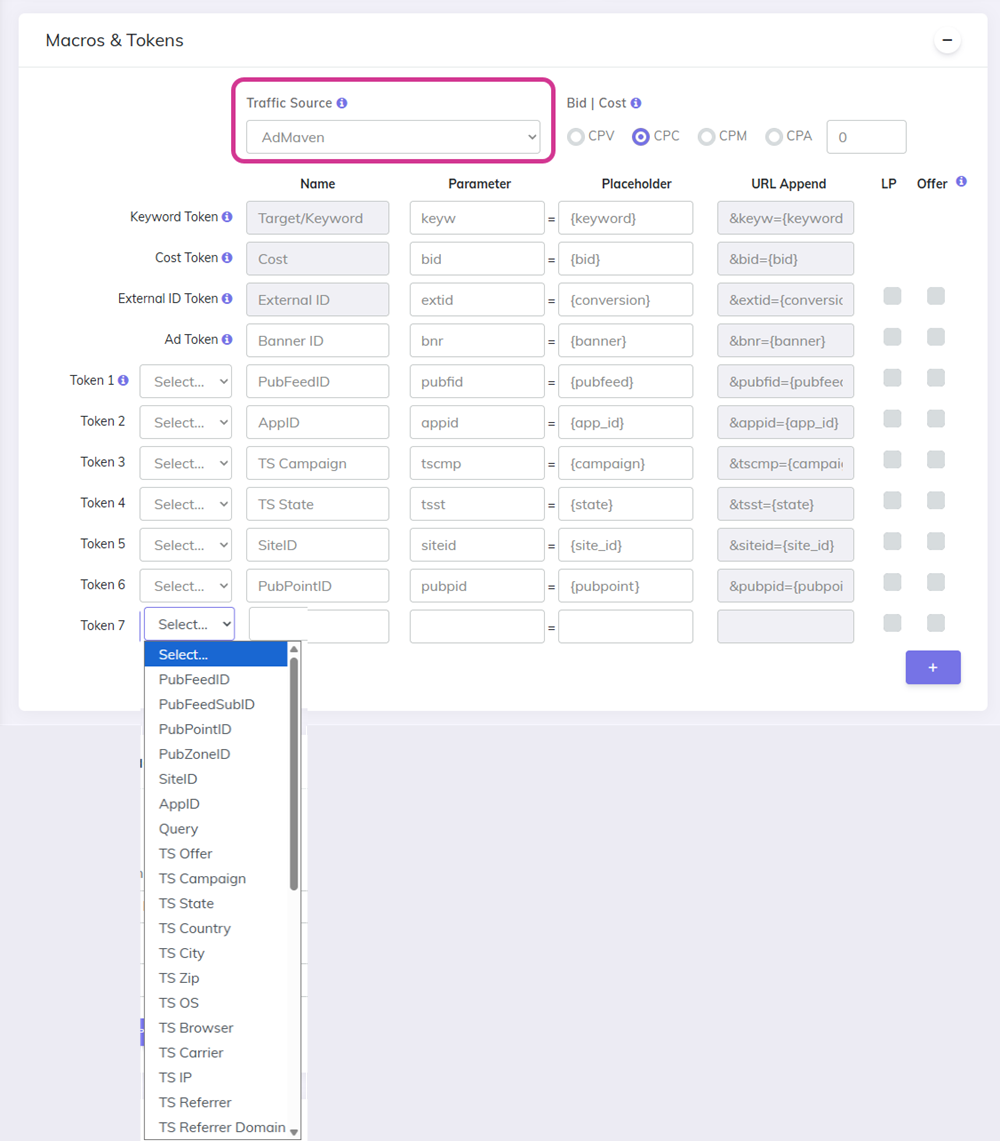
- Complete the other fields
- Save and Validate the campaign
- Copy the Campaign URL for the next step
Step 4: Create the campaign in AdMaven
Login to your AdMaven account
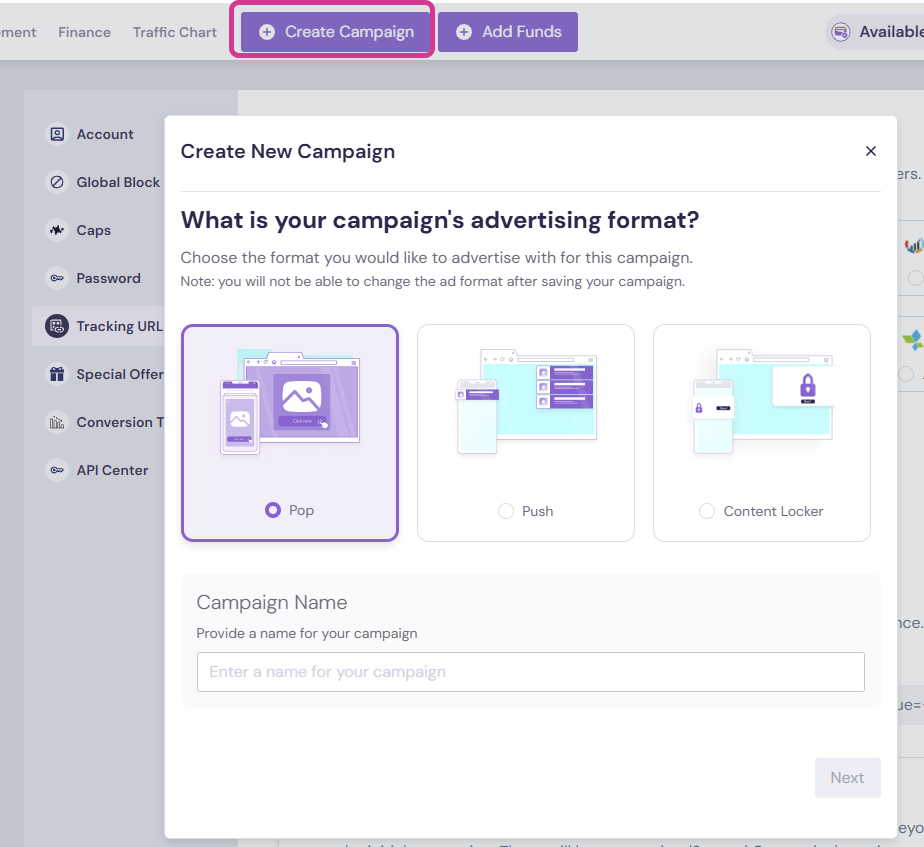
Create a new campaign
Select the type of campaign you want to create: pop, push or Content Locker
Give your campaign a name
Select your Pricing Model
Paste the Campaign URL from your CPV Lab | CPV One tracker into the "Offer URL" Field (it will have all the parameters correctly added)
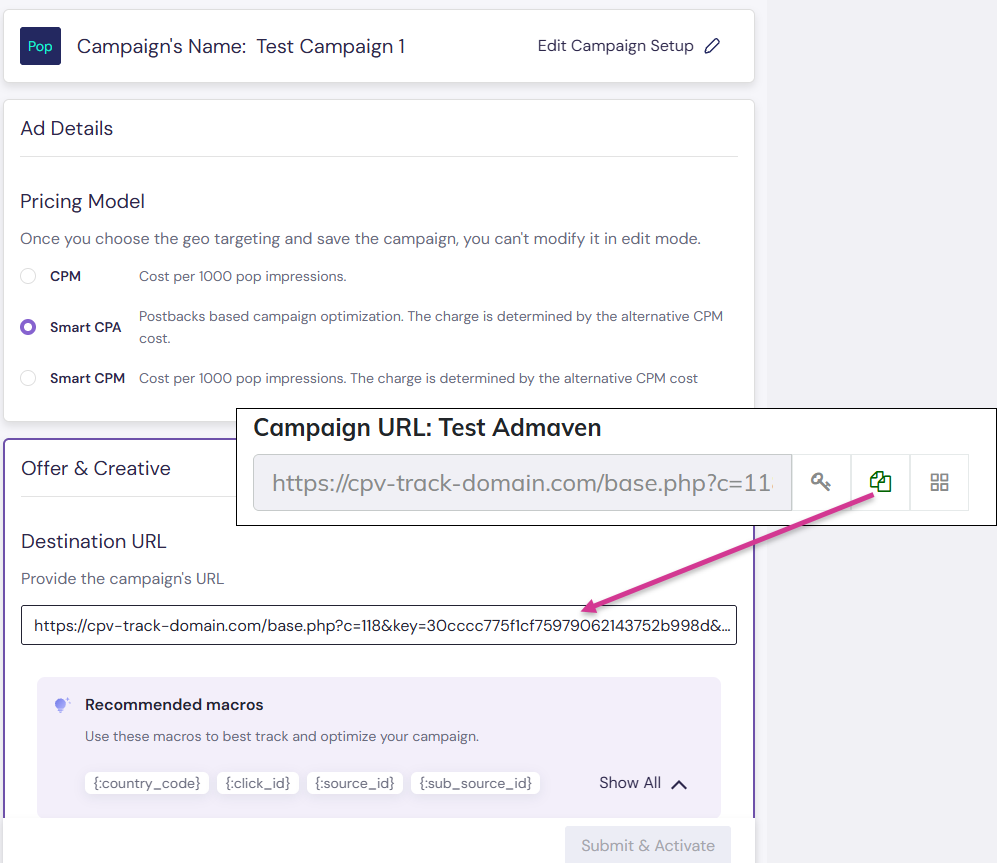
The Campaign URL (provided in the Links & Pixels section from your Campaign Setup page) has all the parameters you selected as Macros
Setup all the other properties for your campaign in AdMaven and launch it!
Step 5: Start the campaign in Admaven
In Admaven platform, by default, after it is created, the campaign is sent to verification. Wait until you get the ok to start the campaign
Start your campaign and follow the results in CPV Lab | CPV One tracker.