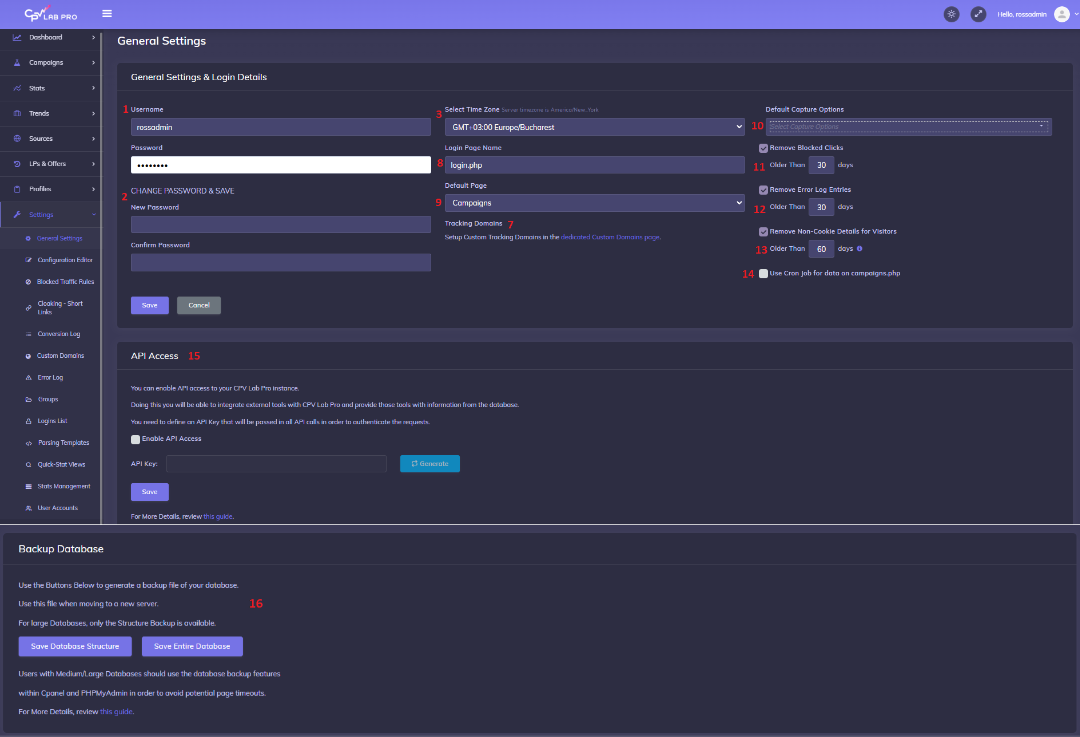
General Settings
Navigation: Settings ➡️ General Settings
- The General Settings is where you can change, edit or update your login details, also specific system functions such as your Time zone, and Additional Data Options.
Page fields and details
New Installs settings
NEW INSTALLS – CHANGE YOUR PASSWORD!
After a new installation the default login details are:
Username: admin Password: admin
See below for details to change your password:
1. Login Details
- Enter a new username or admin, then enter password as:
admin
2. Change Password & Save
- Next, enter your new password, then confirm it and click Save.
- Now your Username and/or Password are updated.
TIP
Be sure to save these logins. We recommend using Roboform or LastPass, but old-fashioned paper will work too.
Additional settings
3. Select Time Zone
- Enter your timezone.
4. Session Timeout
- Set the session timeout.
- This is how long you will be logged in, after your initial login.
- If you’re the only person using the browser then set this to several hours or more.
- If there are other users, then the default is 30 minutes, but can be increased at any time.
5. Character Limit for URL Columns (OPTIONAL)
- This setting helps save desktop space by limiting urls displayed in stats to 100 characters by default.
- You can increase or decrease this, but for most the default is sufficient.
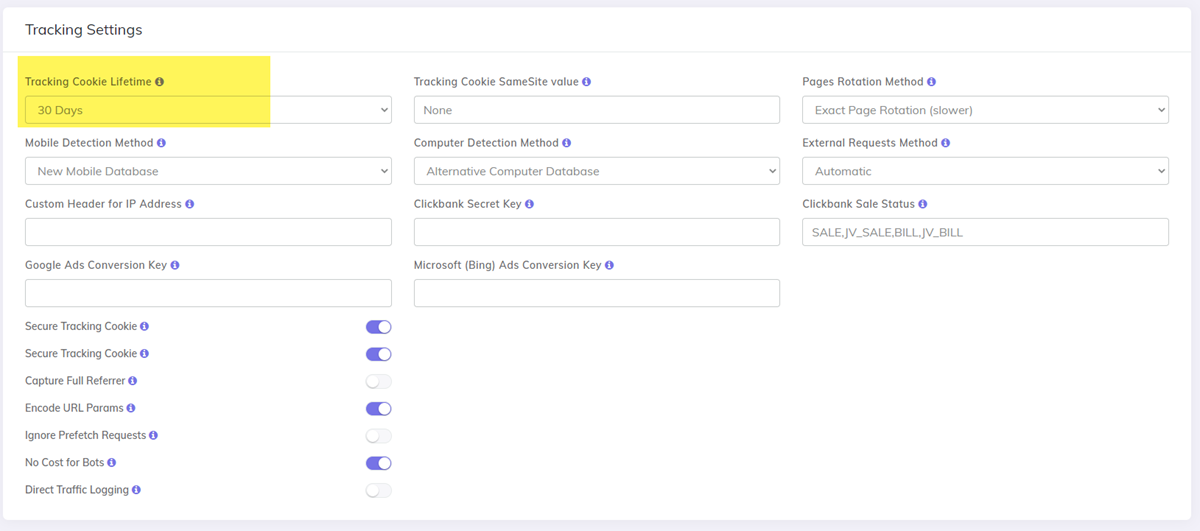
6. Cookie Length
- The default length of tracking cookies is 30 days
- If you wish to edit this, go to the Configuration Editor Page and change the
Tracking Cookie Lifetimevalue.
7. Tracking Domains
- For more information about this option check Custom Tracking Domains
8. Login Page Name
- The default name of the login page is
“login.php”, but to make this less obvious if you wish, you can edit the name of the page, such as“image.php”or“any-page.php” - This is for the security conscious who want to maintain further anonymity, but this is completely optional and doesn’t affect any overall security settings.
- First, open your CPV Lab Pro installation on your Server through your FTP Client and Locate the existing
login.phpfile. - Then just right click on the file and select
Rename - Enter the new name for the login pag (be sure to end in
.php) - That’s it in the FTP Client
- Next Login to your CPV Lab Pro Installation and update this setting to match the new page name.
- Enter your existing user name and password in order to save the change and click Save.
- First, open your CPV Lab Pro installation on your Server through your FTP Client and Locate the existing
9. Default Page
- Here you can select the page you want to land on after you login each time. The Default is the Campaigns Page.
10. Default Capture Options
- Here you select Data Capture Options that will apply to all new campaigns that you create. You can also customize these settings for each individual campaign.
- The options are automatically applied to all new campaigns.
- Computer Data - Capture Browser Information for Desktop Visitors
- Computer Resolution - Capture Screen Resolution for Desktop Visitors
- GEO Data - Capture Continent, Country, State and City
- ISP / Carriers - Capture ISP and/or Mobile Carrier
- Mobile Data - Capture All Mobile Data Points
- Referrers - Capture Referrer Domain and Page
- User Agent - Capture Visitor User Agent
11. Remove Blocked Clicks (more details here)
- The Next few options are simple database cleanup operations.
- Within CPV Lab Pro you can Block Clicks such as Bots by IP and several other options. That is covered here.
- This setting automatically removes the blocked click stats.
- The default setting is 30 days. So blocked clicks older then 30 days are automatically removed from the database. You can adjust this setting to anything you wish.
12. Remove Error Log Entries
- Here you can remove Error Log entries beyond a set date, the default is 30 days. You can adjust this however you wish, but the default setting is usually good as it is.
- The old Error Log entries are removed by the Cron jobs, so you have to enable at least one of the following Cron jobs:
- cron-campaigns.php – handles the calculations from the Campaigns page (not required if the Cache Cron job is setup)
- cron-wurfl.php – handles also the update for Wurfl and BrowsCap databases
- cron-cache.php – handles data caching
TIP
NOTE: All three of the Cron jobs will also remove old Error Log entries beside their main job, so you can have either one of them enabled or even two of them.
13. Remove Non-Cookie Details for Visitors
- The table for clicks contains non-cookie tracking information for visitors and it is used to track clicks and conversions when the cookie-based tracking is not used. Generally, old records from this table are not required after several months and can be removed.
- With this Setting you can automatically remove records older than a specific number of days (60 days is the default value) from the clicks table.
- The cleanup happens using a Cron job, so you have to enable at least one of the following 2 Cron jobs:
- cron-campaigns.php
- cron-wurfl.php
14. Use CRON job for data on campaigns.php
- For high level traffic: this feature is used to increase speed of the Campaigns page by running these calculations from a CRON Job
- You’ll find more details about setting up the various CRON Jobs within CPV Lab Pro here.
- Only Check this Option and Save, if you have the
cron-campaigns.phpCRON Job enabled on your server.
15. API Access (NEW)
- You can enable API access to your CPV Lab Pro (opens new window) instance by checking "Enable API Access"
- Also, you need to generate a KEY to use in your application in order to connect to the API
16. Backup Database
- Click Save below to generate a backup file of your database.
- Use this file when moving to a new server.
- Users with Medium/Large Databases should use the database backup features within Cpanel and PHPMyAdmin in order to avoid potential page timeouts.