Facebook Conversions API integration
The Facebook Conversions API integration allows you to pass conversion details from CPV Lab Pro or CPV One to Facebook Ads and have them appearing in your Ads Manager account.
This is very important for the optimization and the delivery of your Facebook ads.
Since the beginning of 2021, Facebook data reporting for iOS devices was greatly limited after the iOS 14 updates, with less data that can be tracked by Facebook. This means that conversion reporting became more important and the Conversions API integration helps tracking iOS devices.
Pre-requirements
- CPV Lab or CPV One tracker
- At least one active campaign on Facebook Ads
- The campaign should be configured to use the no-redirect tracking method (with the Direct Traffic code placed in the landing page) which offers the best performances for Facebook Ads.
- More details about Facebook Ads campaigns you can find here
Setup the Facebook Conversions API integration
1. Create a Facebook Pixel (if not already created)
- Access the Facebook Events Manager here: https://business.facebook.com/events_manager2/ (opens new window)
- Choose to Connect a New Data Source from the menu on the left side.
- Select
"Web"as the type - Select
"Conversions API"as the connection method.
- Select
![]()
- Enter a name for your pixel and get the generated pixel code.
- Place the pixel code in your landing page by following the Facebook instructions!
- For best tracking performances, go to the pixel Settings tab and disable (set to OFF) these 2 options:
- Automatic Advanced Matching - OFF
- Track Events Automatically Without Code - OFF
- Make sure that you keep the option "First-Party Cookies" set to
On.
![]()
2. Get the Pixel ID
- In the Setting tab for your pixel, look for the numeric Pixel ID and save it in a safe place. It will be needed later for the integration
![]()
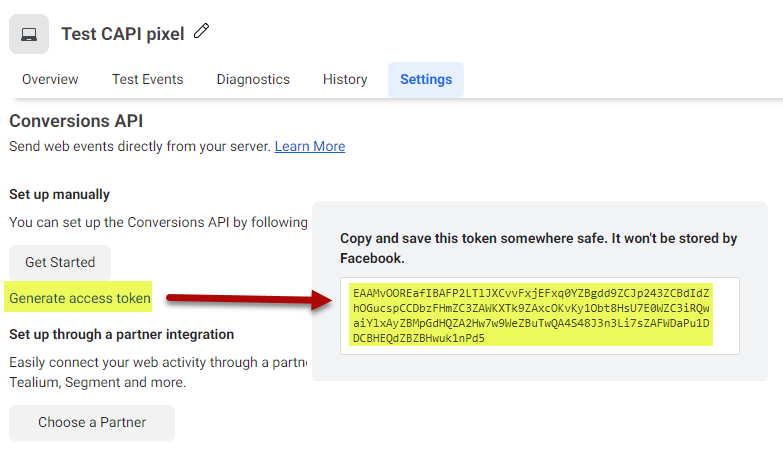
3. Generate the API Access Token
- The API Access Token is needed in order to access the API from CPV Lab Pro.
- Go to the Settings tab for your pixel and click on the "Generate access token" link.
- You will get a multiline textbox with the Access Token (letters and digits).
- Copy this in a safe place as it will be needed later for the integration.
4. Verify your domain on Facebook
- Facebook requires you to verify the domain that you send conversions from.
- This is your landing page domain because you have access to it in order to perform the verification.
Steps:
- Access the Brand Safety page from Facebook Business Settings: https://business.facebook.com/settings/owned-domains/ (opens new window)
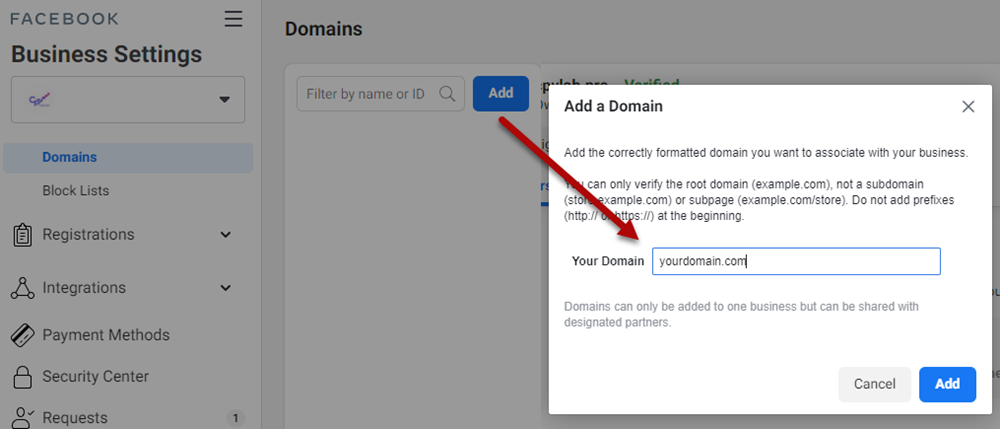
- Then select to add a new domain (the landing page domain) and perform the domain verification using one of the provided methods.
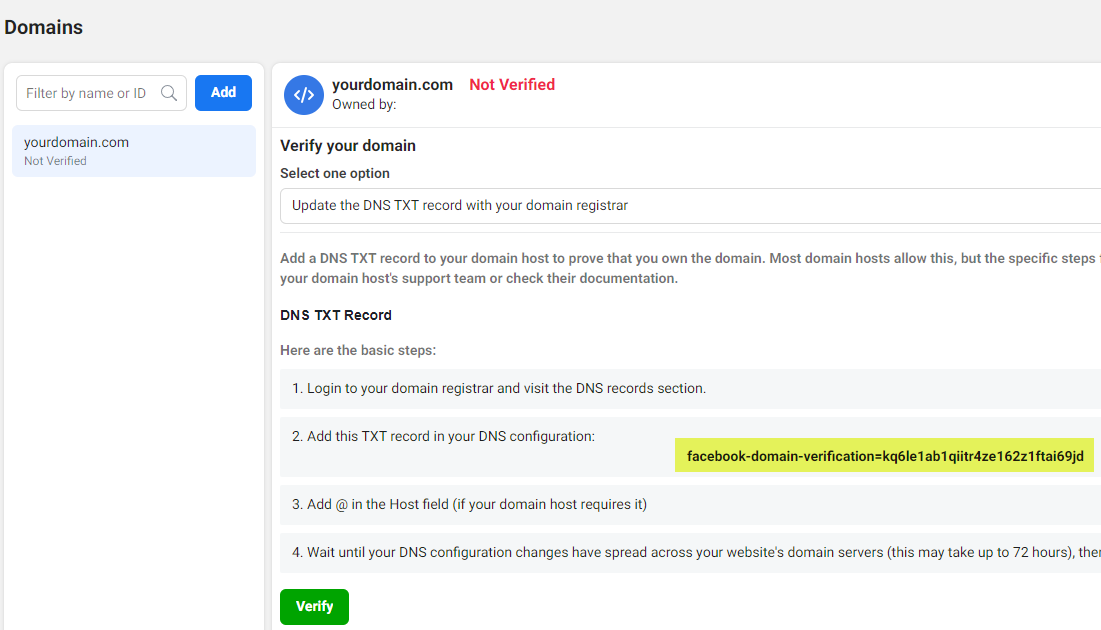
- The easiest option would be to create a TXT record in the DNS settings of the domain at the domain registrar.
Changes in the campaign setup from CPV Lab | CPV One
Edit your Facebook Ads campaign from CPV Lab Pro and perform the following changes (if not already made).
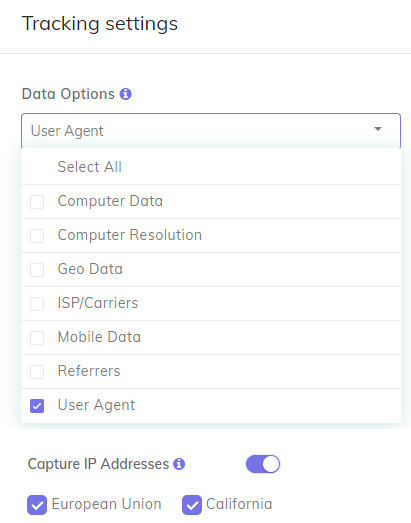
1. User agent is mandatory
- On the "Tracking settings section" choose to capture User Agents and IP Addresses from your visitors in the campaign setup page
- You can also capture other Data Options from the list if you need them in your reports.
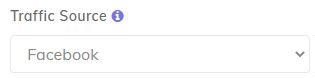
2. Traffic source is Facebook
- On the "Macros and Tokens section, make sure that the traffic source from your campaign in CPV Lab Pro is named “Facebook” or “Facebook Ads”
3. External Id has the correct value
- Set
fbclidas the External ID Token parameter, as shown below:

Setup API access key
- Look for the new Facebook specific section in the "Tracking Pixel" area of the campaign setup page. - Here is where you need to add the Facebook API details:
- API Access Token – the access token generated above
- Pixel ID – the ID of your Facebook Pixel created above
- Event Name – the name of the event you want to pass to Facebook for each conversion. The default name is
Purchase - Amount – the revenue that you want to pass to Facebook.
- The default value of the
{!revenue!}placeholder which will be replaced by the actual revenue. - You can also set a fixed numeric value
- The default value of the
- Currency – the currency for your revenue (3-letter ISO code). The default option is USD.
![]()
5. Add the tracking code to your landing page
- Change the landing page to include new code for Facebook tracking
- Use the tracking code provided in the field "Step 2: Add Code to Landing Pages"
- Place this code before the
</body>tag in your landing page - This piece of code will track the traffic coming from your Meta (Facebook) Ads campaign to your landing page.
The CPV Lab Pro code from your landing page should look like this:

- Save your landing page with the new code added and upload it on the server.
- You are ready to start your campaign in Facebook Ads.
Check that conversions get reported
Once the above are implemented, CPV Lab Pro will automatically send conversion details to Facebook each time a new conversion is received from the Offer Source (affiliate network, your website)
- To receive conversions from the affiliate network, the Postback URL (opens new window) gets fired from the Affiliate Network in your campaign and sends information about conversion to the tracker
- Once that information is received in the tracker, CPV Lab will send it to Facebook via CAPI.
After receiving a few new conversions in your campaign, you should make sure that these were posted to Facebook by looking in 2 places:
- In the Postback Log page from CPV Lab Pro – you will see a record starting with
"type":"fbapiand with the details posted to Facebook for each Facebook API call, something like this:
- In the Postback Log page from CPV Lab Pro – you will see a record starting with
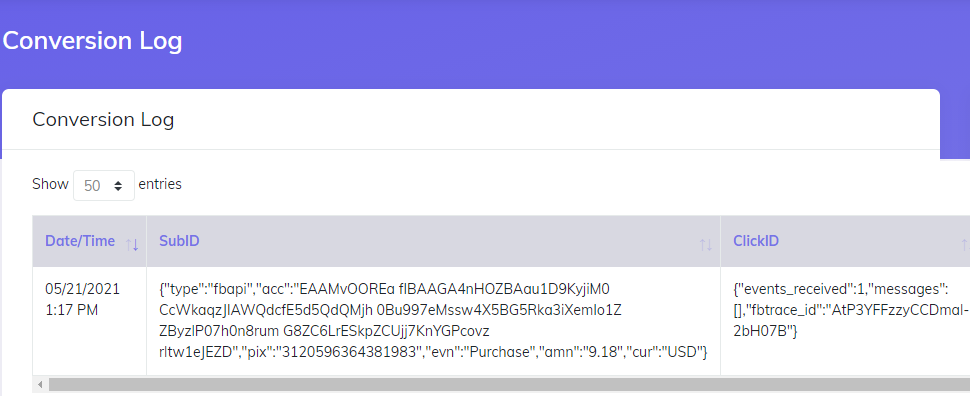
- In Facebook, check your pixel and you should see the Purchase event appearing.
- Choose "View Details", then
"Recent Activities". - You will get a list with all the latest API requests made from your CPV Lab Pro instance.
- Choose "View Details", then
![]()
![]()
Final Notes
- Your Facebook Ads campaign setup in CPV Lab Pro is similar to any other campaign, with only these changes:
- The Facebook API configuration (API Access Token and Pixel ID)
- A new line of code in the Landing Page for Facebook tracking
- Also make sure that you have checked to capture User Agents and IP Addresses from your visitors.
TIP
It is very important to place the Facebook Pixel in your landing page. The Facebook pixel will perform part of the tracking and it will be completed with the API call that sends conversion details back to Facebook.
- There may be a small delay (up to 15 minutes) between the moment conversions are passed from CPV Lab Pro to the Facebook API and the moment that they appear in the Recent Activities report from Facebook. This is normal and doesn’t affect tracking.