Setting up Facebook Ads camaigns in CPV Lab | CPV One
- CPV Lab Pro (opens new window) and CPV One (opens new window) come with Facebook Ads as a predefined Traffic Source in order to make it easier to start your first Facebook Ads campaigns.
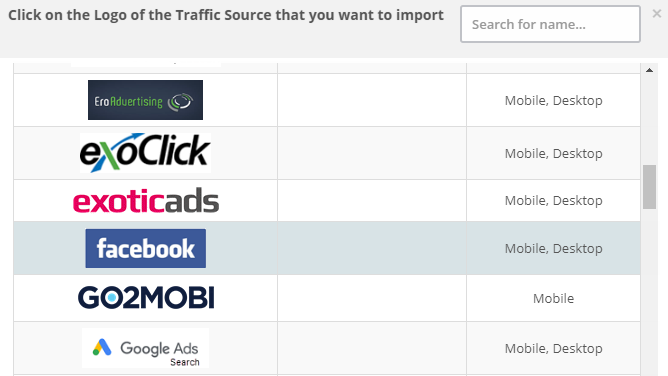
- Look for 'Facebook' in the Traffic Sources page or use the Traffic Sources Catalog to import Facebook Ads.
A regular CPV Lab Pro campaign, where you redirect traffic to the Campaign URL, will work in most cases for Facebook Ads.
But for best performances and lower risk of ad rejection we recommend that you use a no-redirect technique in your Facebook Ads campaigns.
- This can be achieved by implementing the Direct Traffic code in your Landing Pages, similar with how this can be done for the Parallel Tracking requirement in Google Ads or when you have Organic Traffic in your campaigns.
WARNING
NOTE: the no-redirect tracking method for Facebook Ads and Google Ads only works in campaigns that have landing pages. This method doesn’t work in direct-link campaigns.
Basic Example
- Let’s say that you have a campaign with one landing page and one offer (from an Affiliate Network or even your own product) that you promote.
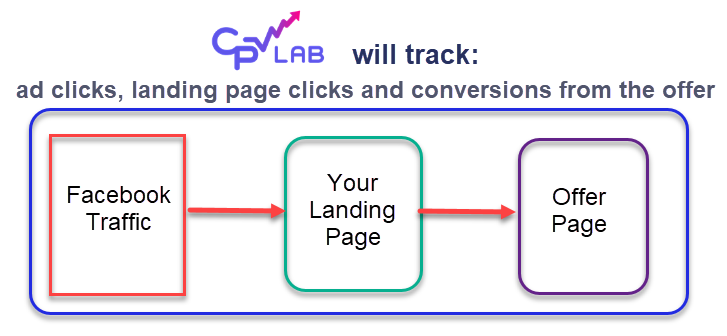
- You want to bring traffic from Facebook Ads (Meta Ads) to your landing page and then to the offer page and you want to track:
- ad clicks,
- landing page clicks
- conversions from your offer.
Setup your campaign in CPV Lab | CPV One
Step 1: Setup General Settings and Tracking Settings
- On the campaign setup page page fill the General settings and Tracking settings sections
- You need to pay attention to the following fields as very important for a Facebook Ads campaign:
- Tracking Domain - it is recommended to use a custom tracking subdomain that will match your landing page domain.
- This is useful to use First Party Data for your campaign and for building trust with your audience
- Data Options - Select what information you want to get tracked by the tracker about your visitor.
- Mandatory - you need to select User Agent from the Data Options list to have everything tracked correctly.
- Campaign type: Landing page - this is needed as Facebook doesn't accept redirects.
- Tracking Domain - it is recommended to use a custom tracking subdomain that will match your landing page domain.

Step 2: Choose Facebook as traffic source
- On the campaign setup page page choose Facebook as the Traffic Source
- import Facebook from the Catalog on the Traffic Source page if it doesn’t appear in the list
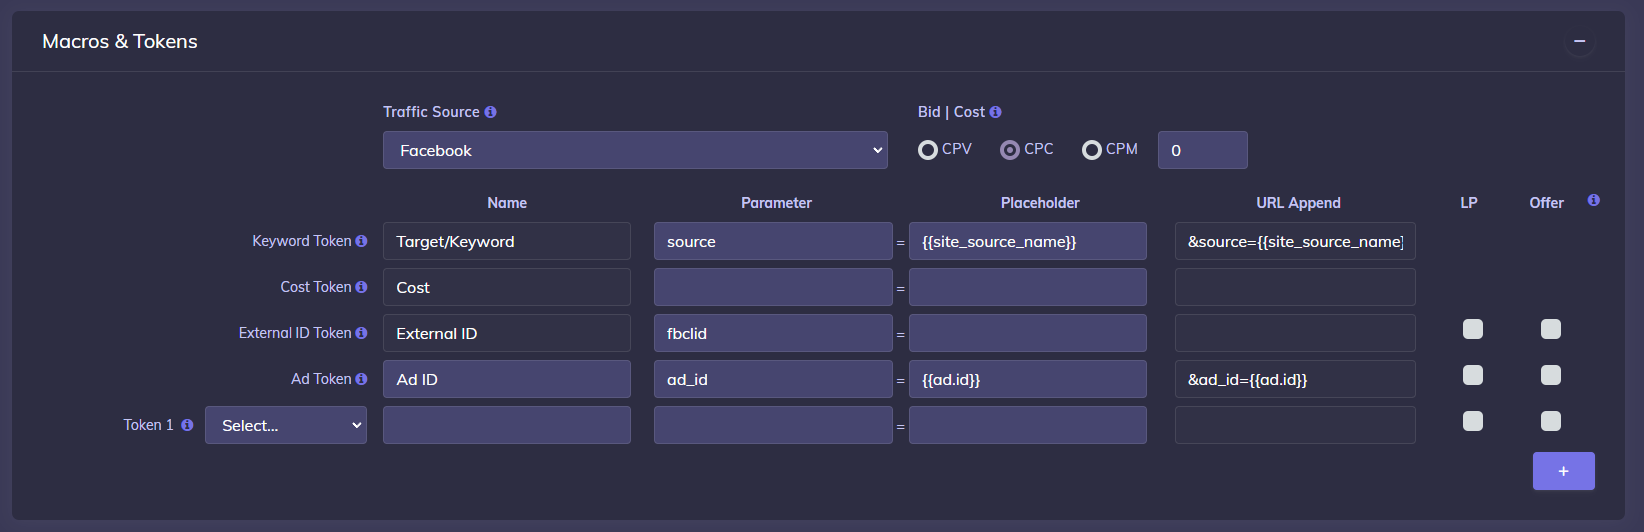
- Select the tokens you want imported from Facebook from the dropdown list and click on the “+” sign to add as many tokens you need. Only select the metrics that you want to see in reports, you don’t have to include all of them.
- You can include the bot tokens as well (they are optional).
- You will have the Keyword Token and Ad Token already pre-filled with the corresponding macros (placeholders) from Facebook
- Select as Extra Token any other metrics that you want to capture from Meta Ads such as Ad Name, Adset ID, Adset Name, Placement etc.
Step 3: Landing Page and Offers
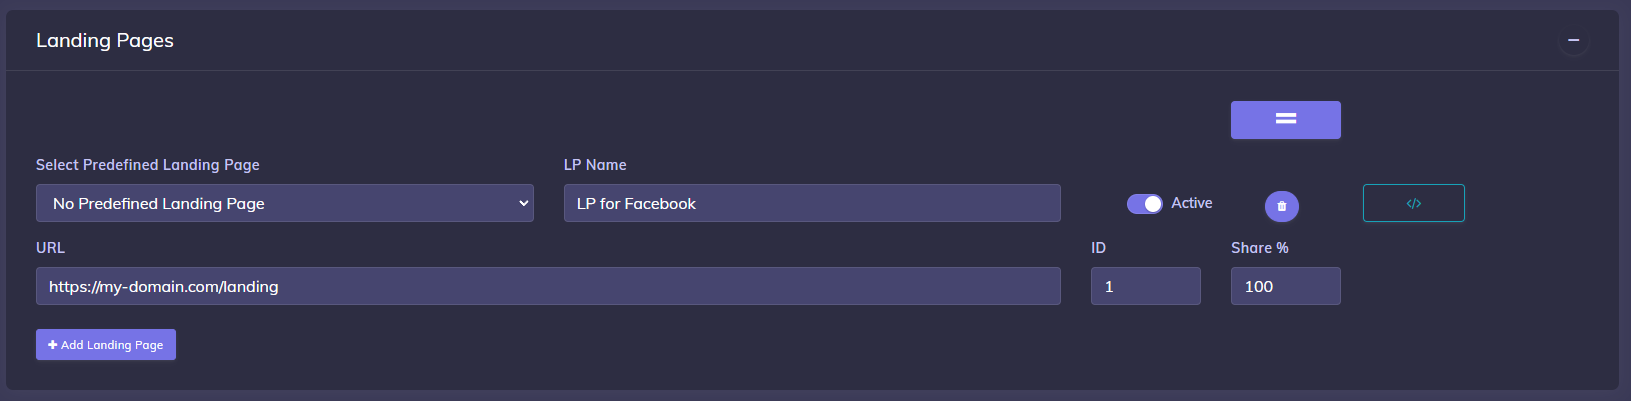
- Define the landing page in the Landing Pages section;
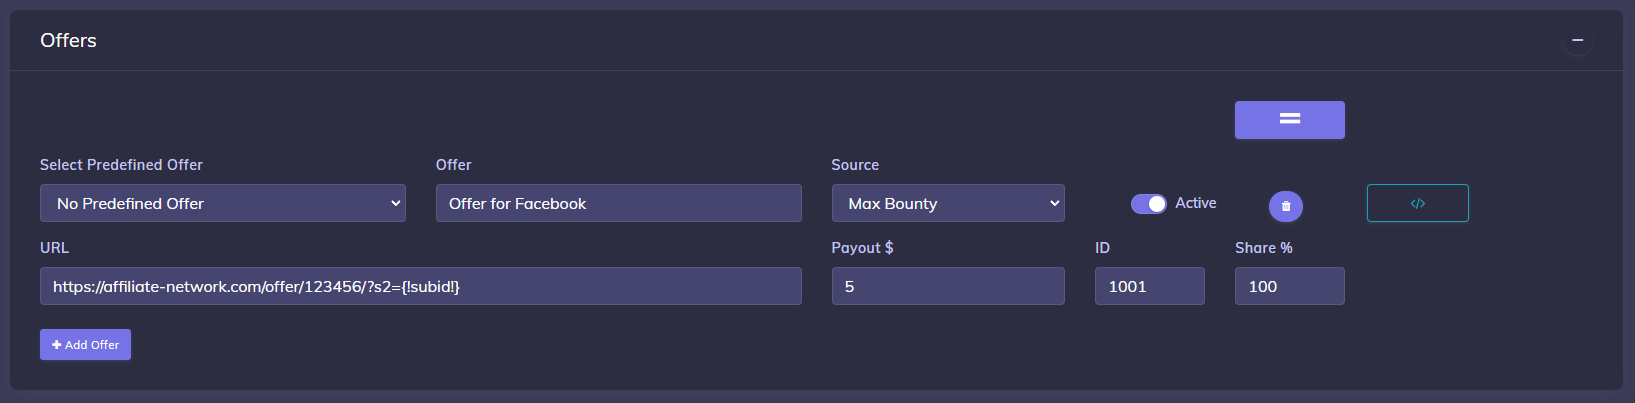
- Define the offer in the Offers section;
- Make sure to end the Offer URL with the parameter for subID accepted by the Affiliate Network (or your website if you run your own offers).
- This parameter needs to receive the
{!subid!}macro which will be replaced by CPV Lab Pro by the actual subID of each visitor.
Step 4: Add the tracking code
On the Links and Pixels section you will find the URLs and tracking code for your pages.
- Campaign URL - this is the test url you can use to make sure your campaign is working right and tracking is working.
- You can change the parameters in the URL to some dummy values for testing
- Some Facebook accounts accept to place the Campaign URL when the campaign is created in Facebook. But that is not the case with the majority of the accounts.
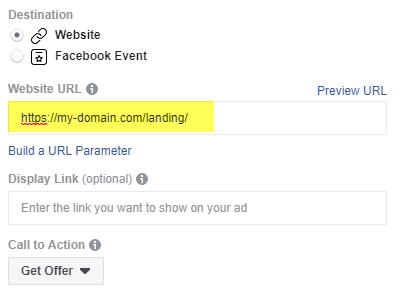
- The Website URL - this is the URL you need to place when you create the campaign in Facebook. It’s where your traffic will go from Facebook.
- URL Parameters - the value from this field should be copied and pasted in Facebook on the “URL Parameters” field in order to have proper tracking.
- “Step 1: Edit Links in Landing Page” - this code is used in case you have direct links to the offer from your landing page.
- If you use a form and not links to the offer, then this is not needed.
- If you have links, you change the links to the offer (the redirect links or buttons from your landing page) with the link provided on this step.
- This should be a
base2.phptracking link (orbase3.phpfor Landing Page Sequence campaigns and Lead Capture campaigns):
- “Step 2: Add Code to the Landing Page” - this is the normal tracking code added to the landing page.
- Add the CPV tracking code in the your Landing Page HTML code, just before the
</body>ending tag of the HTML code (or in the Footer section when using a page builder tool).
- Add the CPV tracking code in the your Landing Page HTML code, just before the
TIP
If you are using TrafficManager form to save the leads, then you need a separate setup. Contact CPV team to give you the exact setup.
![]()
Example of how the tracking code is added to the HTML of the landing page:
![]()
Setup the ad in Facebook Ads
- create a campaign in Facebook Ads and select the desired audience.
- use as Website URL the actual Landing Page URL and not the Campaign URL (check image above)
- enter the URL Parameters in the Tracking section of the ad, which are:
- the parameters and Facebook macros (placeholders) provided by CPV Lab Pro in the campaign setup page, in the "Links & Pixels" section

-Send traffic: save your ad and now Facebook will send visitors directly to the landing page, where tracking will be performed by the CPV Lab Direct Traffic code included in the page.
- Test the tracking: run a test by opening a brand new private or incognito browser (in order to make sure that you don’t have previous tracking cookies in the browser) and navigate directly to the Campaign URL provided by CPV Lab.
- Check the CPV Lab Pro reports (Visitor Stats or Stats) and you should see a visitor in your campaign.
Setup the Tracking Pixel or Postback URL
Setup the Tracking Pixel or Postback URL to your Affiliate Network in order to track conversions.
The entire procedure is defined in this video tutorial and in our Online Documentation:
FAQ
1. What if I want to rotate traffic between 2 or more landing pages?
Since you are direct linking to the landing page instead of using the Campaign URL in your Facebook campaign, you cannot have the landing pages rotated directly and you need an alternative approach.
One solution is to create different ads in Facebook for different landing pages.
Another solution that will actually allow you to split-test the same ad is to use the MV Lab tool which offers a Landing Page Rotator option.
- MV Lab will generate the code to create a redirect page that will be uploaded in the same server location as the landing pages.
- Then in your ad defined in Facebook you will use the URL of the redirect page instead of the URL of the landing page.
- Visitors come from Facebook to the redirect page first, then they are sent to one of the landing pages based on the share% defined in your campaign setup page.
- MV Lab will generate the code to create a redirect page that will be uploaded in the same server location as the landing pages.
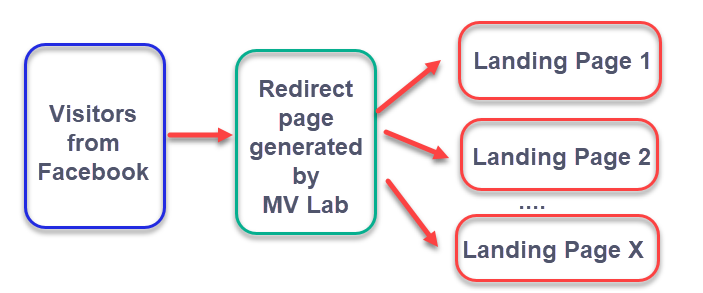
- MV Lab is a multivariate testing tool which integrates with CPV Lab Pro and can also act as a Landing Page Rotator for your CPV Lab Pro campaigns.
2. How to test my Facebook campaign?
- In order to test the tracking of the campaign you need to:
- Open a brand new private or incognito browser window which simulates your visitors since it won’t have existing tracking cookies.
- Then Load the Campaign URL directly in this browser window
- You should see your test click appearing in the CPV Lab Pro reports (Stats, Visitor Stats etc).
- Open a brand new private or incognito browser window which simulates your visitors since it won’t have existing tracking cookies.
3. What to do if my test click doesn’t appear in CPV Lab Pro?
- If you performed the test using a brand new private or incognito browser window as described above but you don’t see the click in CPV Lab Pro (Visitor Stats, Stats etc), then make sure that you entered the Direct Traffic code correctly in your Landing Page.
- The Direct Traffic code should appear at the end of the body section of the HTML (footer section for landing page builders)
- and it should come after the 2 lines of code provided at Step 2 in the campaign setup page
- and you need to replace the ‘xxx’ part with the actual landing page ID that you defined for this page.
- It should look like this:

4. What tokens (macros) to capture from Facebook?
- With CPV Lab Pro you can capture a Keyword Token, an Ad Token and up to 10 Extra Tokens from the Traffic Source.
- With Facebook selected as Traffic Source, you already have the Keyword and Ad Tokens set to their corresponding Facebook macros (placeholders).
- You can also capture other data from Facebook in the 10 Extra Token fields available.
- The most common macros (placeholders) that you can capture are AdSet ID (or AdSet Name) and Placement.
5. Can I see the exact cost for each click on my Ad?
Option 1:
- You should setup an API integration with Facebook Ads from Sources ➡️ API integrations
- After you setup the integration, follow the instructions from here to make sure your campaign has the right name and appears in the cost syncronization process.
- You should setup an API integration with Facebook Ads from Sources ➡️ API integrations
Option 2:
- You can use an Average CPC that you will define in the campaign setup page and periodically adjust it to match the actual average cost of your clicks.
- Additionally, you can download a CSV report with the costs per each ad from Facebook and use this report to Upload the Exact CPC per ad in the Exact Bids page from CPV Lab Pro for more exact cost figures.
- You can use an Average CPC that you will define in the campaign setup page and periodically adjust it to match the actual average cost of your clicks.
6. I get extra traffic registered in CPV Lab Pro for my Facebook Ads campaign
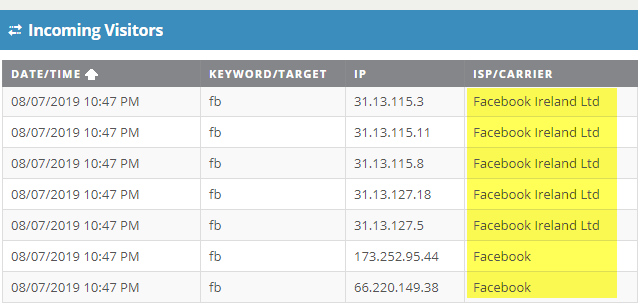
- The extra traffic registered in your campaign is usually just bot traffic sent by Facebook to check your Landing Page.
- Each time you make changes to your ad in Facebook Ads, they send between 3 and 10 requests to your page to check it.
- You can easily identify bot traffic from Facebook by looking at the ISP/Carrier reported by CPV Lab Pro for those clicks (enabled the ISP/Carrier data option in your campaign first).
- The ISP/Carrier will appear as 'Facebook' for those clicks, something like this:
7. Does Facebook tracking work with pages created in landing page builders (like Clickfunnels)?
- Sure!
- Facebook tracking works with any kind of landing pages as long as you are able to include the Direct Traffic code in the HTML code of the landing page.
- With Clickfunnels and other landing page builders you need to include the code in the Footer section of the landing page.
- This code should go only in the first landing page from your funnel (in case you have more pages).