ClickFunnels tracking tutorial
In this tutorial we will explain how to place the tracking code in a Landing Page created with ClickFunnels.
What is ClickFunnels
ClickFunnels (opens new window) is a sales funnel creator to help businesses automate their sales process from A to Z. It offers the power to keep each stage of the purchasing journey under control.
With ClickFunnels, you can build regular websites, opt-in pages, landing pages, membership websites, squeeze pages, webinars, and so many more. Besides, it allows users to build sales funnels with a large number of pre-made, customizable designs.
If your marketing campaign is using a ClickFunnels page, then CPV Lab (and CPV One) can track it easily.
Step 1: Creating your site on ClickFunnels
ClickFunnels comes with a free trial so, setting up your account is easy
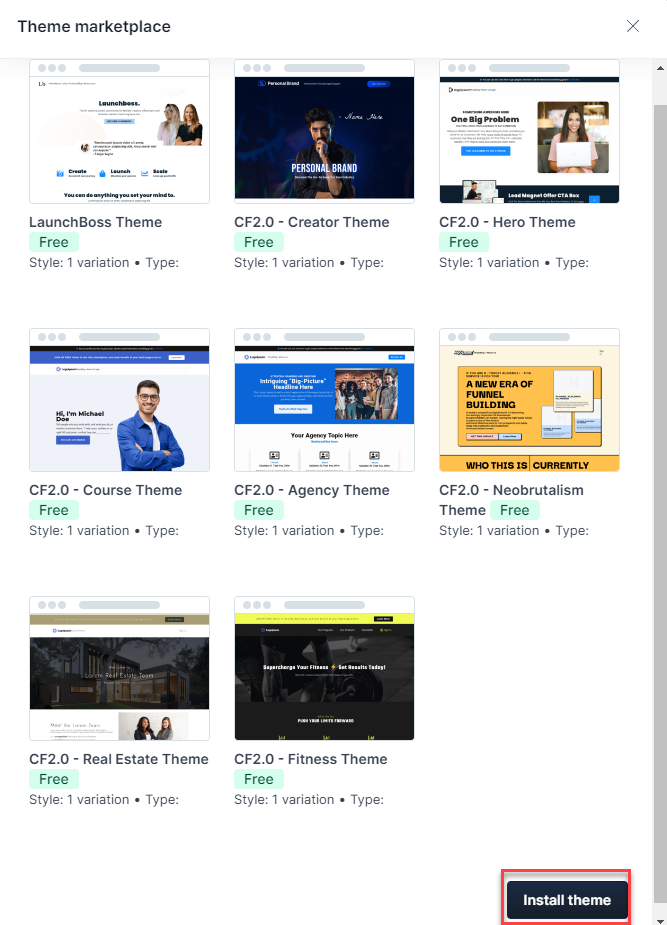
After creating your account, ClickFunnels offers multiple options of themes for your site.
Select a theme that is suitable for you:
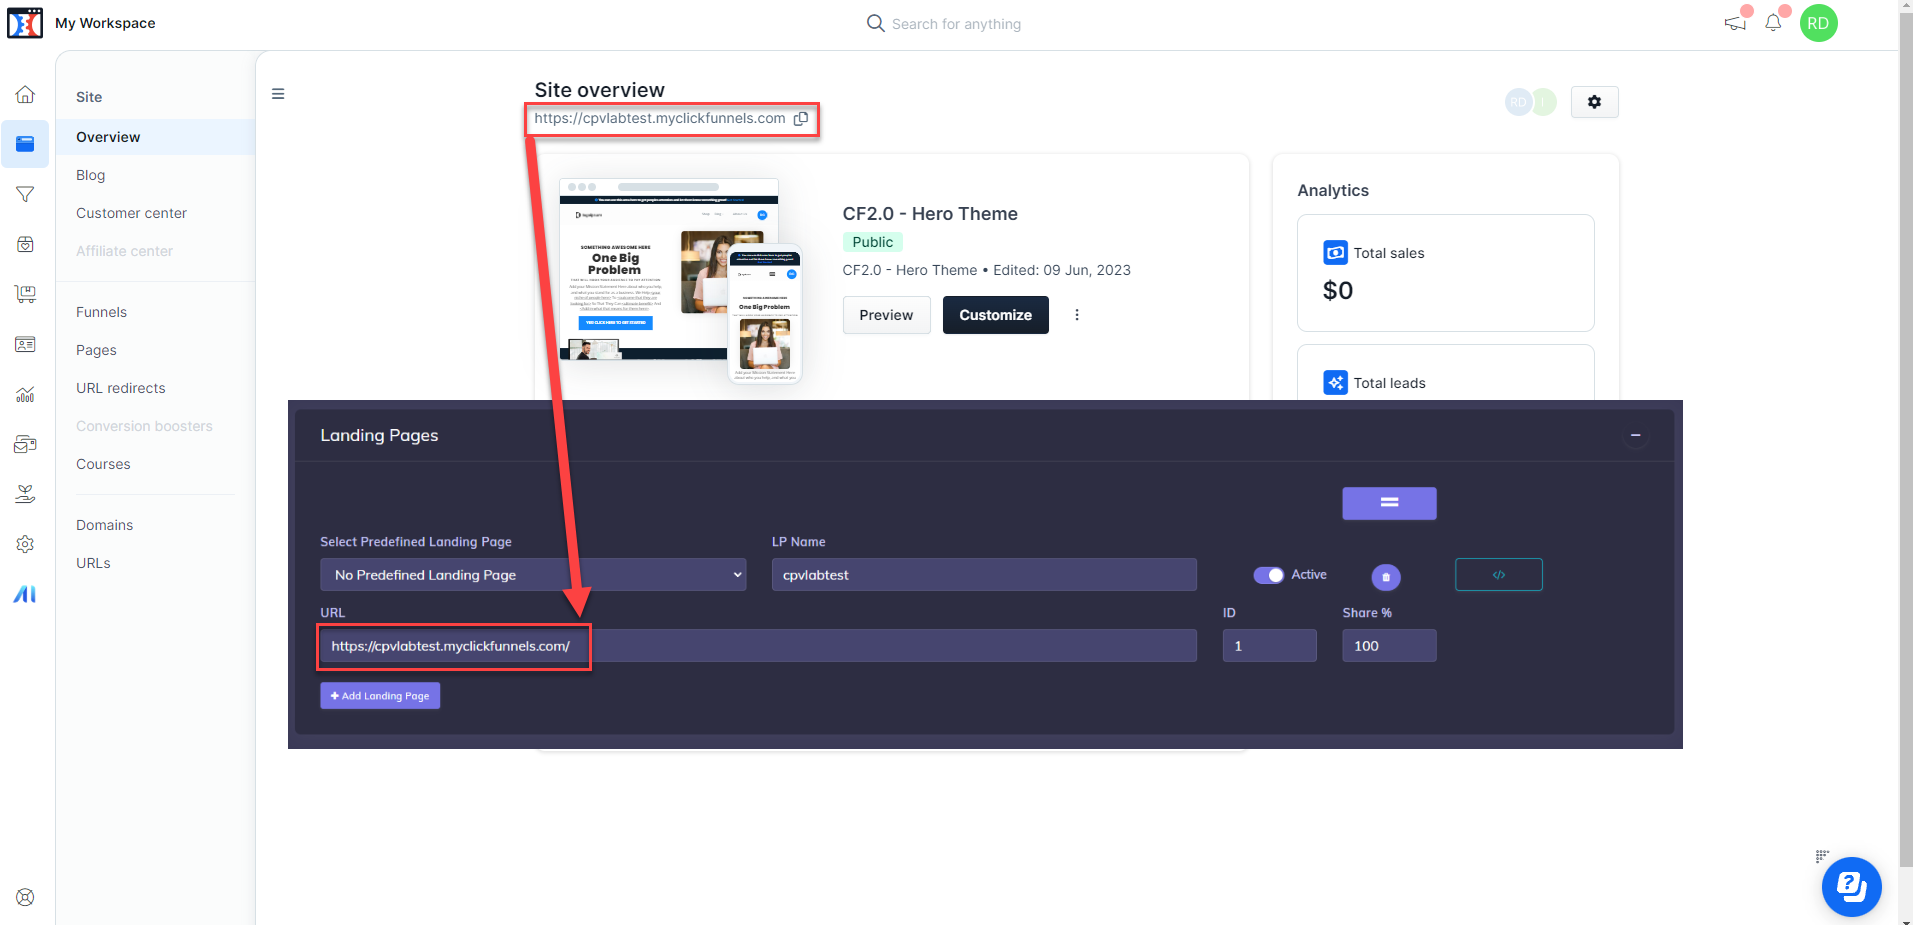
a. Navigate to Site -> Overview
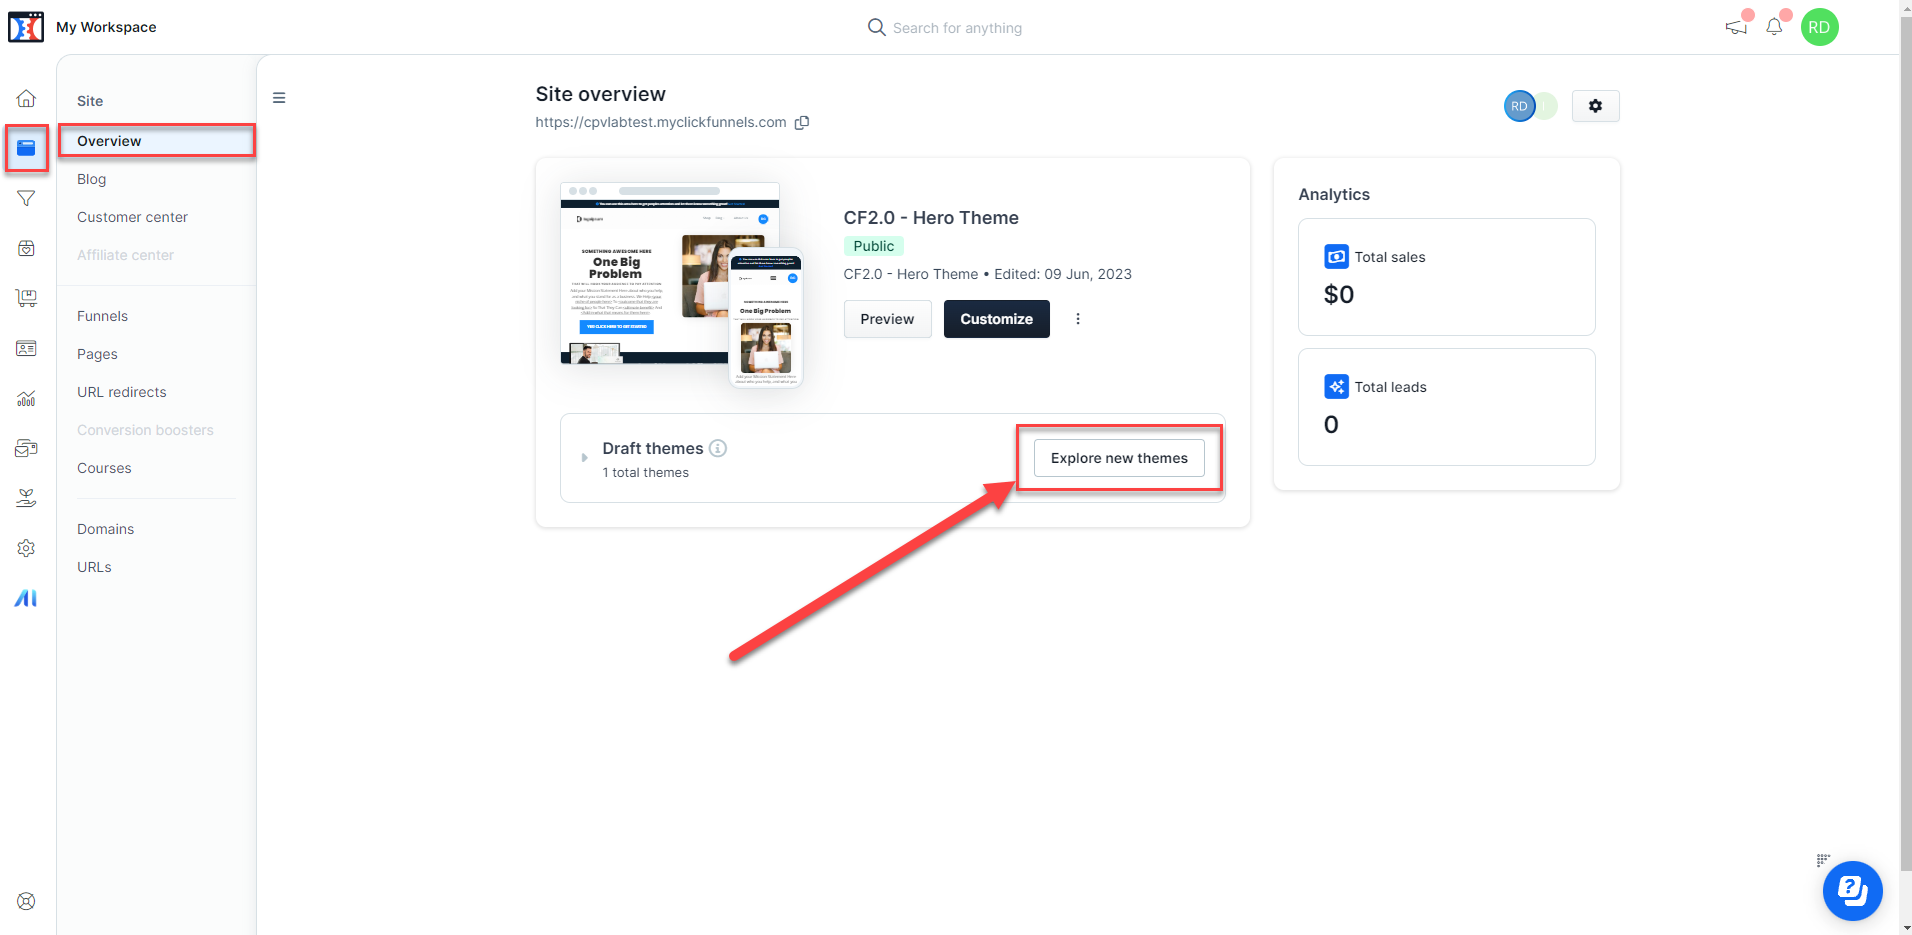
- Then, you can select a theme for your site and click ‘Install theme’.
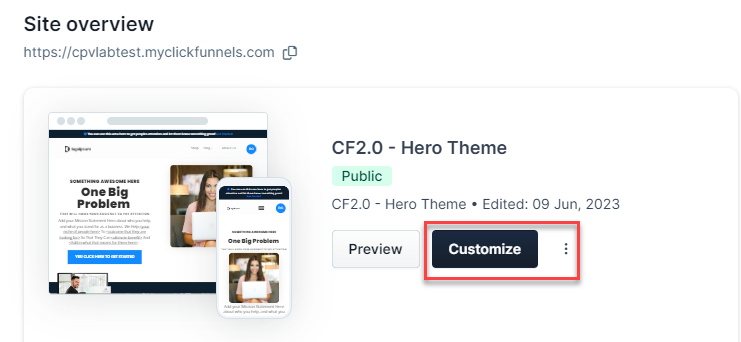
b. After installing the theme, you can start editing the page by clicking ‘Customize’
Step 2: Add a landing page in CPV Lab
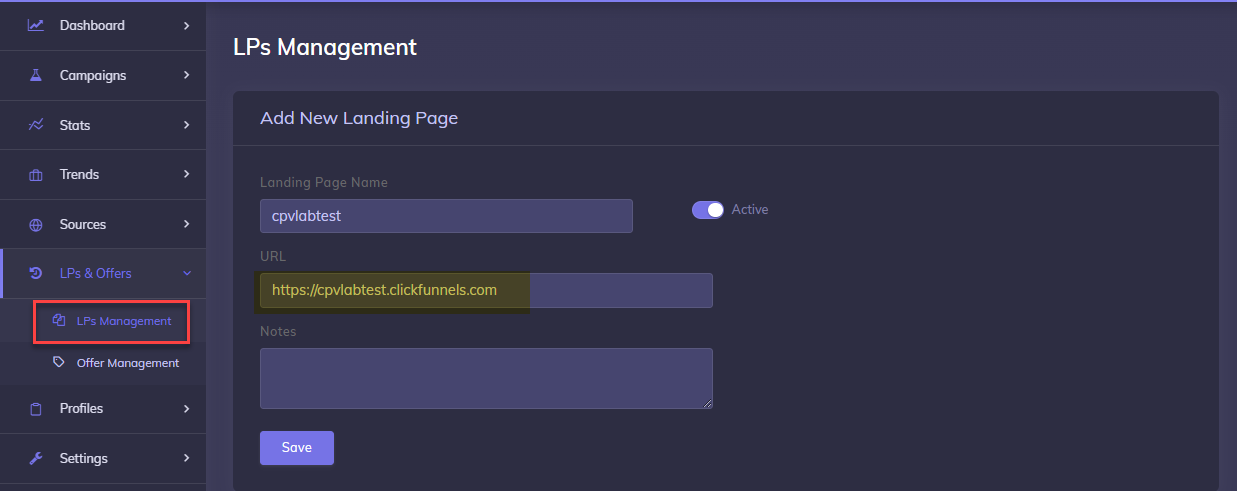
- Go to your CPV Lab (opens new window) (or CPV One (opens new window)) tracker and login
- Navigate to LPs&Offers ->LP's Management
- Add your ClickFunnels Landing page
Step 3: Create a Campaign in CPV Lab
Navigate to: Campaigns -> Add New Campaign
For this tutorial we will choose Direct Link and Landing Pages campaign (opens new window)
- you can choose any campaign type, depending on your needs: Landing Page Sequence, Lead Capture & Opt-in, Multiple Options, Multiple Paths or Email Followup.
Complete all the General and Tracking Settings as you consider for your campaign.
For the Landing Pages section, select the Landing page added at Step 2 above
- Complete the other fields
- Save the campaign
Step 4: Adding Landing Pages Offer Links to your ClickFunnels site
Now we want to edit our ClickFunnels page to make sure all the buttons that will redirect to offers are tracked. For that we need to use the "base2" page. These are the steps:
- Login to your ClickFunnels account
- As mentioned in step 1, navigate to Sites -> Overview, then select your site and click ‘Customize’
- We will edit the page and to make sure all buttons are tracked before redirecting to the offer
- We will add a tracking link that will redirect to the Offer Page for all the buttons on our site which redirects to an Offer Page
- Click on the button/buttons that redirect to an offer page
- On the
‘edit’menu, go to “BUTTON ACTION” - On the first drop menu, we will select the option “go to…”
- On the 2nd drop menu, we will select Custom URL
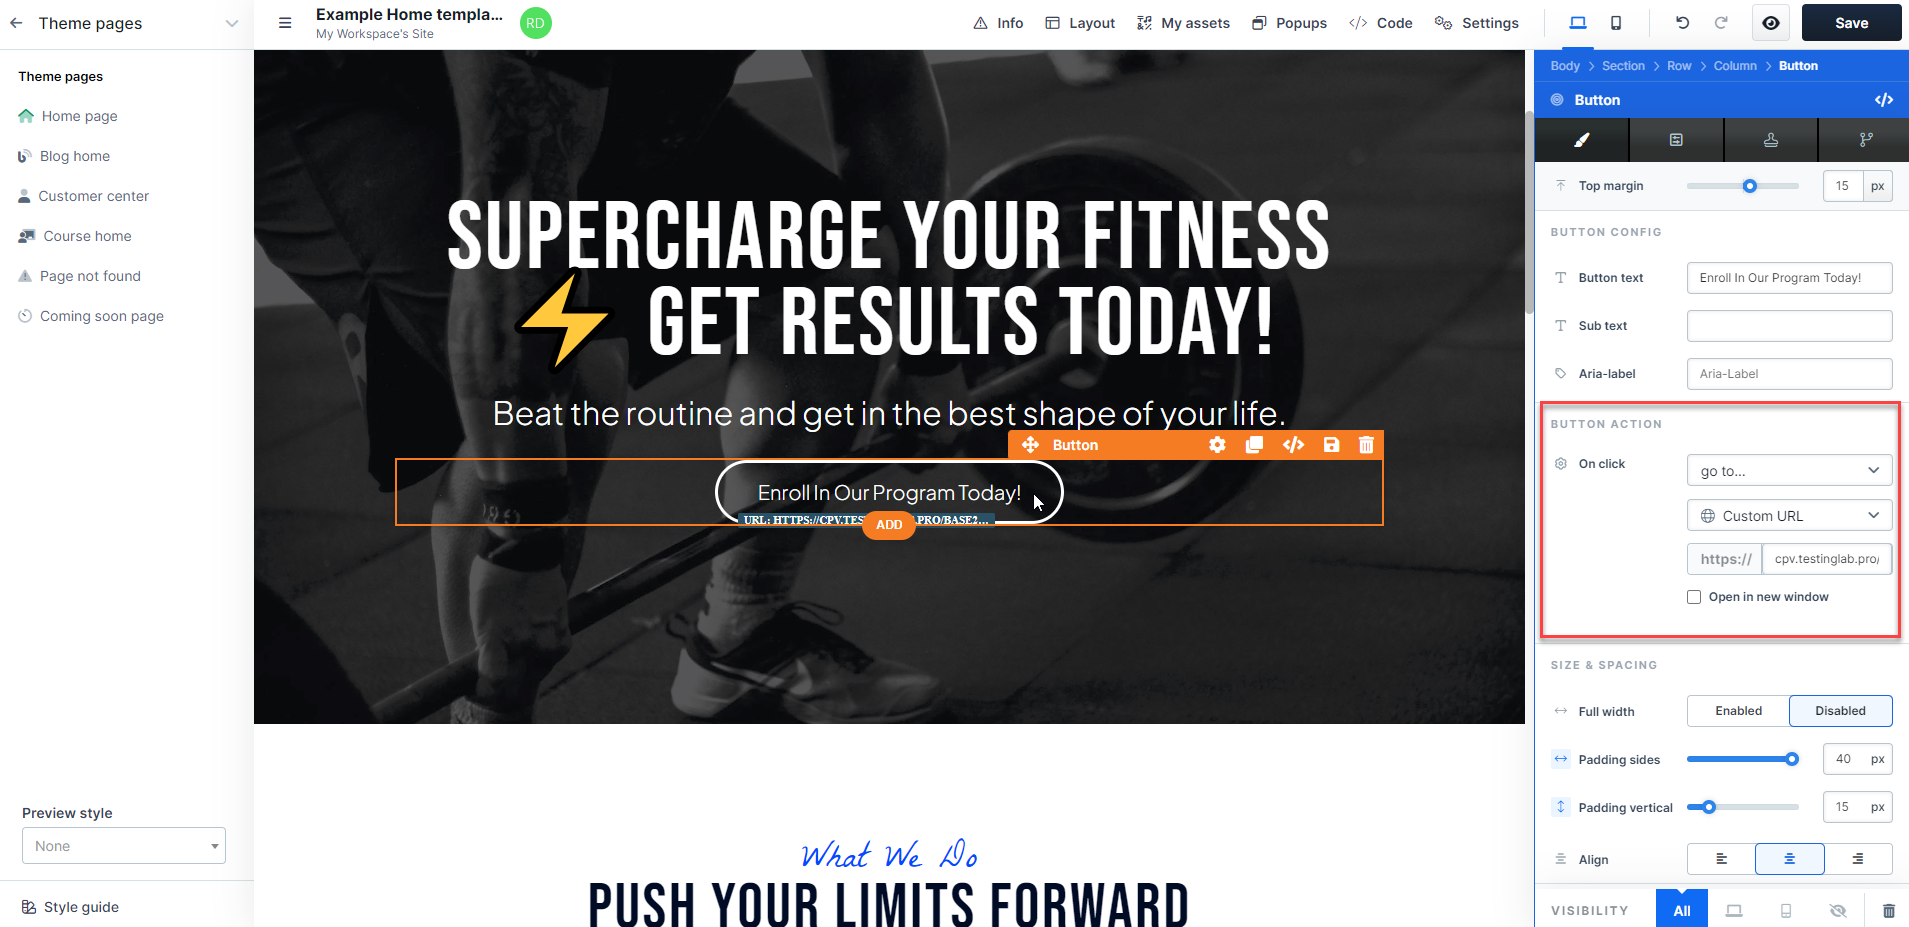
- Then, we will insert our
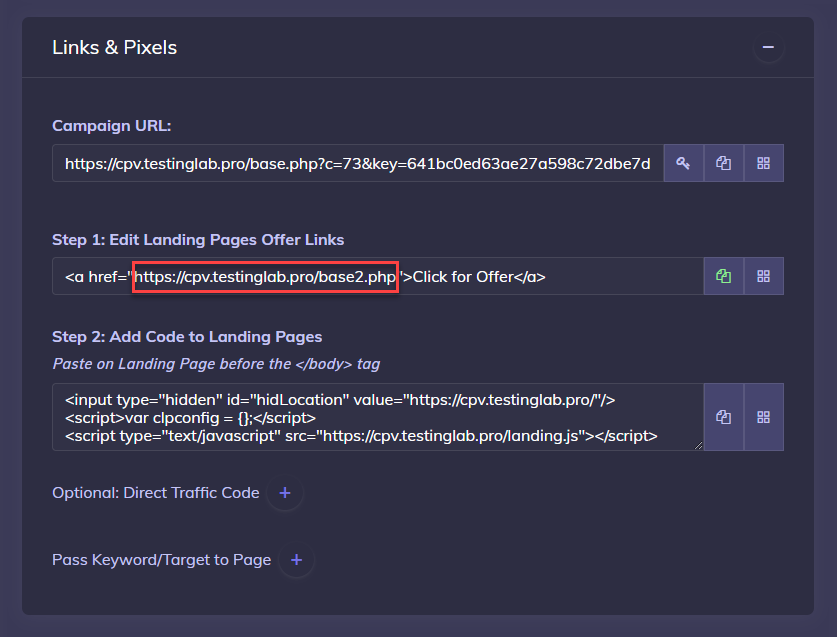
base2 linkfrom the CPV Lab campaign. This can be found on the Links and pixels section of your campaign page.
- Click “Save”
Step 5: Add tracking link to your landing page
- After editing each button action, we need to insert our trackig Code from CPV Lab to the Landing Page.
- Go to your CPV Lab campaign - Links & Pixels section
- Copy the code specified in the section "Add Code to Landing Pages"
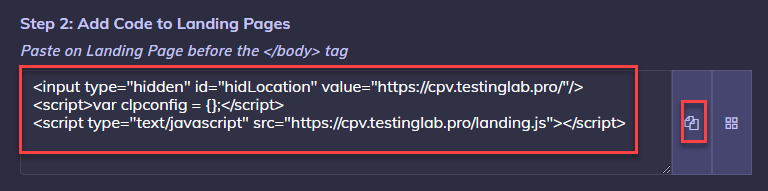
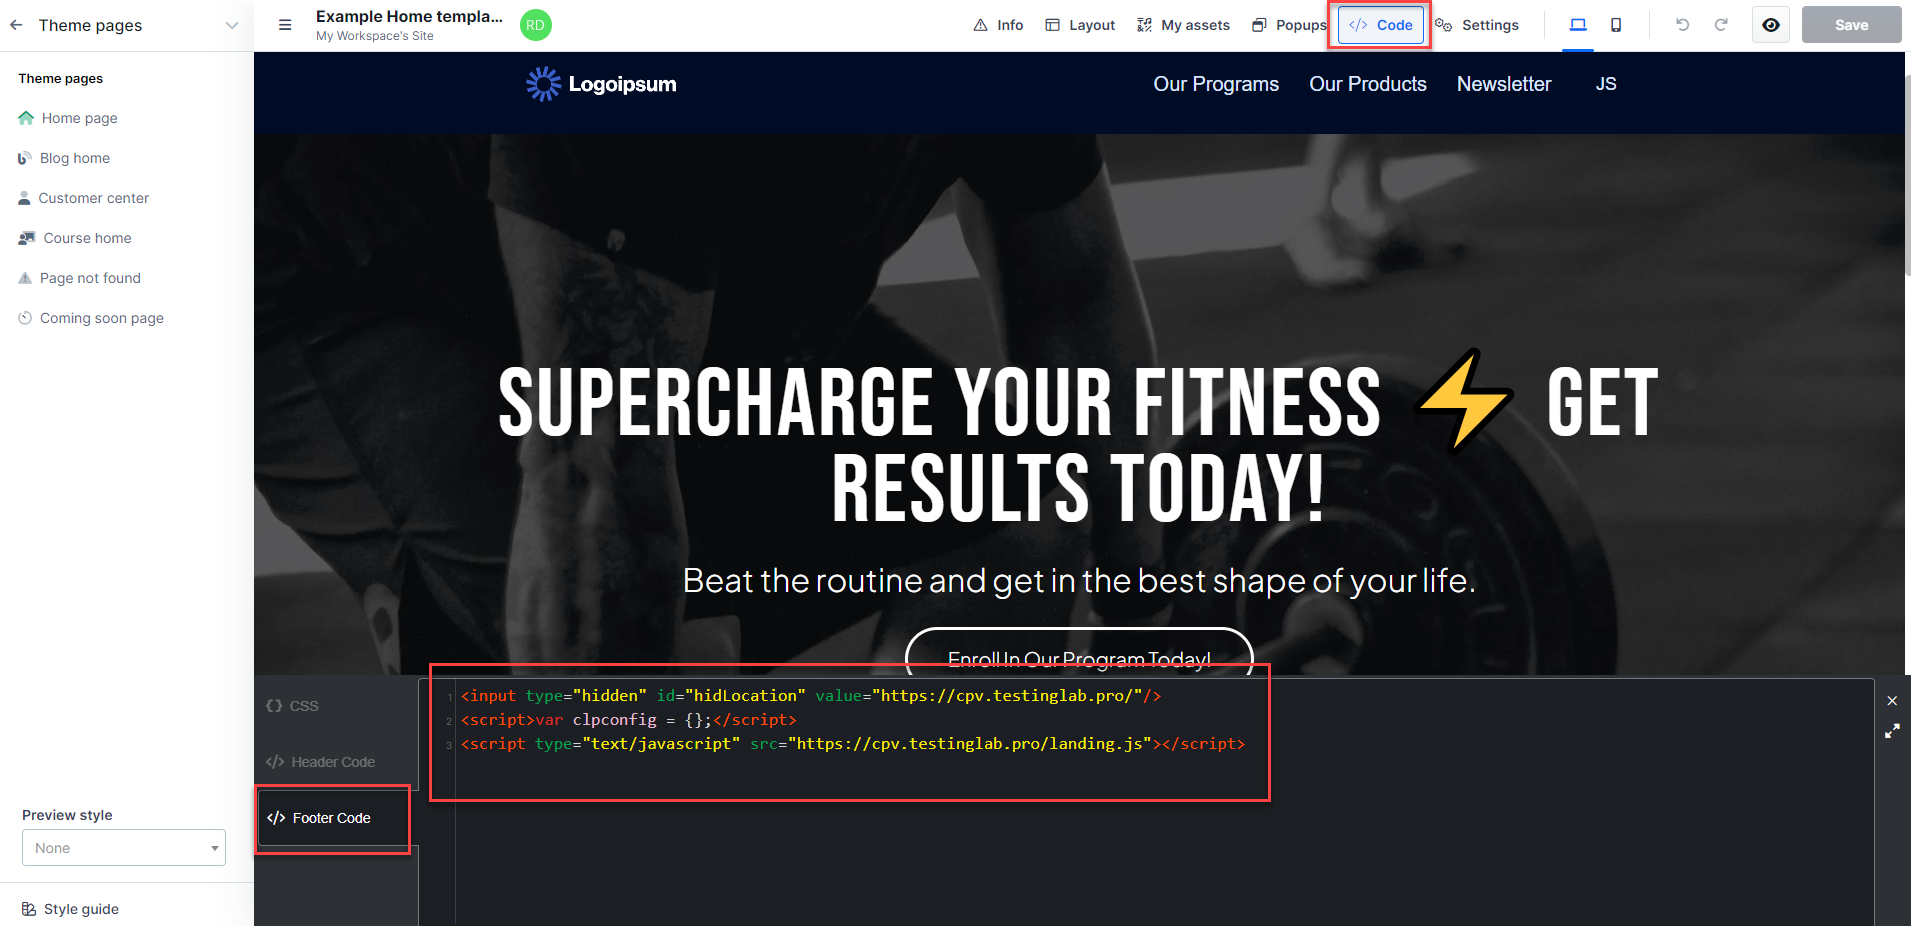
- After copying the Code, navigate back to your ClickFunnels account and go to Customize option for your site.
- On top of the page, you will see
“</> Code”and click it. - Now, we need to add our Code from CPV Lab in
“</> Footer Code” - Then Click "Save"
- On top of the page, you will see
TIP
Important: If you are using Facebook/ Microsoft (Bing) Ads or Google Ads as a Traffic Source, you need to add the Direct Traffic Code as well in Footer Code.
Find more details in the video below:
Video Tutorial for setting up your CPV Lab tracking code in a Clickfunnels page (opens new window)