Getting Started with CPV Lab | CPV One
After you get your CPV One account, there are a few primary settings you need to do before starting running traffic to your campaigns.
The following pre-settings are nedded for both CPV Lab and CPV One users.
- Update login information
- Password
- Timezone
- Default Capture Options
- Select Offer Sources
- Select Traffic Sources
- Setup Custom Tracking Domains (Recommended)
The following settings are needed only for CPV Lab (self-hosted) tracker:
- Import Mobile Carriers to Reduce Database Calls (Optional)
Update Login information
Once you have the installation completed, Login to your CPV Lab Pro Dashboard:
http://YourInstallLocation.com/login.php
For CPV One, you get your tracker login URL over email.
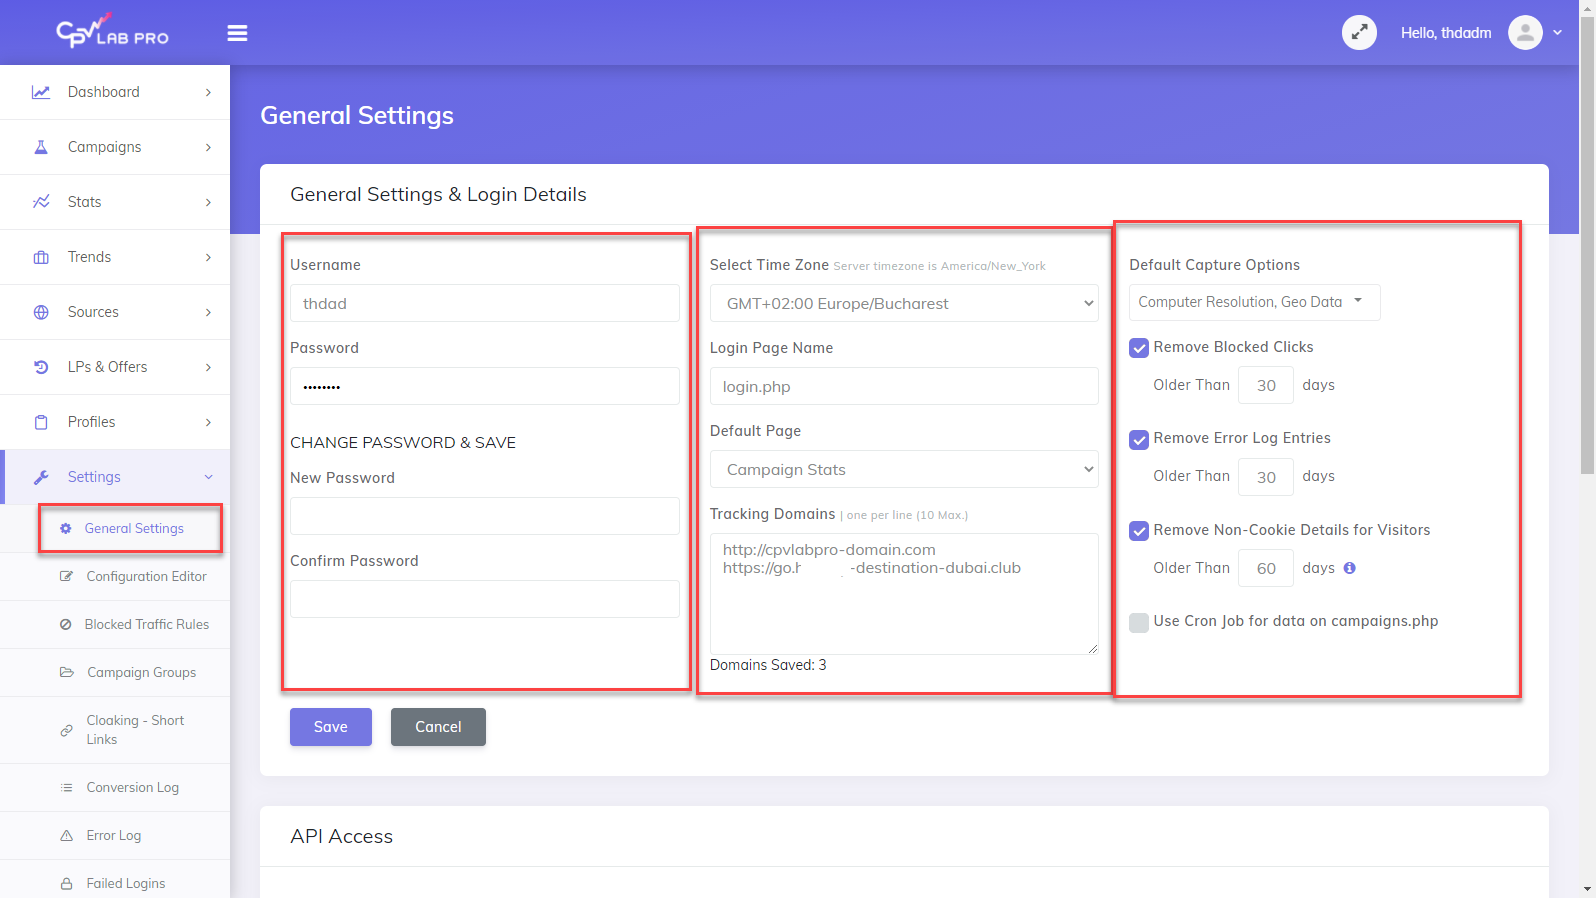
1. Change Your Login Details
Go to Settings ➡️ General Settings
- In the login details section:
- You can leave the Username as it is or enter a new username.
- Enter the current password
- Enter a new password and confirm it
- Use the Dropdown menu to select your local timezone
- Click Save
WARNING
For CPV Lab, your default login details are the following:
Username: adminPassword: admin
2. Set your Default Capture Options
Here you select Data Capture Options that will apply to all new campaigns that you create.
- Go to Settings ➡️ General Settings
- You can also customize these settings for each individual campaign.
- Computer Data = Capture Browser Information for Desktop Visitors
- Computer Resolution = Capture Screen Resolution for Desktop Visitors
- GEO Data = Capture Continent, Country, State and City
- ISP / Carriers = Capture ISP and/or Mobile Carrier
- Mobile Data = Capture All Mobile Data Points
- Referrers = Capture Referrer Domain and Page
- User Agent = Capture Visitor User Agent
3. Add Offer Sources
Add the Offer sources (affiliate networks) you will be using in your campaigns.
CPV Lab comes with almost 200 affiliate networks predefined. You will select only the ones you will use in your campaigns.
Go to Sources ➡️ Offer Sources
- By default CPV Lab Pro (opens new window) has several default offers sources listed.
- On this page you can easily add and edit any offer source.
When you import a new Affiliate Network from the catalog you need to define:
- you open the catalog
- select the affiliate network you want to import
- click on the affiliate network name and load the data
- save it
After this, a new offer source will be available in the table and when you add offers to your campaigns.
You can also add a new offer source manually or ask the CPV Lab team to add it for you in the catalog.
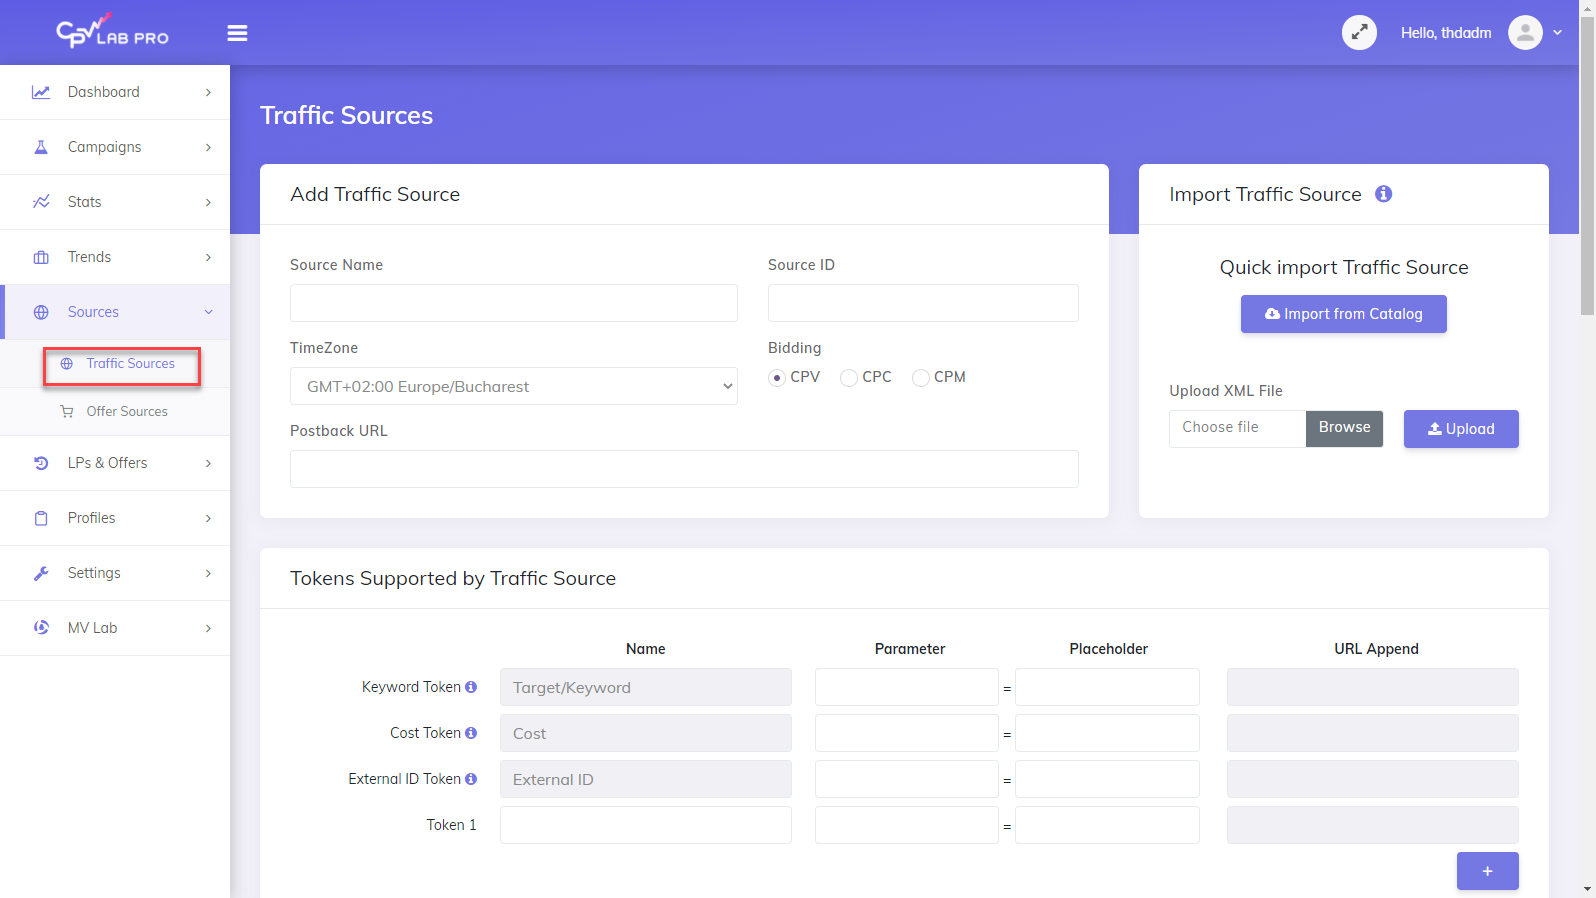
4. Add Traffic Sources
Add the Traffic Sources you want to use for your campaigns. CPV Lab (and CPV One) comes with more than 150 traffic source predefined in the catalog and ready to be used.
- Go to Sources ➡️ Traffic Sources
- Follow the steps from the Traffic Sources page and add the Traffic Source you need.
- Save it and then you can use it in your campaigns
- The Extra Tokens can be easily used in the campaign setup page in the "Macros & Tokens" section.
See also Update Extra Tokens page for more details.
5. Setup Custom Tracking Domains
Some benefits of using custom tracking domains:
your tracking links will be more trustworthy as they will use a better domain
you can get first party data by using as tracking domain a subdomain of your website/landing page
you avoid getting ad blockers to block your tracking links
For CPV Lab : To setup Custom Tracking Domains, please follow the instructions from Custom Tracking Domains
For CPV One - follow the instructions from here to setup a custom tracking domain.
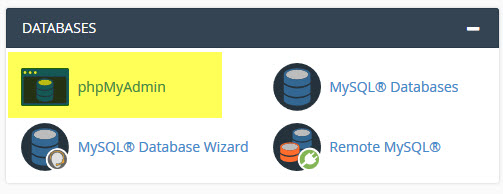
6. Import Mobile Carriers to Reduce Database Calls (Optional - only for CPV Lab users)
- Import the carriers file named
cpvlabpro-carriers.sqlinto PhpMyAdmin. If you don't import this file, carriers will still be captured correctly, however an extra database call is needed every time a new carrier is found. - This optional step Pre-loads the Carrier Database. Again, this step isn’t required but recommended for Users moving high levels of traffic.
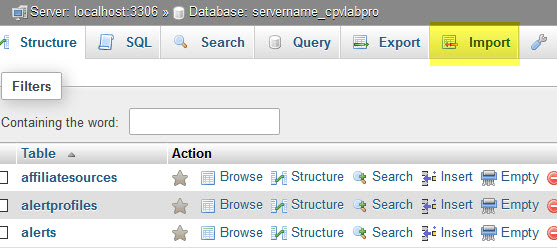
Step1. Open the PhpMyAdmin utility from cPanel, select the CPV Lab Pro database and click on the ‘Import’ tab
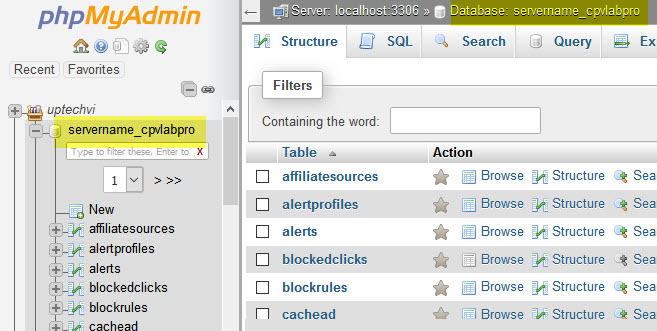
Step2. Click on the ‘Browse’ button and select the cpvlabpro-carriers.sql file from the CPV Lab Pro installation package.
