Direct Link & Landing Page Campaigns Setup
To setup a Direct Link & Landing Page Campaign you need to follow the steps below:
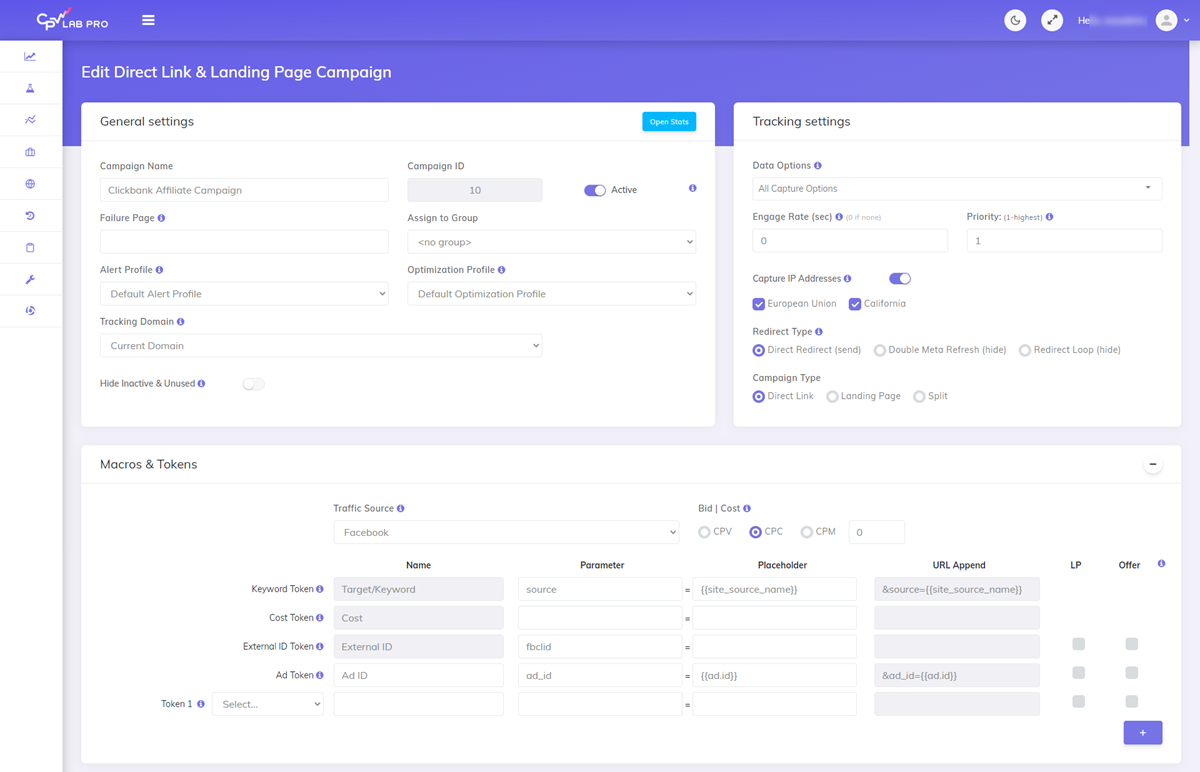
Step 1. Setup the General Settings
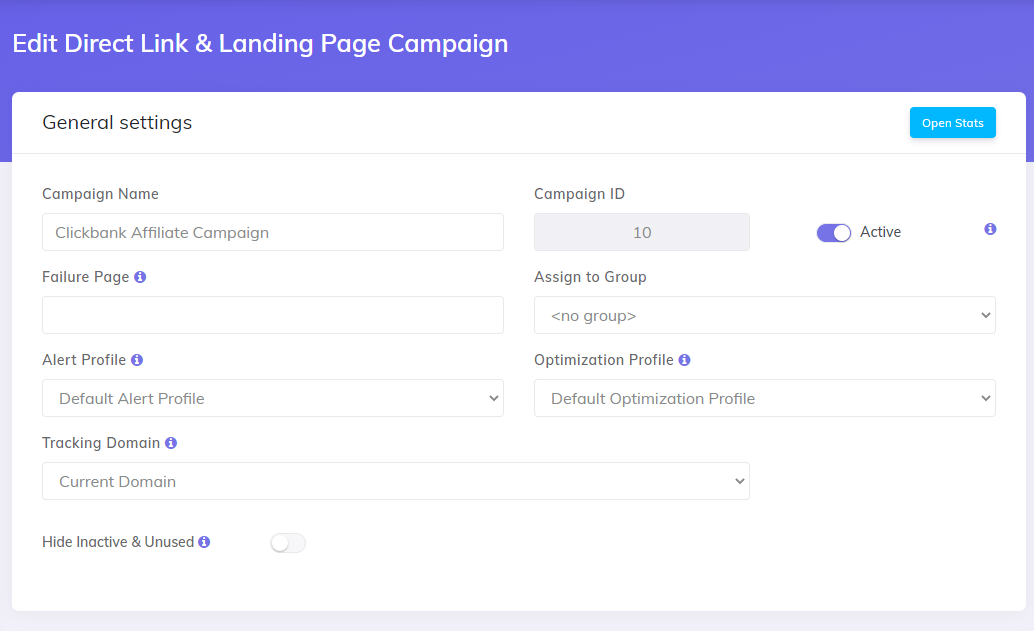
- provide the name for your campaign
- The tracking domain (it can be your current tracker domain or any other custom tracking domain)
- Hide "Inactive/Unused" - will hide from your campaign setup page the Landing Pages or the Offers that you mark as Inactive.
Step 2. Setup your Tracking Settings
![]()
Select the Data Options you want to capture in your campaign: Computer Data, Geo Data, ISP/Carriers, Mobile Data, Referrers, Browser Language Header, Computer resolution, User Agent.
Select the Redirect type:
- Direct Redirect – sends referrer
- Double Meta Refresh – hides referrer
- Redirect Loop – hides referrer
Choose the Campaign Type (what do you wish to do?):
- Direct Link - Send Visitors Directly to the Offer/s
- Landing Pages - Send Visitors to Landing Page/s and then to Offer/s on the Click Through
- Split - Rotate traffic through each of the above, and set the % of the Traffic that will be redirected to the Landing Pages and the remainder will direct link to the offers.
GDPR tracking settings
- if you run your campaign in European Union, then you probably don't want to capture IP address so you can follow the GDPR regualtions
- Same applies for CCPA regulations
Step 3. Select your Traffic Source
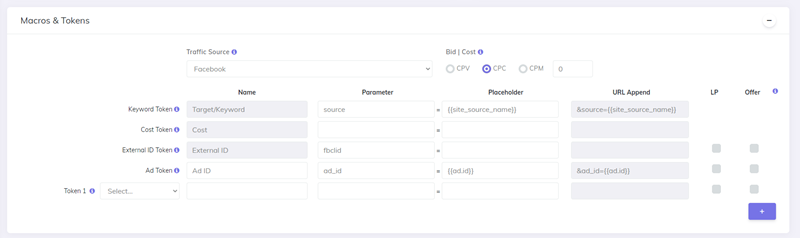
- Select your Traffic Source and the tokens for that Traffic Source will be available to be selected.
- Choose the tokens you need to be tracked in your campaign
TIP
If the traffic source is not in the list, go to Sources -> Traffic sources and import that traffic source from the catalog
Step 4. Enter your Landing Pages
- Enter a Name and URL for each Landing Page
- Each page has a unique ID. You can change the unique numeric ID for each landing page in the Campaign if you want to. We recommend to keep it default.
- Set the Share% for each LP. Total Share% must add up to 100%
- You can add more Landing Pages by clicking the "Add Landing Page" Button
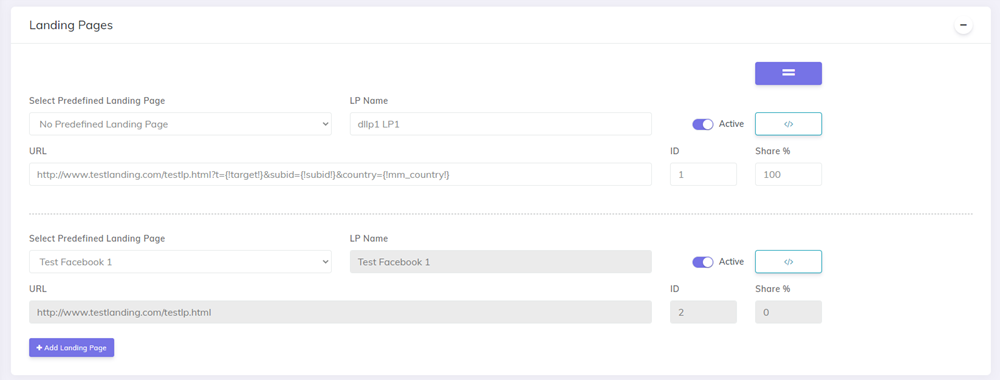
TIP
Notes:
- For each Landing Page URL you can pick the tokens to be added by selecting them from the Easy Tokens Menu
- Make sure you first add the parameter name to the URL followed by the "=" sign
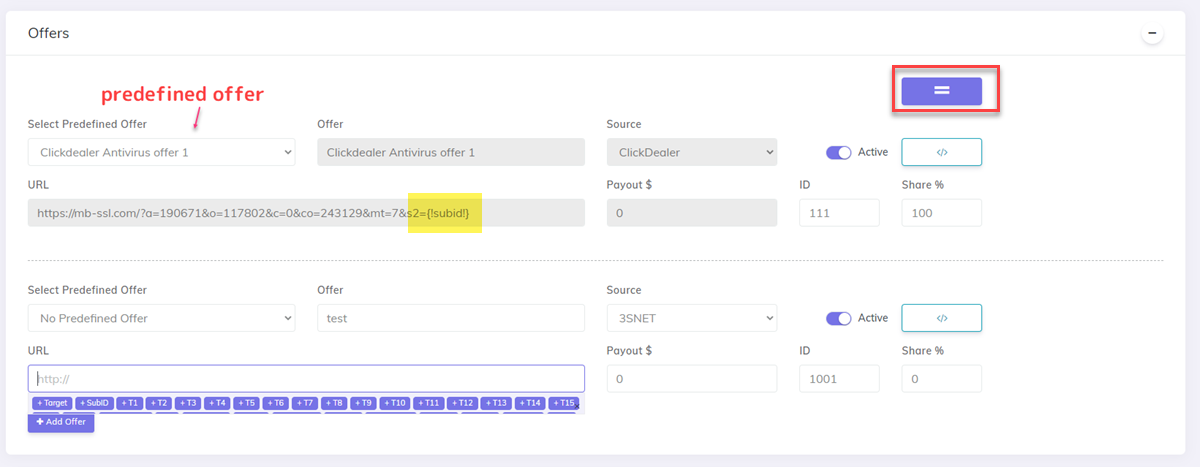
Step 5. Enter your Offers / Options
- Select a predefined offer (or you can manually add one)
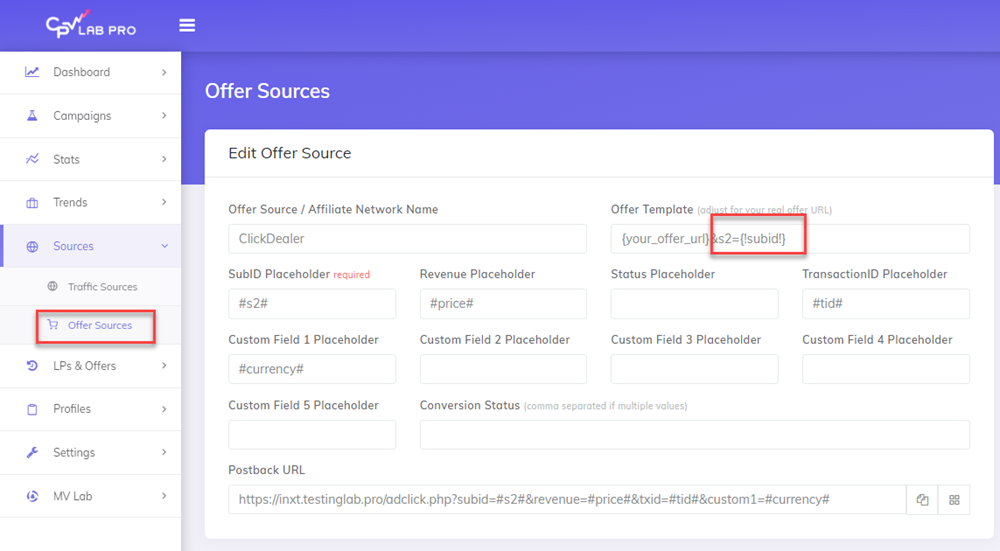
- Make sure the Offer URL has the
{!subid!}parameter at the end- each Affiliate network has it's own parameters. Get the right one for your selected offer source!
- Make sure you Enter the Conversion Payout
- Set the shares for each Option group. Each Option group must add up to 100%
TIP
Notes:
- For each Offer URL you can pick the tokens to be added by selecting them from the Easy Tokens Menu
- Make sure you first add the parameter name to the URL followed by the "=" sign
- You can also predefine offers on the Offer Management and select them in multiple campaigns (recommended!)
Step 6. Click “Save Campaign”
- Click the Save Campaign Button
Step 7. Add Codes and Links to Landing Pages and Place your Pixel
- In the "Links & Pixels" section of the campaign you can find the predefined links to be used in your pages:
- If you are using Landing Pages:
- Code your links to the offer/s on your landing pages using the Step 1 link code. http://YourDomain.com/base2.php
- Enter the Step 2 Code directly above the closing body tag
</body>on each of your landing pages.
![]()
In the "Tracking Pixel" section of your campaign you will find all the kind of pixels you can use to track your campaign:
There are 3 default samples of tracking pixel + postback URL:
- Image Pixel
- Iframe Pixel (required when calling multiple 3rd party pixels)
- Script Pixel
- Postback URL Pixel (Server2Server Pixel)
![]()
- Here you can find more details about how to use Tracking Pixels and Traffic Source Pixels
Step 8. Set the Redirect Profiles for your campaign (Optional)
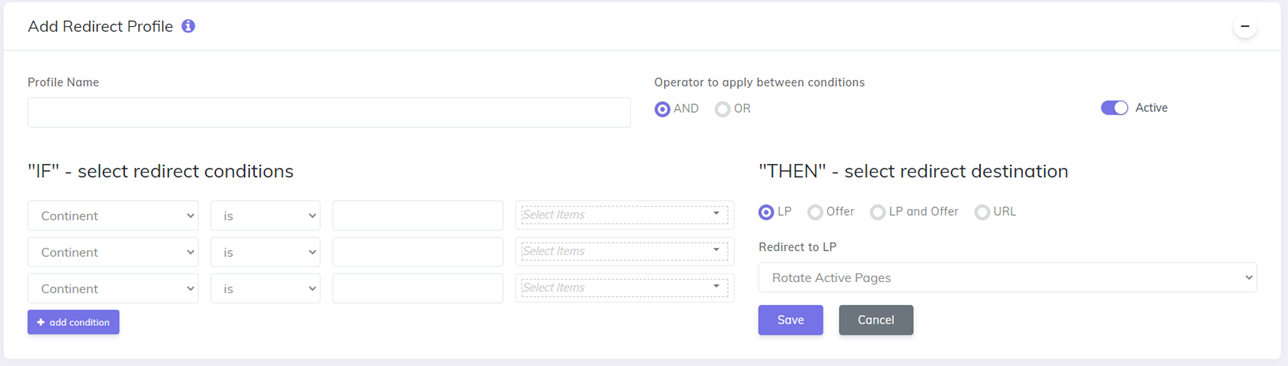
- You can set up Redirect Profiles on the Campaign Setup page or on the Redirect Profile page. The setup is the same in both locations.
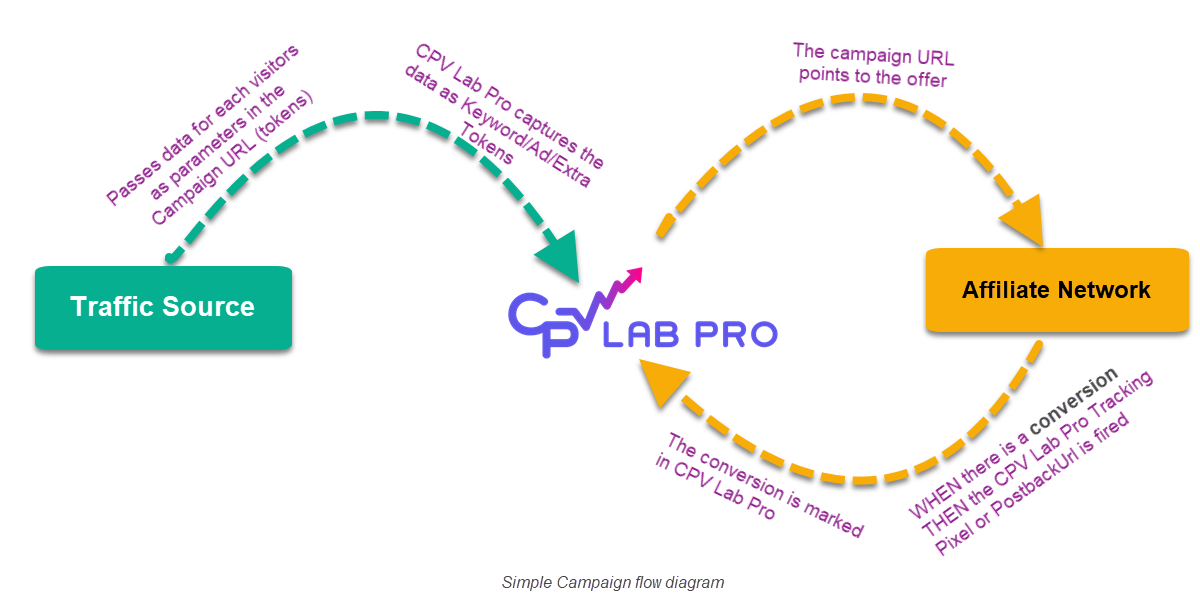
Simple campaign flow diagram:
Find more details in the video below:
Video Tutorial for setting up your first CPV Lab Pro campaign (opens new window)
Additional information
If you want to understand more about how a Direct Link and Landing Page campaign can help your business, check this article to understand more indepth benefits for your marketing.
You may also find useful:
