CPV Lab - Custom Domain Setup with CloudFlare
Introduction
CPV Lab ad tracker allows unlimited page and offer tracking using a single instance (installation).
By default, the tracking links use the instance domain as the base URL.
- If CPV Lab is installed at
http://cpvlabpro-domain.com, the default tracking links and pixels will use this domain:http://cpvlabpro-domain.com/base.php?c=1&key=qwewqewqewqehttp://cpvlabpro-domain.com/base2.phphttp://cpvlabpro-domain.com/adclick.php
- If CPV Lab is installed at
The Custom Tracking Domains feature lets you attach different domains to your CPV Lab instance and use them in the tracking links for your campaigns.
- This is done by editing the DNS
A Recordsor DNSCNAME Recordsfor the custom tracking domains at your Domain Name Registrar/Provider.
- This is done by editing the DNS
To use a different domain in the tracking links for a campaign or group of campaigns, you can set up a Custom Tracking Domain.
More details about custom tracking domains you can find here (opens new window).
TIP
In CPV Lab , you can define up to 100 custom tracking domains.
- However, it's essential to note that the CPV Lab interface, including Campaigns, Stats, and Trends pages, will always be accessed using your main domain (cpvlabpro-domain.com).
- The custom tracking domains, on the other hand, are specifically used in tracking links and pixels.
Steps to Setup a Custom Tracking Domain with Cloudflare
Step 1: Obtain the domain
If you don't already own the domain you wish to use as a custom tracking domain, you must purchase it first. Numerous domain registrars are available, but we recommend namecheap.com (opens new window), namesilo.com (opens new window), or dynadot.com (opens new window) as they are highly reliable options.
Step 2: Register Your Domain with CloudFlare
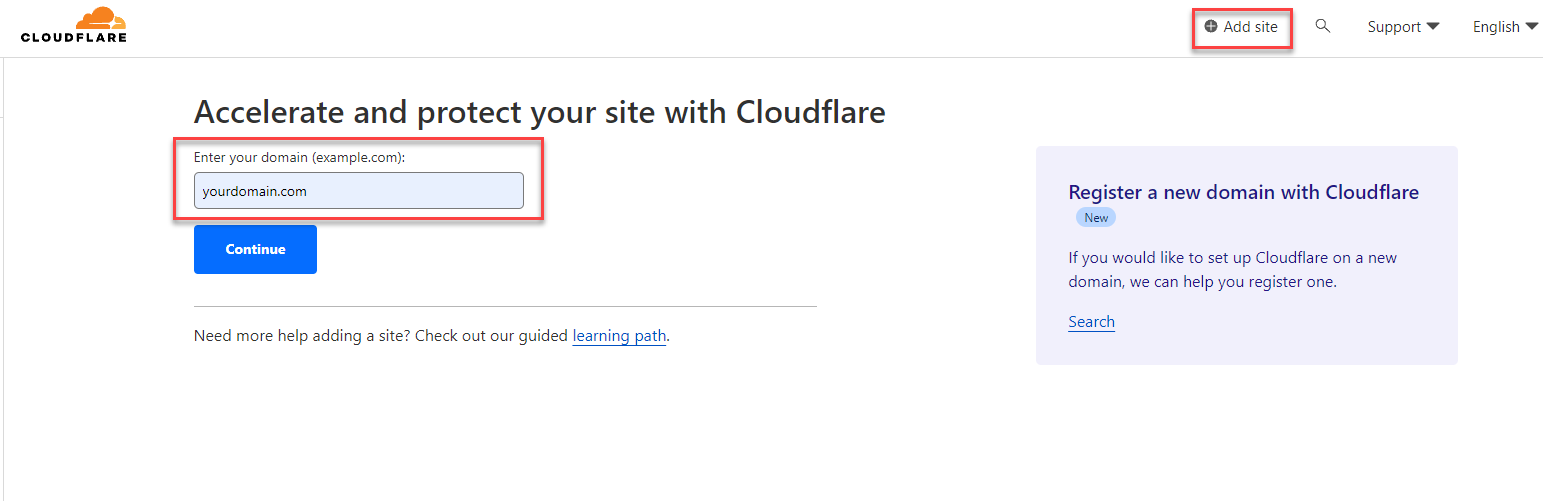
- Log in to your CloudFlare account
- Click on
“+ Add Site” - Enter your domain in the designated field and click continue
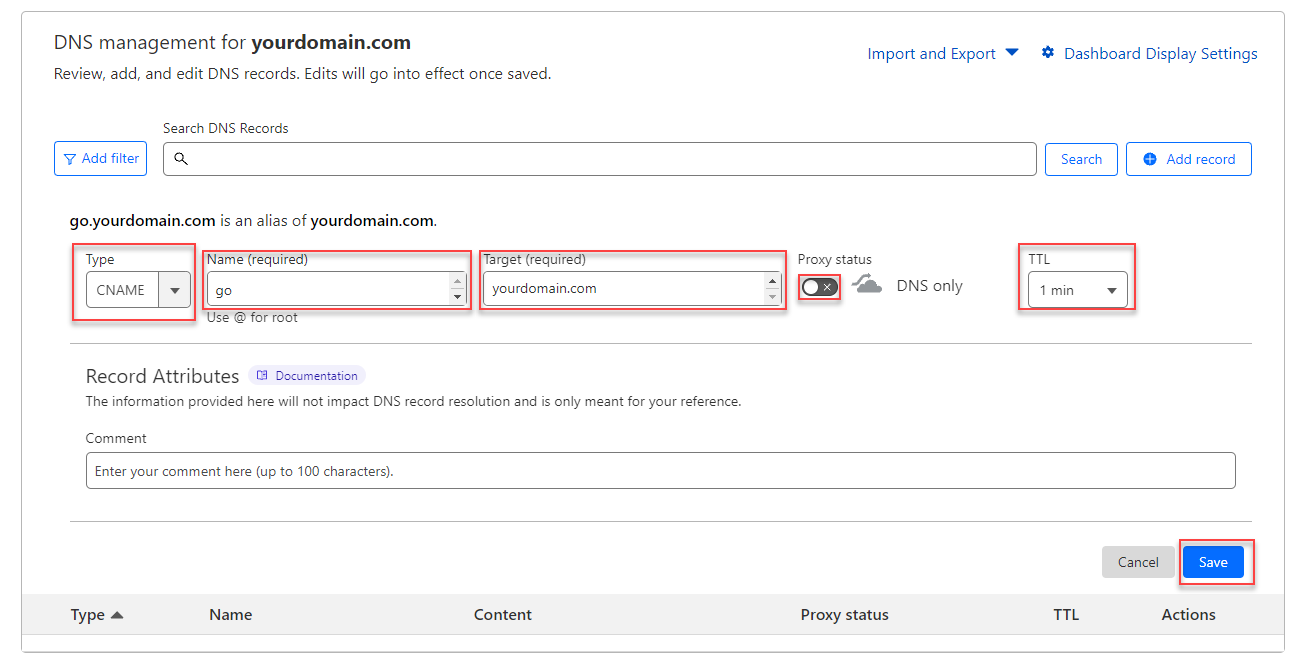
Expand the DNS section and click on
“Records”Define a CNAME Record
Ensure that the CNAME record is directed towards the domain associated with your primary CPV Lab instance.
If you have already set up an A record for the custom tracking domain, make sure to modify this CNAME record accordingly.
In case you haven't created an A record yet, you need to generate a new CNAME record using the vided details.
Example:
- Type: CNAME
- Name: go/trk/best/ etc.
- Target: Your CPV Lab domain
- Proxy status: This needs to be turned OFF (DNS Only)
- TTL: 1 min (as low as possible)
Save
WARNING
Then, you have to wait for up to an hour for the DNS to be pagated. You can check the status here: https://www.whatsmydns.net/
TIP
If you are using the cloud hosted CPV One (opens new window) tracker, then the only difference is that you need to specify as target the domain for CPV One. Here are the instructions on how to setup custom tracking domains on Cloudflare for CPV One.
Step 3. (optional) For shared IP addresses on the main CPV Lab domain
- If your CPV Lab instance doesn't have a dedicated IP address and it can share the IP address with multiple domains on the same server, then you also need to complete one of the 2 steps below:
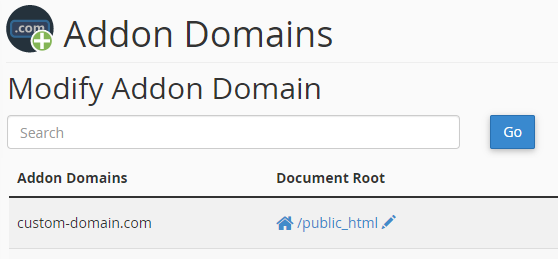
1. On servers with cPanel administration
- add the Custom Tracking Domain as an Addon Domain and define its Document Root to the same server path as Main Domain in cPanel for the Main CPV Lab Pro domain
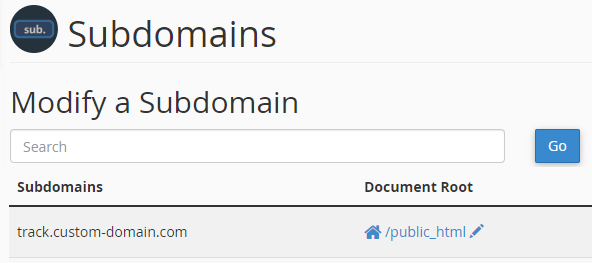
- If using a subdomain for the Custom Tracking Domain, you need to create the subdomain and define its Document Root to the same server path as the Main Domain
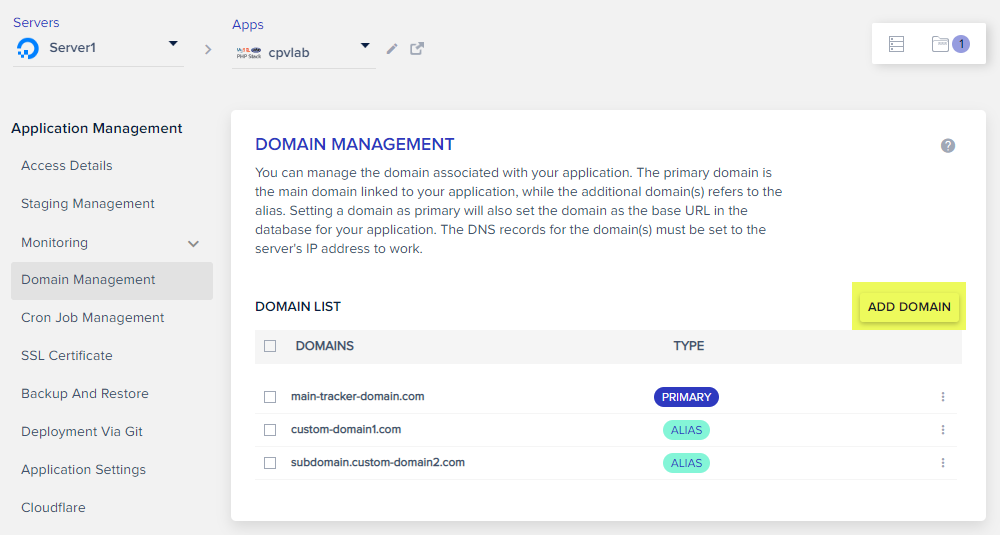
2. On Cloudways servers
- For Cloudways you will access your CPV Lab application in their interface, then go to the Domain Management page.
- You should have your tracker domain already appearing as the Primary domain in the list.
- You need to add the custom tracking domain or subdomain as an Alias domain in the list. Use the "ADD DOMAIN" button for this.
3. For other servers
- add a virtual host (vhost) in Apache on the Main Domain server for the Custom Domain to point to the same server path as Main Domain
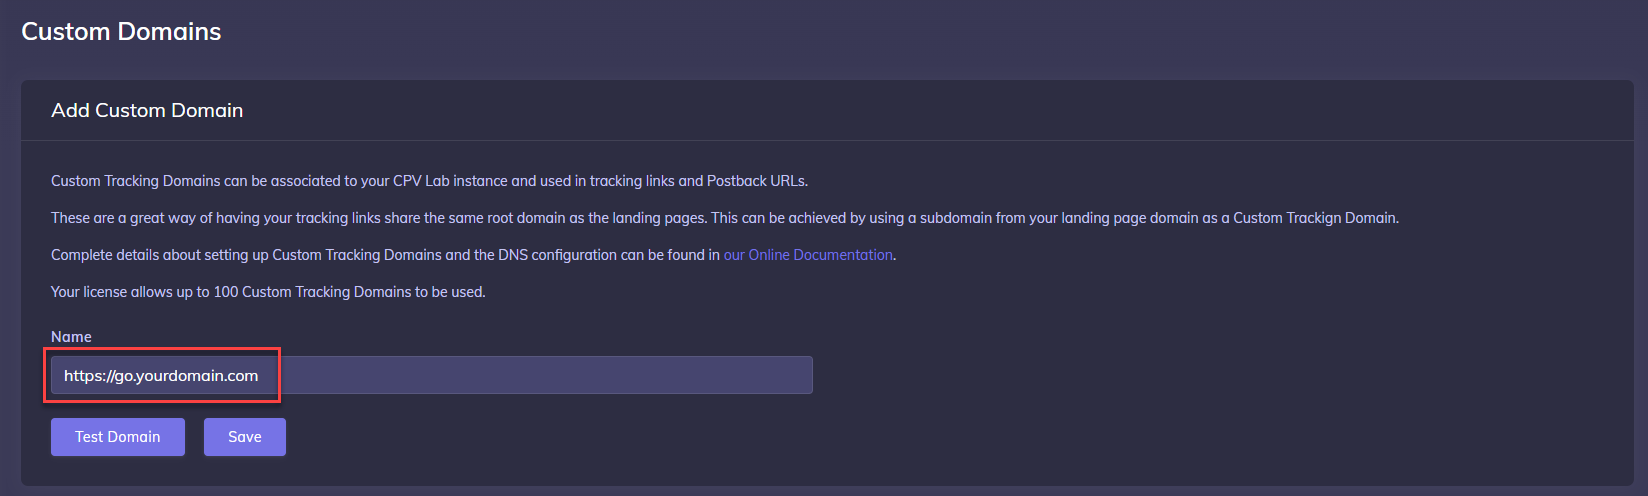
Step 4: Define the Custom Tracking Domain in CPV Lab
- Login to your CPV Lab tracker (or CPV One)
- Navigate to: Settings -> Custom Domains
- Enter your newly created custom tracking domain starting wither with "http://" or with "https://"
- Save
Step 5: Create a campaign in CPV Lab using your new Tracking Domain
Follow these steps to create a new campaign in CPV Lab:
- Setup a campaign with CPV Lab
- Ensure that you choose the recently created custom domain as your Tracking Domain.
![]()
- Upon completing all the steps, you will achieve successful link tracking with the newly created custom domain.
Step 6. Test your custom domain
- You need to wait for the new domain to propagate somewhere between 1 and 24 hours.
- Once the domain is propagated you can call the
custom-domain-check.phpon the custom tracking domain in a browser and the page should load fine (note: you won’t be able to login at that custom domain URL, just check that the page loads). - Once you have the page loading on the custom tracking domain, you can select the custom tracking domain in your campaigns and all tracking links provided in the campaign setup page will use the custom domain.