CPV Lab Pro V9.0 changes summary
New Dark Mode design
The Dark Mode design is now available starting with V9.0.
With the new dark design changes you will get a new experience in working with CPV Lab Pro (opens new window). The dark mode responsive design comes with a lot of changes and improvements in user experience.
A very friendly button on top of the page allows you to change from light to dark very easily.
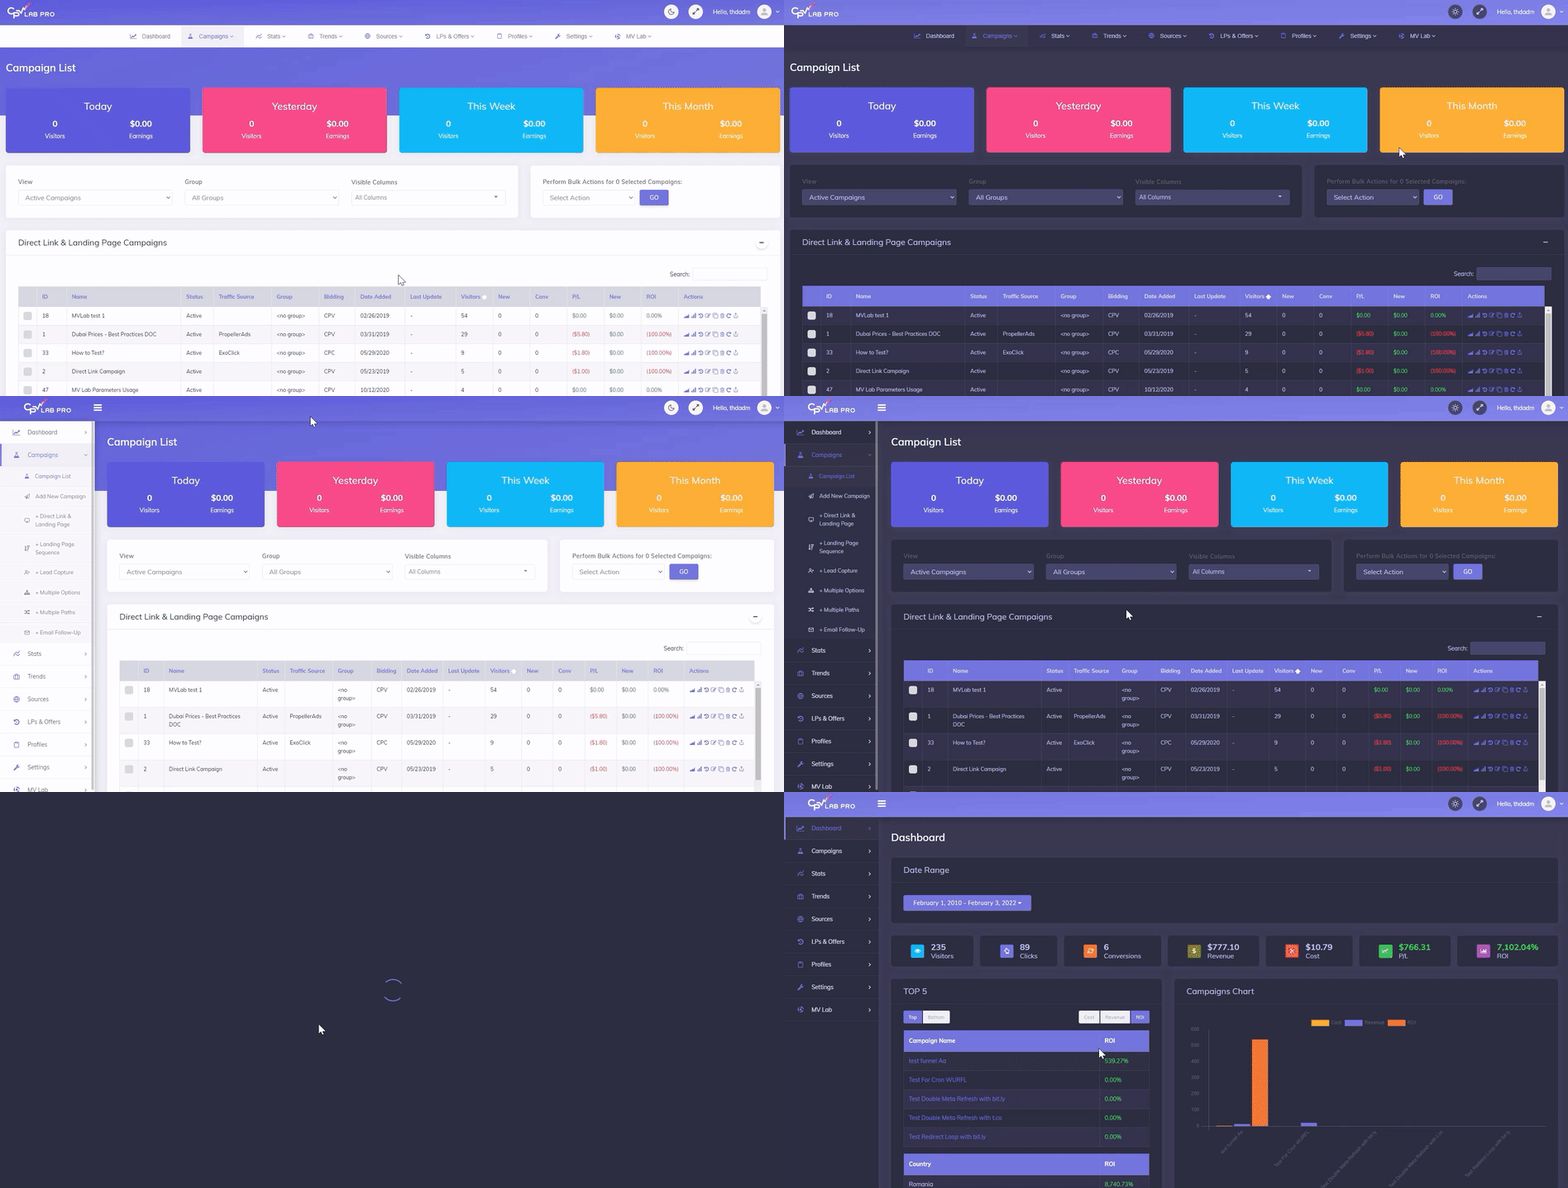
Here you can find more information about the new Dark Mode design.
CJ Affiliate integration
CJ Affiliate (formerly Commission Junction) is one of the world’s largest and oldest affiliate networks. Unlike most affiliate networks, CJ Affiliate don't have the option to place a Tracking Pixel or to define a Postback URL on their side. In this case conversions should be retrieved in your ad tracker through their API.
The API integration between CPV Lab Pro and CJ Affiliate is now available starting with Version 9.
Here are all the details about how you can setup this integration in your CPV Lab Pro instance.
TikTok integration
With the TikTok integration you can now pass conversion details from your tracker to TikTok and see them directly in your TitTok Ads Manager account. This is important for optimization purposes and also for the delivery of the ads through TikTok.
Here are all the details about how the TikTok API integration in CPV Lab Pro works!
MV Lab 2.0
MV Lab 2.0 comes with the following updates:
- improved integration with CPV Lab Pro when you use the Direct Traffic code for tracking the landing page
- option to specify the maximum number of characters from variations to pass to CPV Lab Pro when using Variation Text instead of Index
- ability to assign MV Lab variations to PHP variables for advanced customizations
Browser Language Header
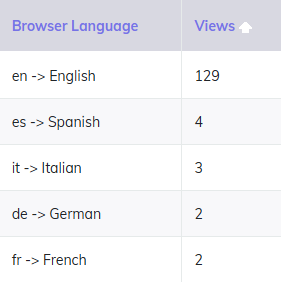
A new Data point is now available to capture the preferred language passed by visitors' browsers.
It is a useful metric in order to understand which languages visitors prefer for the displayed content and can help you see which languages to translate your landing pages into.
New metric: Average Order Value (AOV)
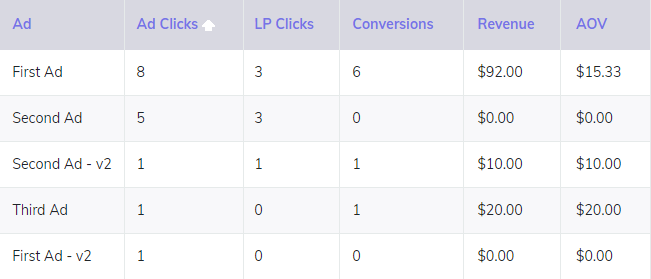
This new metric shows the average revenue for your conversions and it can be displayed in the Stats table in conjunction with any of the grouping columns (Target/Keyword, Ad Toke, Extra Tokens).
It is calculated by diving the total revenue by the number of converting visitors.
AOV = Revenue / ConversionsThis will allow you to have an image over the visitors that bring higher average revenues.
It is a powerful metric when promoting offers with variable payouts because in these cases the number of conversions or the conversion rate alone don’t bring enough information over the performance of your visitors.
Example: In order to see the average order value for each of your ads, you can check the Ad Performance report and made the AOV column visible. You will get a complete report with data breakdown for each ad value:
Improvements in IP Address capturing and processing
- We have addressed some issues with IPv6 IP Addresses when using Cloudflare on your domain. This was happening because Cloudflare overwrites the regular headers used for IP addresses with some custom headers.
- Starting with Version 9, you have all IP addresses (IPv4 and IPv6) captured and processed correctly in CPV Lab Pro. Addresses in IPv6 format look like in the image below:
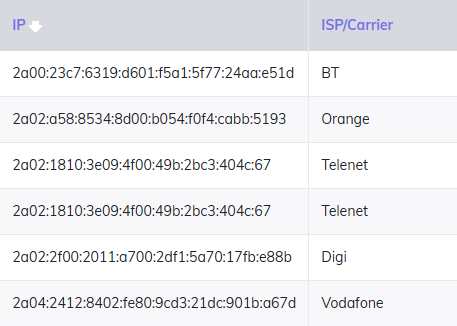
- The IP address is an important metric which allows further Geo Location and ISP/Carrier identification, so it is always important to have it captured correctly.
- No changes are needed in the CPV Lab Pro configuration in order to have all IPs tracked correctly, just upgrade to CPV Lab Pro 9.0.
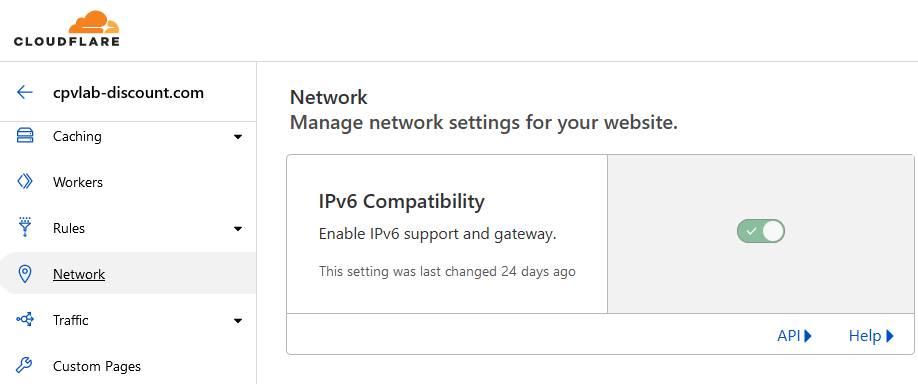
- In case you are using Cloudflare and have previously disabled IPv6 addresses from Cloudflare, then you should re-enable IPv6, so that you have something like this in your Cloudflare settings:
Upload total campaign cost
A new option that allows to have accurate costs in your campaign was added: now you can upload the total campaign cost and have it automatically adjusted in CPV Lab Pro.
Keeping the Cost data accurate in the tracker may become tricky when you have variable CPC values and the Traffic Source doesn’t offer a token for the CPC.
- Until now the best option was to periodically upload a spending report with a breakdown of CPC values per Target or per Ad, as described in the Update Exact CPC article.
Starting with version 9, you also have the option to upload the total campaign cost in the tracker and this will be reflected instantly in the costs already registered.
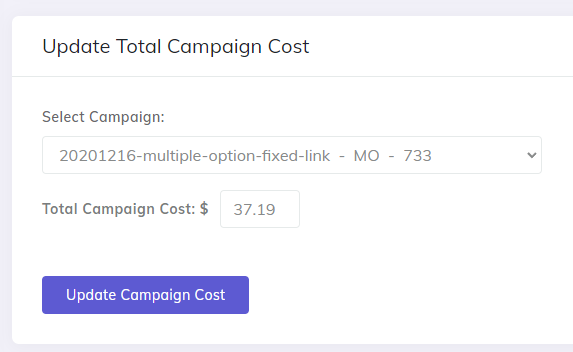
Navigate to Stats -> Update Exact CPC page and look for the new section at the bottom of the page.
- Here you will select the campaign that you are updating and then enter the total Cost.
- This will automatically update the average CPC (Bid) of your campaign in CPV Lab Pro and also update all the CPC values registered for older visitors.
- Once this is done, you will have the same Total Cost tracked for this campaign in CPV Lab Pro and in your Traffic Source.
You can upload a new Total Campaign Cost whenever you need it and when you see that the Cost in Stats is off compared to the Traffic Source.
Updated mobile detection database
- The mobile devices detection component was updated and improved in order to provide more accurate details about the mobile devices used by visitors.
- All the latest devices, models, browsers, operating systems are included and can be identified correctly for your visitors.
- You can then get information about them in the dedicated Mobile Audience report or in the General Stats reports.
- This allows you to easily see top performing devices/platforms and focus your campaigns on them.
TIP
Note: The latest mobile detection updates require PHP 7.2 or newer in order to run correctly.
Improved auto-update for internal databases
- The process that updates internal databases (GEO data, mobile devices database, computer details database, ISP/Carrier database) has been greatly improved.
- This means that you will always have these databases up-to-date in your CPV Lab Pro instance and that you will track accurate information from visitors.
- Since these metrics are constantly changing, it is very important to always have the latest updates in the internal databases.
- This ensures that your reports are accurate and that you make well-informed decisions.
WARNING
Important: Just make sure that you have the Cron job for Internal Databases updates enabled on your server and this Cron job will take care of everything else. This Cron job needs to be configured to run once per day as shown here.
Track Engage Rate when using Direct Traffic Code
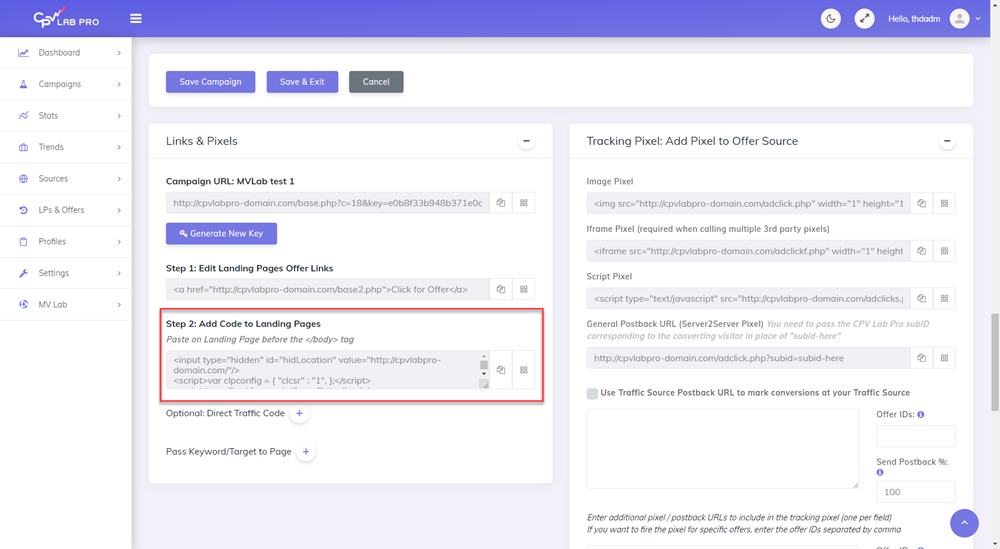
- Now you can configure and track the Engage and Engage Rate for your landing pages even when using the Direct Traffic code tracking method (previously this only worked when the Campaign URL was used).
- The Engage is captured when a visitor spends a specific amount of time (default is 3 seconds) on your landing page.
- This is an important indicator for the attractiveness of your page and allows you to see what percentage of visitors close the page shorty before landing on it.
- Always aim to make changes to your pages in order to increase the Engage Rate and this will reflect in the conversion rate as well.
TIP
If you already have a campaign tracked with the Direct Traffic code:
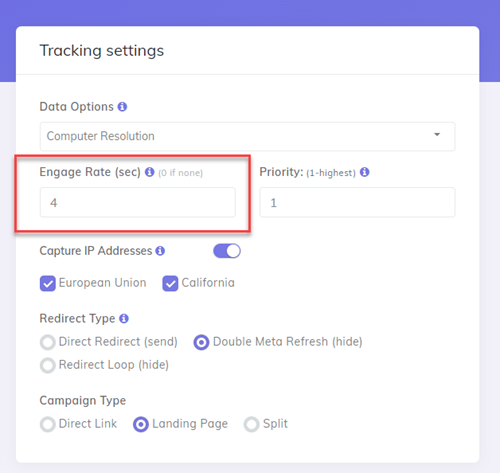
- then you can enable Engage Rate capturing for it by setting a value for the Engage Rate (seconds) option in the campaign setup page
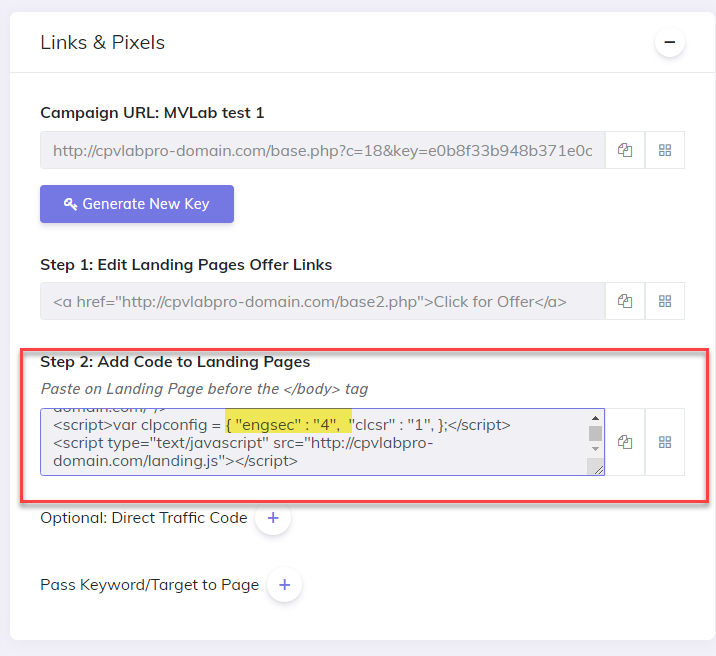
- then get the updated Step 2 code and place it in your landing page.
That's it!
- The Engage metric was added in the Visitor Stats and Click Lookup reports.
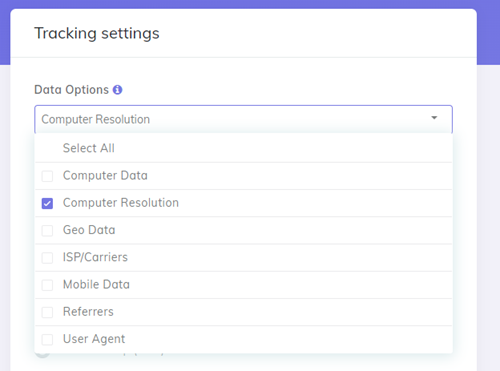
Track Computer Resolution when using Direct Traffic Code
- Just like with the Engage Rate, the Computer Resolution Data Option was previously captured only when the Campaign URL tracking method was used.
- Starting with version 9.0, the Computer Resolutions can be tracked also when you use Direct Traffic Code tracking, directly from your landing pages.
TIP
Make sure to select the Computer Resolution Data Option in the campaign setup page and to update the Step 2 code in your landing pages when you want this metric tracked.
New faster page rotation algorithm
We always want the fastest redirects possible from the tracking links, that’s why we have introduced a new and faster rotation algorithm in Version 9.0.
Current Algorithm:
- You can rotate (split) traffic to any number of landing pages and offers in CPV Lab Pro in order to test which ones perform.
- This is done by specifying the
Share%for the pages in the campaign setup page.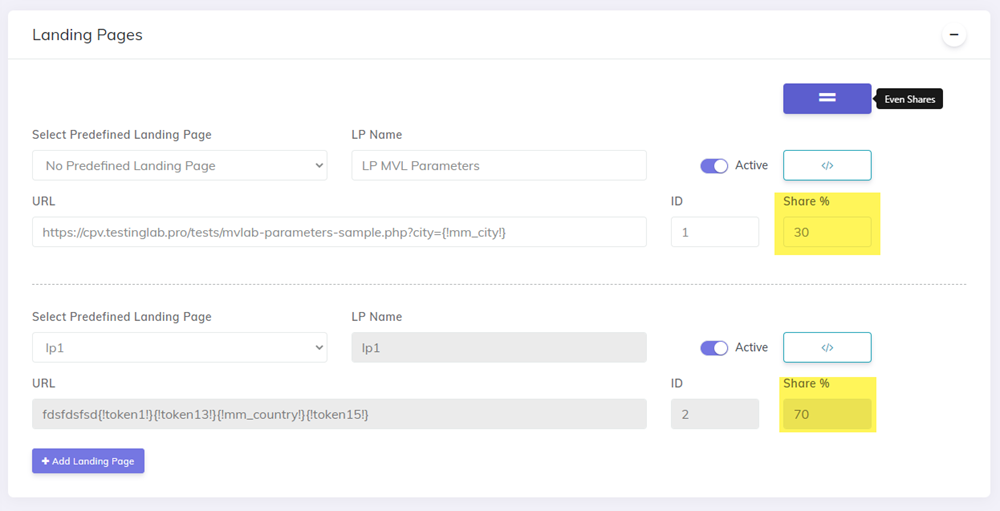
- With the default rotation algorithm, you get exact split between your pages, just as defined in the campaign setup page.
- Every 100 visitors are split exactly as specified by the shares. This is great for most cases, but this exact method also adds a small amount of time (milliseconds) to the redirect.
- This is done by specifying the
New Algorithm:
- The new rotation algorithm uses a probabilistic model which makes the redirect even faster than before.
- This is especially useful for large traffic figures (like pop traffic) where the redirect speed is essential for your success.
- The shares defined for pages are still respected, but the probabilistic model doesn’t guarantee the exact distribution for each 100 visitors.
- This will not be an issue for large traffic campaigns where the increase in redirect speed is important.
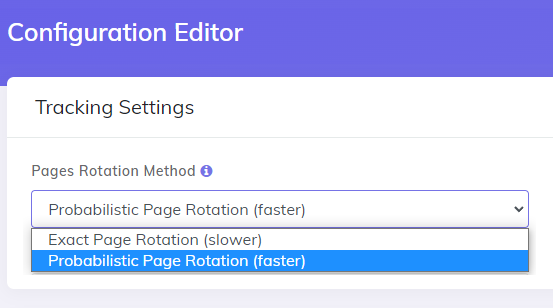
- You can switch between the rotation algorithm used from the Configuration Editor Page, like this:
Capture extra tokens from Postback URL calls
Extra Tokens are usually captured from the Traffic Source as pieces of information related to your visitors.
- But sometimes you may want to have information passed from the affiliate network (for converting visitors) displayed in your tracker reports.
- Now this is possible because the Postback URL can capture values passed and store them in the Extra Token fields.
Example: When using a smartlink you want to know which offer converted for your visitors.
- You can now pass the
Offer IDorNamein the Postback URL call and capture it in an Extra Token from CPV Lab Pro.
This works very easy:
define an Extra Token for the information that you need and leave the placeholder part blank (this Extra Token doesn’t come from the Traffic Source, so it doesn’t have a placeholder)

configure the placeholder accepted by the affiliate network in the Postback URL and pass it in the
tokenXparameter (where "X" is the number of your extra token)

- Check with your affiliate network for details about the metrics that they can pass and see if some of them would be useful for you. You can always see the latest Offer Template and Postback URL configuration for each network in our Integrations section
Option to ignore prefetch requests to the Campaign URL
Scenario:
- Sometimes Traffic Sources or other bots want to download or check the landing pages before visitors actually access them.
- This process is called prefetching and it can artificially increase visitor count in your campaigns when the Campaign URL is prefetched.
Solution:
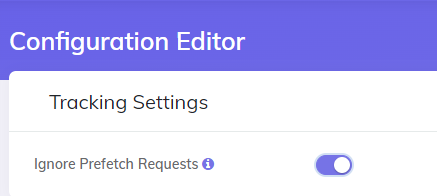
- CPV Lab Pro 9 introduced a configurable option that will ignore such "prefetch requests", so that only real visitors get counted in your campaigns.
- If you see more visitors reported in your campaign by CPV Lab Pro than by the Traffic Source, then enable the option to ignore prefetch requests from the Configuration Editor page
New Visitor Lookup report
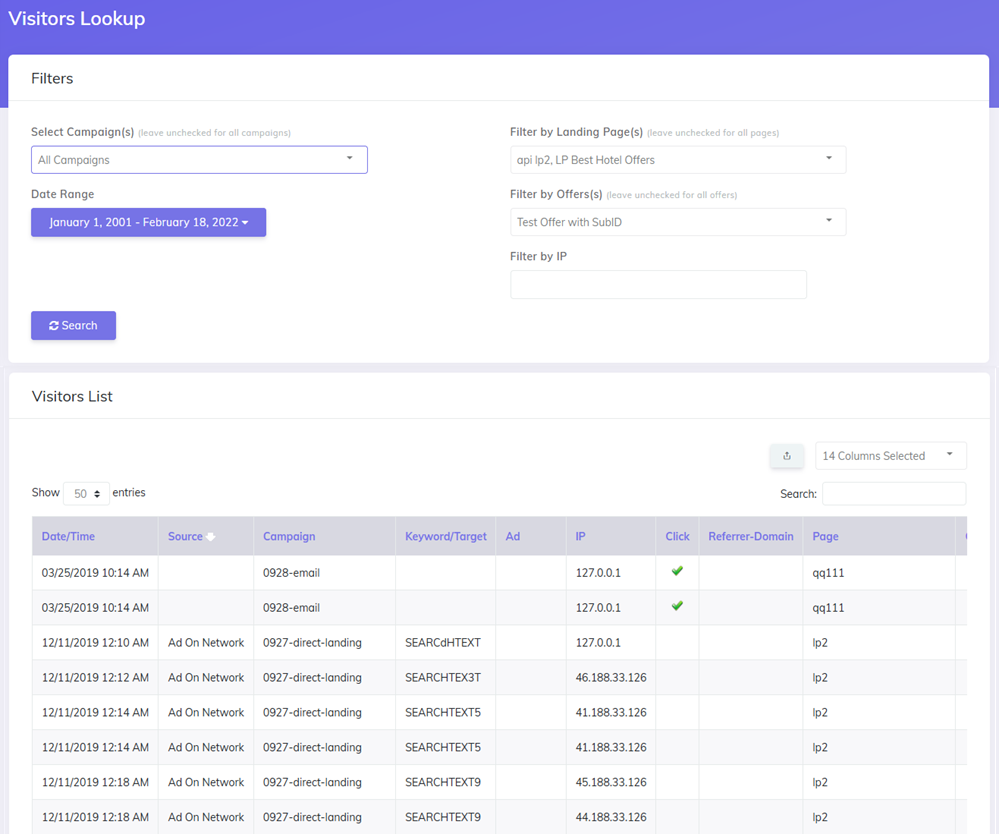
A new report is now available, allowing you to search through all the visitors from some specific campaoigns or from all the campaigns. The report permits searched by IP, landing page or offer.
Others
Here is a list with other additions or bug fixes added in Version 9.0:
New macro (placeholder) in the URLs
{!campaignid!}– passes the Campaign ID
new changes to the API to allow integration with other tools (like theOptimizer)
