Ad Spend Templates
Navigation: Trends ➡️ Ad Spend Templates
- Ad Spend Templates are used to Upload Reports in CPV Lab Pro to create a Hard-Data Report using your ad spend report directly from your traffic source.
- Several Ad Spend Templates are setup by default and can be edited based on your needs and new templates can easily be added.
A. Page fields and details
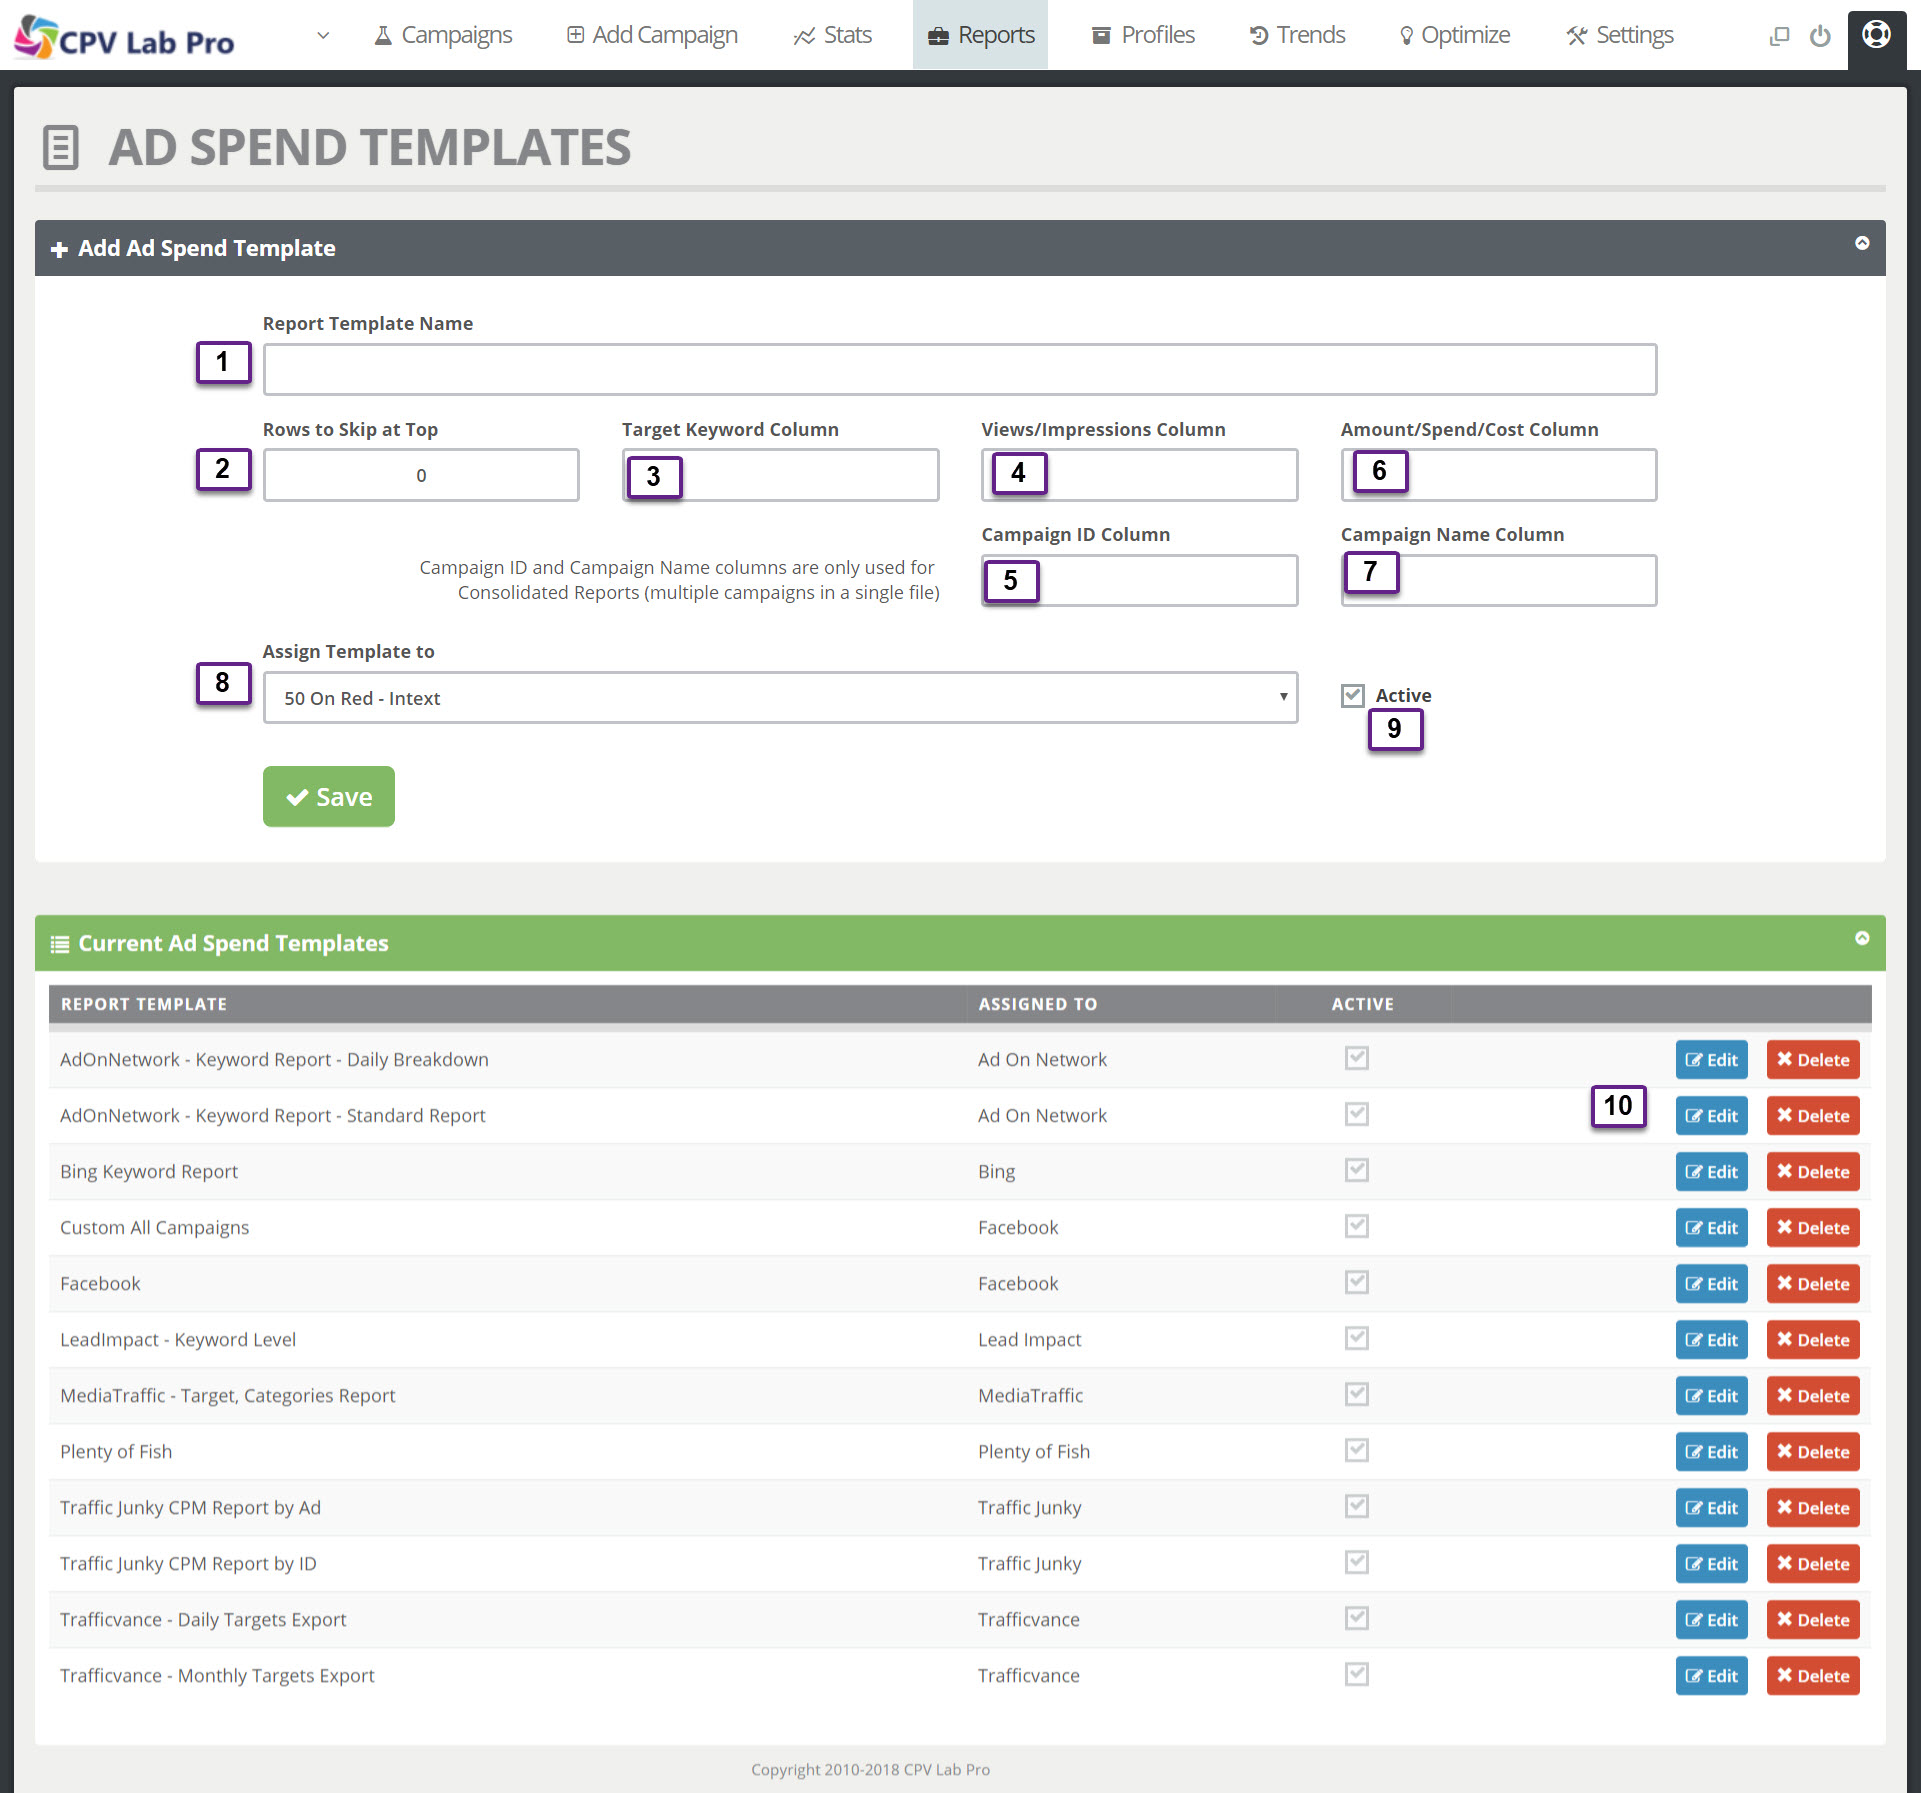
1. Report Template Name
- Enter a Name for the Ad Spend Template
2. Rows to Skip at Top
- See Below for information to determine this setting.
3. Target Keyword Column (Mandatory)
- Enter the Column Title used in your Traffic Source Ad Spend Report for Target or Keyword.
- In the example below, it’s Targets|Categories
4. Views/Impressions Column (Mandatory)
- Enter the Column Title used in your Traffic Source Ad Spend Report for Visitors, Views, Impressions or Clicks depending on the type of report.
- In the example below, it’s Views
5. Campaign ID (Optional)
- Used only for Bulk Consolidated Reports, which is covered below.
6. Amount/Spend/Cost Column (Mandatory)
- Enter the Column Title used in your Traffic Source Ad Spend Report for the Cost or Spend.
- In this example it’s Amounts
7. Campaign Name (Optional)
- Used only for Bulk Consolidated Reports, which is covered below (check the example in B. Adding & Editing Ad Spend Templates)
8. Assign Template to
- Select the Traffic Source to assign this template to
9. Active
- Check to activate this Ad Spend Template for use.
10. Current Ad Spend Template Actions
- Edit or Delete Templates
B. Adding & Editing Ad Spend Templates
- First, download a Spend Report from your Traffic Source.
- In this example we’ll use this report format for our Traffic Source here which is Media Traffic:
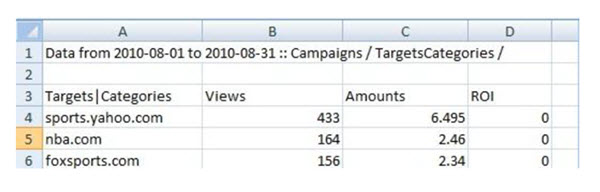
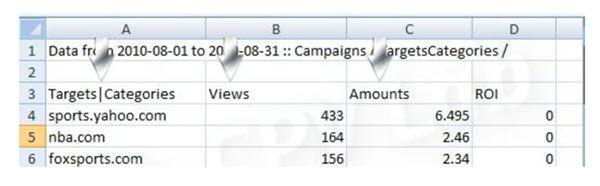
The 3 Critical Columns to match up are…
- Target Keyword Column - Targets|Categories
- Views/Impressions Column - Views
- Amount/Spend/Cost Column - Amounts
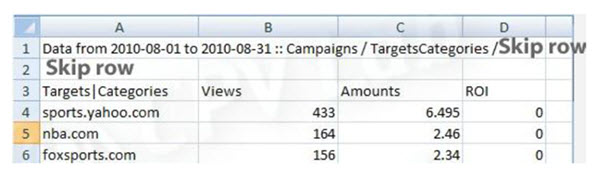
Also note the number of Rows to skip at the top of the report, which in this example the actual column titles or headings are on the 3rd row of the report.
- You want to skip the first 2 rows in this case, so 2 is entered for this setting.
- Rows to Skip at Top = 2
TIP
Now that you have the information required to setup a Ad Spend Template simply enter this information into the Form and Click Save. And that’s it!
C. Setting Up Bulk Upload Templates
TIP
Used to Upload Reports for Multiple Campaigns at One Time and Create New Reports for each Campaign Automatically
- In order to add spending data for more than one campaign you need to create a custom spreadsheet.
- The custom spreadsheet is basically a regular Spending Report from any Traffic Source, that has an extra column containing either the CampaignID from CPV Lab Pro or the CampaignName from CPV Lab Pro.
- For example
- let’s take the Spending Report from MediaTraffic, that has the following columns: Targets|Categories, Views, Amounts, ROI.

- In order to convert this report to a bulk upload spreadsheet, you will insert a new column in the report such as CampaignID or CampaignName.
- Example 1 (using CampaignID):

- Then in the newly added CampaignID column you need to add the **Campaign ID** next to each target that goes with that particular campaign.
- Enter the campaign ID, exactly as it’s assigned in CPV Lab Pro. You can find this on the individual [Campaigns Add/Edit Page](campaign-setup-page.md) or on the [Campaigns](campaigns-dashboard.md) Page.
- Then simply Go to **Settings :arrow_right: CPV Networks :arrow_right: Edit MediaTraffic** and add this to the Template for Campaign ID (Field #5 - CampaignID)
- Example 2 (using Campaign Name):

- Then in the newly added **CampaignName** column add the** Campaign name** next to each target that goes with that particular campaign.
- Enter the campaign name, exactly as it’s setup within CPV Lab Pro. You can find this on the individual [Campaigns Add/Edit Page](campaign-setup-page.md) or on the [Campaigns](campaigns-dashboard.md) Page.
- Then simply Go to **Settings :arrow_right: CPV Networks :arrow_right: Edit MediaTraffic** and add this to the Template for Campaign Name (Field #7 - CampaignName)
The report will have now the following columns:
CampaignID, Targets|Categories, Views, Amounts, ROIorCampaignName, Targets|Categories, Views, Amounts, ROINext Step: go to the Upload Reports page and select ‘All Campaigns’ from the Campaign dropdown, select the time interval, upload the custom spreadsheet you just created and select the corresponding Ad Spend Template.
Then, paste converting subIDs for all campaigns in the textbox and Click ‘Save’.
A new report will be created for each campaign that has data in the custom spreadsheet.
Please note: The name for the extra column required for the custom spreadsheet is not fixed to CampaignID or CampaignName. This can be customized per Spending Report Template from the Spending Report Templates page. It can be set to whatever you want to use to match your needs.
DANGER
IMPORTANT: Upload Reports as quickly as possible after download. For example if you wait 3 days after downloading, and then upload by selecting 'Today' as the interval, this won’t produce accurate results. Because data is extracted from the pasted converting subIDs only the ones from today (as indicated by the selected interval), but the Spending report is now 3 days old, so it doesn't refer to today anymore. Remember to upload only fresh generated Spending reports.
You may also find useful: